Sketch Scan
 Updated
by
Heather Jones
Updated
by
Heather Jones
Overview
Sketch Scan is a part of the XactAI suite and allows you to create a connected, detailed floor plan by moving through a space with your lidar-equipped iOS device. The camera collects data on all the walls, floors, ceilings, counters, furniture, and more to create an accurate 3D scan of the room(s) that you can import into Sketch. This innovative feature saves you precious time and is easy to use.
Sketch Scan is intended to accelerate sketch creation by providing data without the need for manual measuring. You should always review the generated sketch and make adjustments as needed to ensure accuracy.
Limitations
Sketch Scan is currently in early access while we continue to refine it and obtain customer feedback. During this stage, you will see “(BETA)” next to the name when accessing it.
Sketch Scan is still evolving, so here are some general guidelines to make your scans more accurate:
- Scan only three or four rooms at a time if they are cluttered or oddly shaped.
- Move through the room and scan walls and other surfaces as thoroughly as possible.
- Ensure that the room(s) are well-lit.
- Ensure that the floors, walls, and other surfaces are as visible and uncluttered as possible.
Sketch Scan currently has the following limitations:
- Sketch Scan is limited by line-of-site for the camera during the scan. Accuracy can decrease in extremely cluttered spaces.
- Sketch Scan may not accurately capture non-rectangular or irregular rooms; you may need to manually correct these in Sketch.
- Sketch Scan sometimes does not recognize or record reflective and mirrored surfaces.
- Sketch Scan cannot obtain accurate scans in some low-light environments.
- Sketch Scan cannot capture large or multi-story projects in one scan because iOS device hardware has a limited capacity. You can scan a smaller portion, save the scan, and do additional scans.
- Sketch Scan currently captures stairs as reference blocks instead of stairs; however, you can capture stairs by using the standard Sketch AR feature.
- Sketch Scan sometimes misses or inaccurately records wall openings. For example, windows that are close together are sometimes recorded as a single window, doors are sometimes not recorded, and large openings are sometimes recorded as a continuation of the same room. You should scan these areas from multiple angles and distances. You may need to add them manually in Sketch.
- Sketch Scan captures many open concept spaces as a single room. You may need to separate the rooms after saving the scan to Sketch.
Access Sketch Scan
Sketch Scan is only available for users with an XactAI license and must be added to your instance and profile. If you want to add XactAI to your account, contact our sales department (800-424-9228). You can also purchase XactAI in the Xactware store.
Sketch Scan is available under Sketch AR in Xactimate mobile. To access it, either use the Sketch Scan button or use the option in the Sketch AR menu:
Sketch AR menu
- Within Sketch, select the Room flyout menu.
- Select the Sketch AR option.
- Select Sketch Scan from the menu.
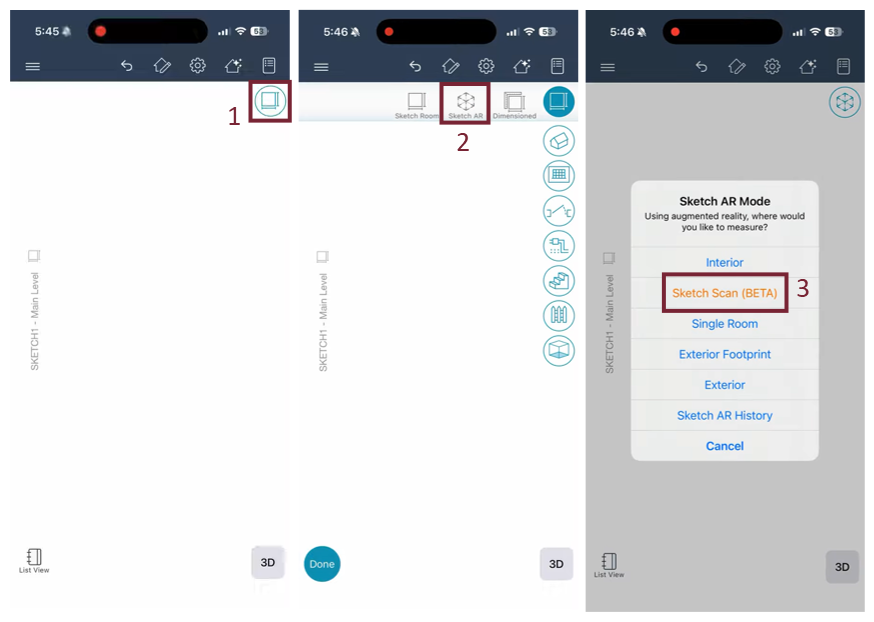
Sketch Scan button
Within Sketch, select the Sketch Scan button in the upper left corner.
Note: If the button does not appear, you do not currently have access to Sketch Scan.
Use Sketch Scan
Sketch Scan is meant to be quick and easy. Once initiated, it uses your device’s camera to scan the room. It directs you to go to the room or area you want to scan and then select Start.
Scan
Once it begins scanning, you simply need to move the device around so that the camera can capture the space from multiple angles. Follow any directions provided on the screen as Xactimate mobile directs you through the process. You can see it build the space as you move; it adds lines to represent each corner (walls, floors, ceilings, furniture, cabinets, etc.) in view and displays a 3Dd rendering on the screen so you know what it has and has not captured. As it captures a space to your liking, you can move to the next area.

Capture images
You can also capture images at any time while scanning, and they will be added to Photos within the project. The images do not include the added lines and 3D rendering from the scan, just the raw image.
End scan
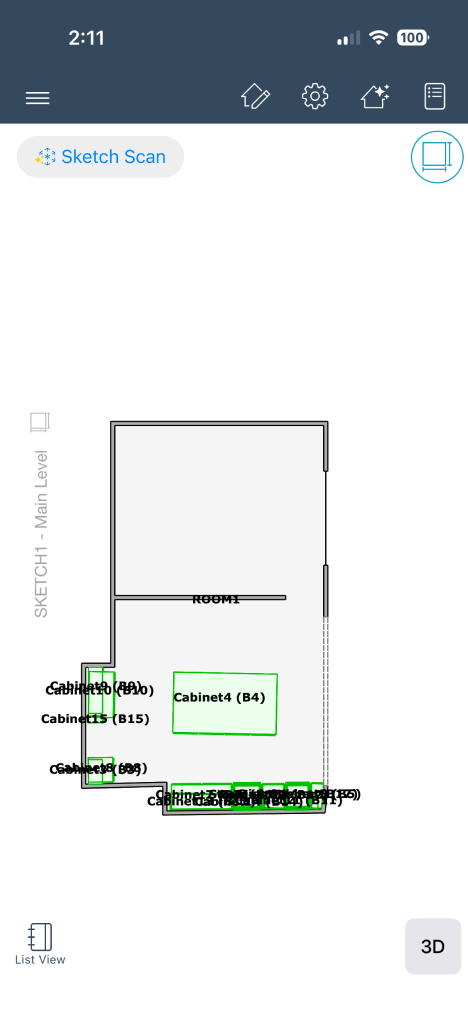
Once it has sufficiently scanned the area, select Done at the top of the screen to end the session and view the 3D rendering. From the 3D view, you can either select Restart or Save. Restart deletes your scan and initiates a new one; Save directs you to choose which items to import into the sketch. Select the appropriate items and select Import.
Sketch Scan then imports the room and all selected items into Sketch.