Annotate images in Xactimate mobile
 Updated
by
Heather Jones
Updated
by
Heather Jones
Xactimate mobile for Android will be discontinued and no longer available or supported in Q2 2027, with limited functionality beginning in January 2027.
- From the Photos page, tap the photo album that contains the images you want to annotate.
- From inside the album page, tap the photo thumbnail that needs edits to open the image preview.
- Make the necessary edits to the photo by using the following:
- Tap the Details bar just below the image to edit the name of the one who took the photo, the date taken and the description as needed. Tap the bar again to collapse the menu.

- To annotate your image, tap the edit icon (
 ) at the bottom of the screen.
 - To see all the annotation options, tap the circle in the upper-right corner of the image for iOS, or tap the pencil in the red circle in the top-right corner for Android.
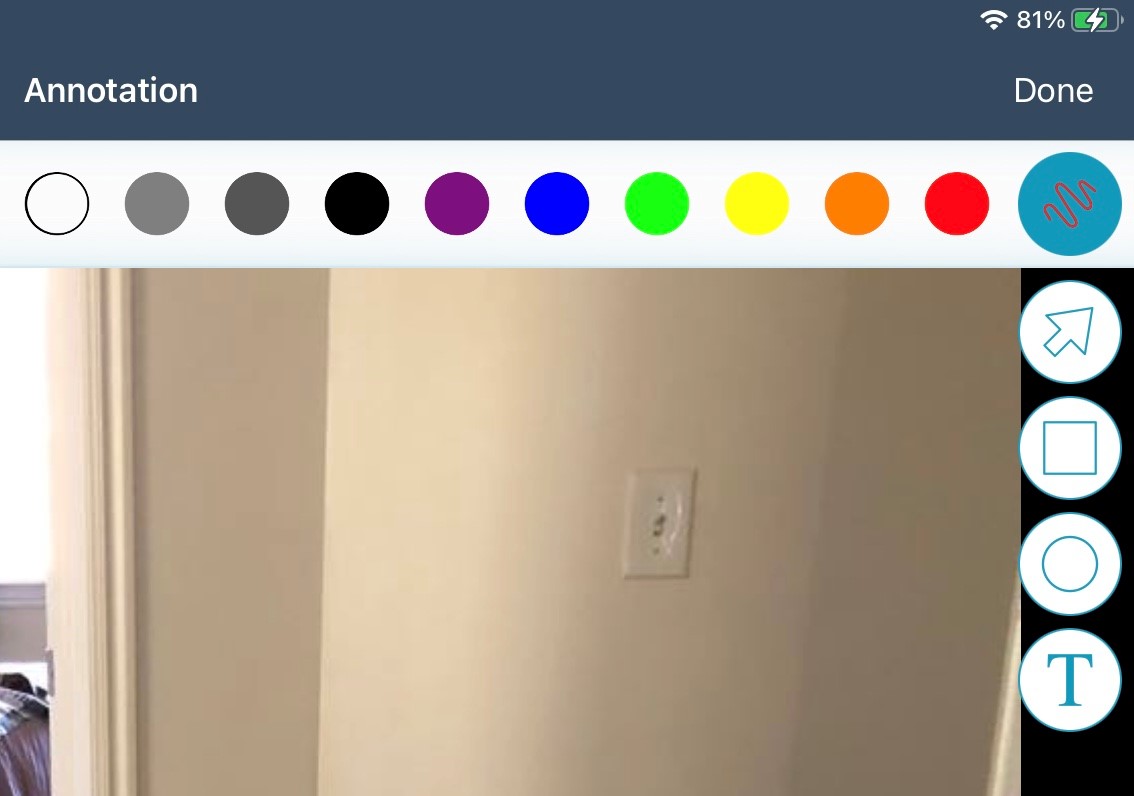
- From here, you can select colors for your annotations, place shapes, add text, and draw custom lines. You can also adjust the thickness of the lines with the adjuster bar at the bottom of the page.
- When you finish adding annotations, select Done in the upper-right corner in iOS, or the check mark in Android.
- The edited image appears in the full-screen preview, and if you want to make additional edits, you can tap the icons at the bottom of the screen.
- The arrow in the box (
 ) allows you to move your image to another album.
 - The crop icon (
 ) allows you to crop the image.
- The arrow in the box (
- If you are finished editing the image, tap the back arrow in the upper-left corner of the page to return to your photo album.
- Repeat the steps as needed to annotate all required images.
To include the annotations in your reports, open the Reports page in Xactimate online or Xactimate desktop. From there, navigate to Images and select Print Image Annotations. Your report will then include the annotations.
