Creating an XactScope roof and exterior sketch
 Updated
by
Heather Jones
Updated
by
Heather Jones
Initiating roof and exteriors with XactScope
XactScope tools make it easy to accurately scope the cost of work to repair exterior damage to a property. This includes the various materials, labor, and calculations for the equipment.
To use XactScope for roofing and exterior surfaces, first create a sketch in Xactimate via Estimate > Sketch with an Exterior level (you can include a regular floorplan on the Main Level or other layers as well). To add an exterior level, follow these steps:
Option 1
- Right-click the Main Level tab on the bottom of the Sketch screen.
- In the drop-down menu that appears, select Add Exterior Level.
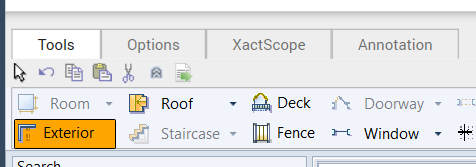
- In the new Exterior level, add your roof and/or exterior walls (the Exterior tool appears below the Room tool in the ribbon and functions in much the same way).
- For roofs, right-click the blank space of the Sketch workspace and select Convert Level Roof to Roofwire frame roof. This converts the roof to a frame that you can work with in XactScope.
Option 2
- Create your roof on any level.
- Right-click the blank area of the Sketch workspace to open the options for the level.
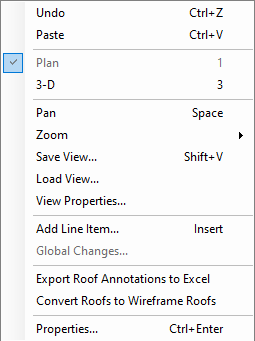
- Select Convert Roofs to Wireframe Roofs. The converted wireframe roof is placed on the exterior level and the original roof is deleted.
Once you have created your sketch, switch to the XactScope tab at the top of the Sketch window.
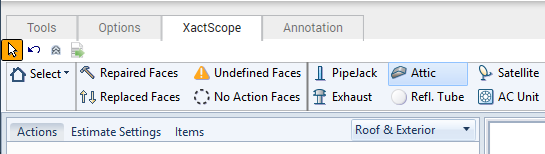
The script pane appears on the left of the Sketch workspace, which is where the prompts will appear later. The dropdown in the top-right corner of the script pane allows you to switch between Mitigation and Roof & Exterior. If you need to change the floor plan, switch back to the Tools or Options tabs, make your changes, and return to the XactScope tab. Be aware that the Mitigation script only functions with the Main Level layer, and Roof & Exterior only functions with the Exterior layer.
Using XactScope for roofs
Adding components
You can place components (pipe jacks, satellites, etc.) within the sketch to help simplify the estimation process and obtain accurate cost estimates. You can select either the containing room or the object itself to see and answer the prompts related to the object, which adds the appropriate repair and material costs to the items list.
To place components, open the XactScope tab and verify you have Roof & Exterior selected in the drop-down menu. With this selected, the ribbon populates with all the components that you can place.

Once you have found the appropriate item, select it and tap or click wherever you wish to place it within the sketch. The item will appear in that location and the related prompts will appear in the Actions tab. The prompts do not require answers, so they do not increase the number of unanswered prompts, but they are available for you to customize the actions and materials needed.
Using XactScope for exterior walls
Create your wall sketch
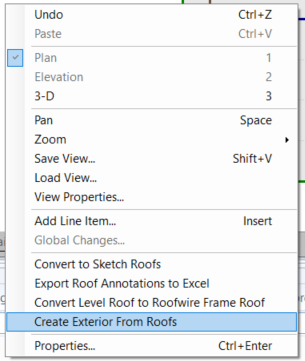
Create the Exterior level as described in Initiating roofs and exteriors with XactScope. You can create the walls by either using the Exterior tool in the Tools tab or, if you have created a roof, you can create exterior walls based on the roof by right-clicking a blank area of the workspace and selecting Create Exterior From Roofs. Because Xactimate is estimating your walls based on the roof, you will need to adjust both position and height.
Working with exterior walls
To view the exterior walls, use the 3-D view by either pressing the 3 key (while the Xactimate window is active) or selecting the 3-D view in the view menu on the bottom right. Use your cursor to adjust the angle of your view as needed to access all the appropriate walls.
Edit exterior walls in the same way you would edit regular walls: either use Plan view to make general adjustments or use 3-D view to change heights, and view window, door, and other positioning within the walls.
Use the Split tool (located with the other sketch tools at the top) to divide an exterior wall. This allows you to have multiple surface materials on one wall (such as rocks on the bottom portion and stucco on the top portion). Press the Tab button on the keyboard to change from horizontal to vertical, and vice versa.
Groupings
Groupings allow you to define the elevations of the sketch, making it easier to organize estimates and to know which side of the property needs each item. Be aware, however, that if you create groups after you add items to the project, the items disappear, and you must recreate them. To avoid losing items from answered prompts, be sure to define the groups before answering prompts.
To group walls, select Grouping Mode in the XactScope ribbon of Sketch to open the Custom Groups pane. Select walls either individually, in 3-D or Plan view, or use a cursor marquis to select multiple walls at once in Plan view. Once you have made a selection, find the group you want in the Custom Groups pane and select the plus button for that group. If you want to create a new group, select the plus button at the bottom of the list.
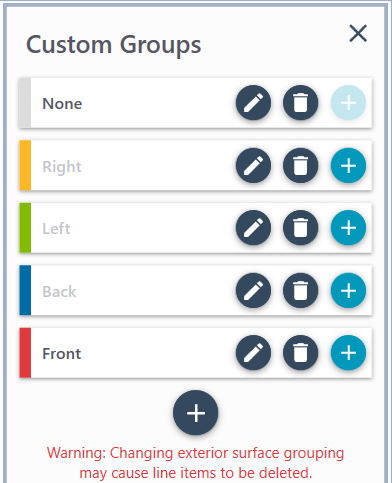
Add as many walls as needed to each group, and either ignore or remove the groups you do not need. Unused groups remain grayed out. Once you have added a wall to a group, the wall takes on the color associated with that group. Groups that you create default to gray, and you cannot change the group colors. You can, however, rename any of the groups to reassign existing colors as needed. When you exit grouping mode, the walls revert to the original sketch color, but the groupings remain in effect.