Create and add multiple users
 Updated
by
Jill Bowers
Updated
by
Jill Bowers
Note: Only instance admins can add users.
The Add Users functionality in XactAdmin allows instance admins to create Xactware IDs (XIDs) and automatically add those XIDs to an Xactimate or XactContents instance.
To use this tool, fill out user information in a .csv template and import the template to XactAdmin. You must also include user XIDs, which are added to your instance. If a user does not already have an XID, one is automatically created and added to your instance
Before importing the .csv, please ensure that the license types assigned to users fall within the available licenses for the instance. If there are not enough licenses available for the users you entered, the import will not be successful.
Download the template
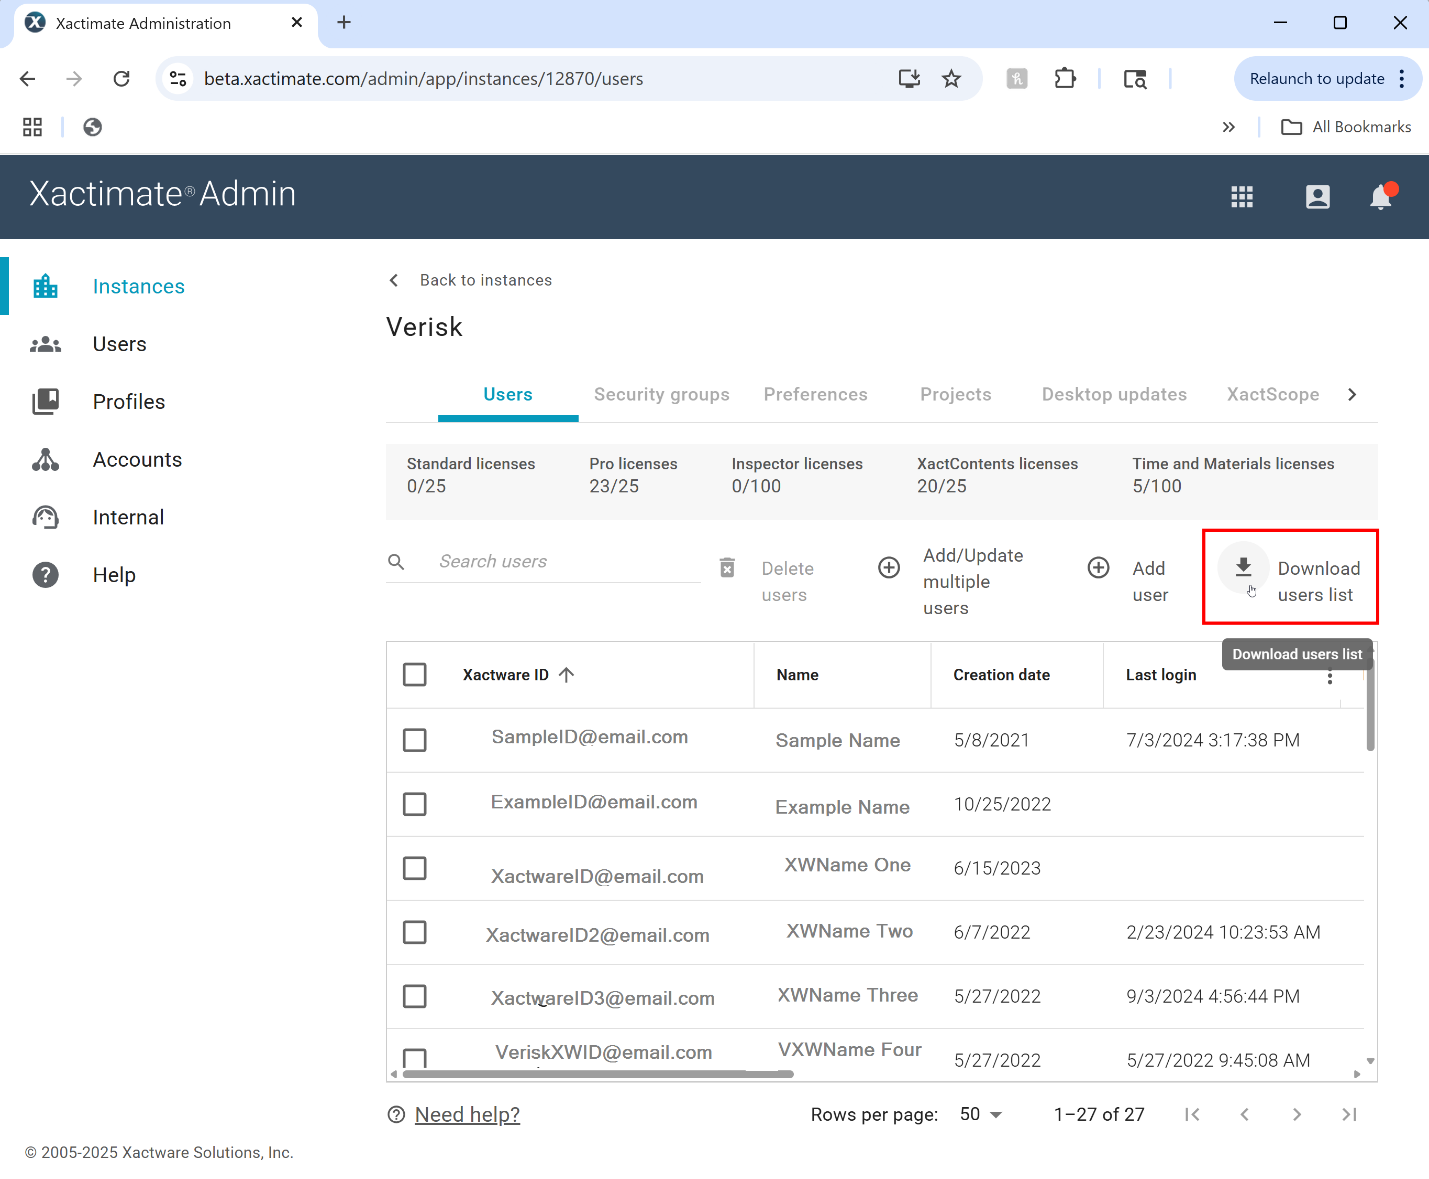
- Select your Instance from the table on the homepage of XactAdmin.
- In the Users tab, select Download users list on the left side of the screen. The .csv users list automatically downloads.
Fill out user information
Follow these requirements as you fill out the spreadsheet:
- Enter information in all columns (except Platform) to create an XID and an Xactimate online user.
- Enter a valid email address for the XID (e.g., jane@example.com).
- Separate security groups with a pipe.
- Enter a user code in the Code field. User codes should be unique and can be up to eight characters long. They can include letters A-Z, digits zero through nine, underscores (_), hyphens (-), periods (.), or dollar signs ($). Codes cannot have any spaces or the @ symbol.
- Under License Type, enter one of these three options: Desktop, Online, or Pro. Be sure your instance has enough licenses of each type for the number of users you add.
Note: Time & Materials is only available with Pro licenses. You can still indicate which Pro license users have Time & Materials by entering Yes or No in the Time and Materials column in the spreadsheet, but this is not available for Standard licenses.
- If the user should have access to the XactContents module, enter Yes under XactContents.
Save the file as a .csv
Before you upload a completed template, make sure it is a .csv file. Follow these steps to change the file to a .csv file.
- Open the file.
- Select File.
- Select Save As.
- Choose the location where you want to save the file.
- Change Save As Type to CSV (Comma delimited) (*.csv).
- Select Save.
Import the .csv file
On the Users tab in your instance, select Add/Update multiple users. This opens a side drawer.
Add new user(s) tab
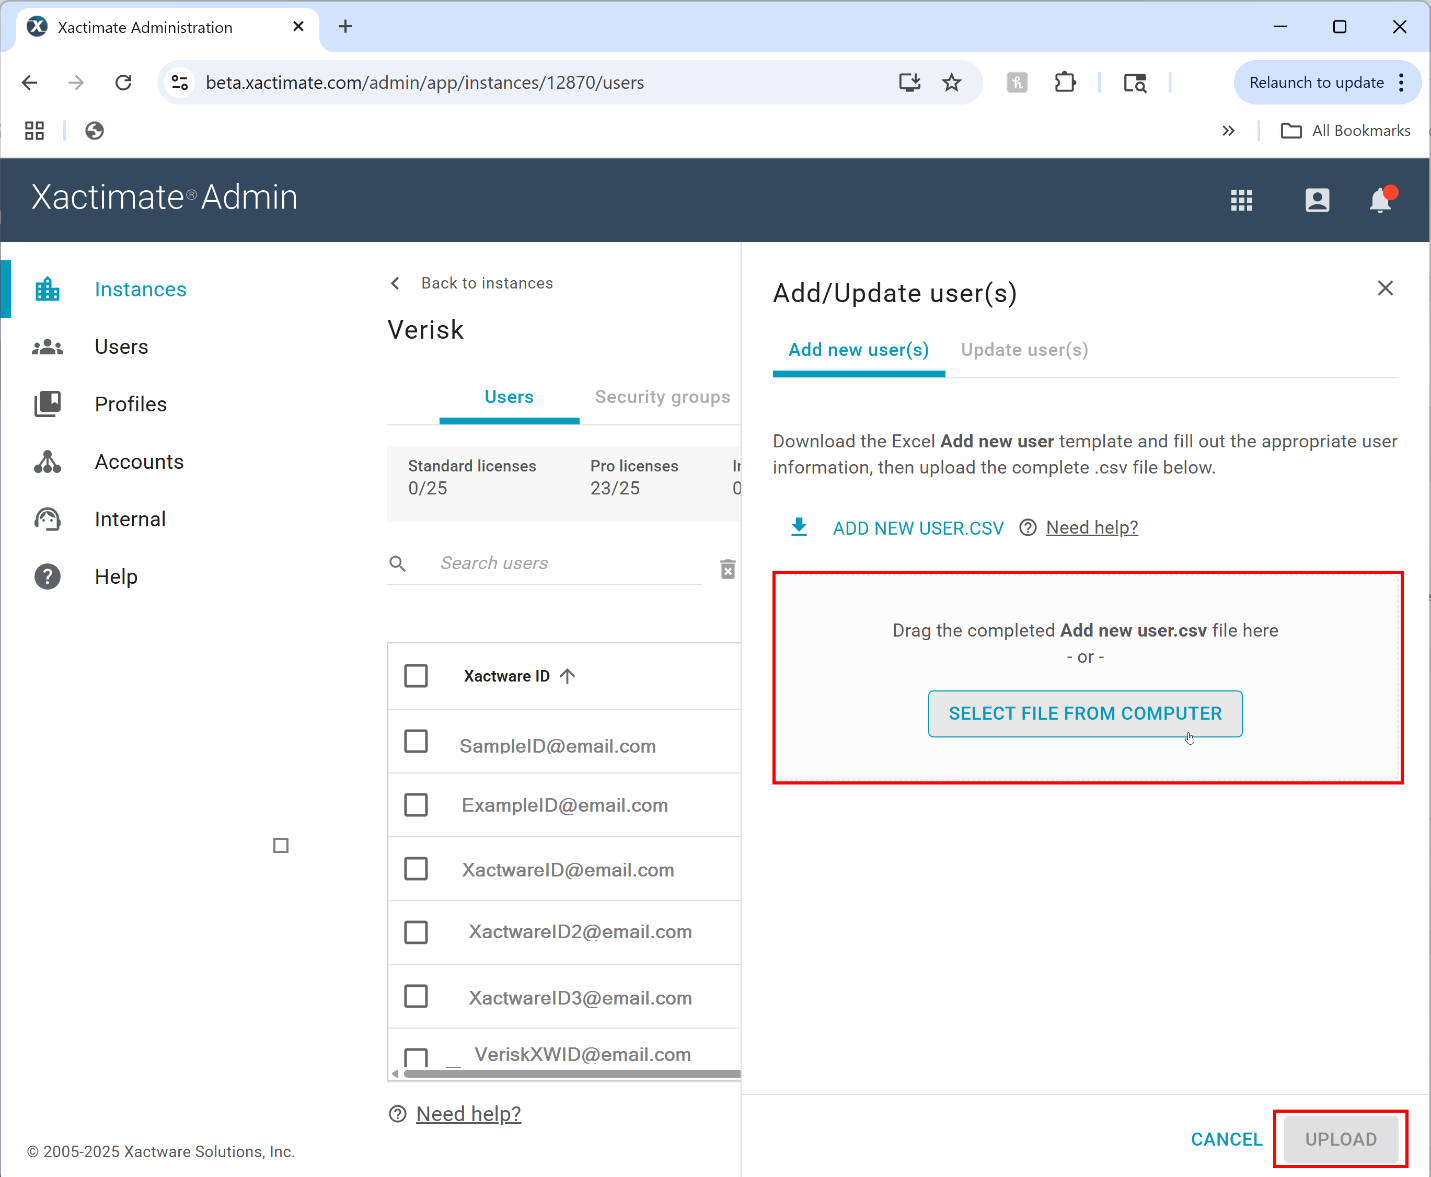
- In the Add new user(s) tab, upload the completed Add new user .csv file.
- Select Upload.
After the upload is complete, the users are updated and assigned as listed in the .csv file.
Update user(s)
- Select the Update user(s) tab.
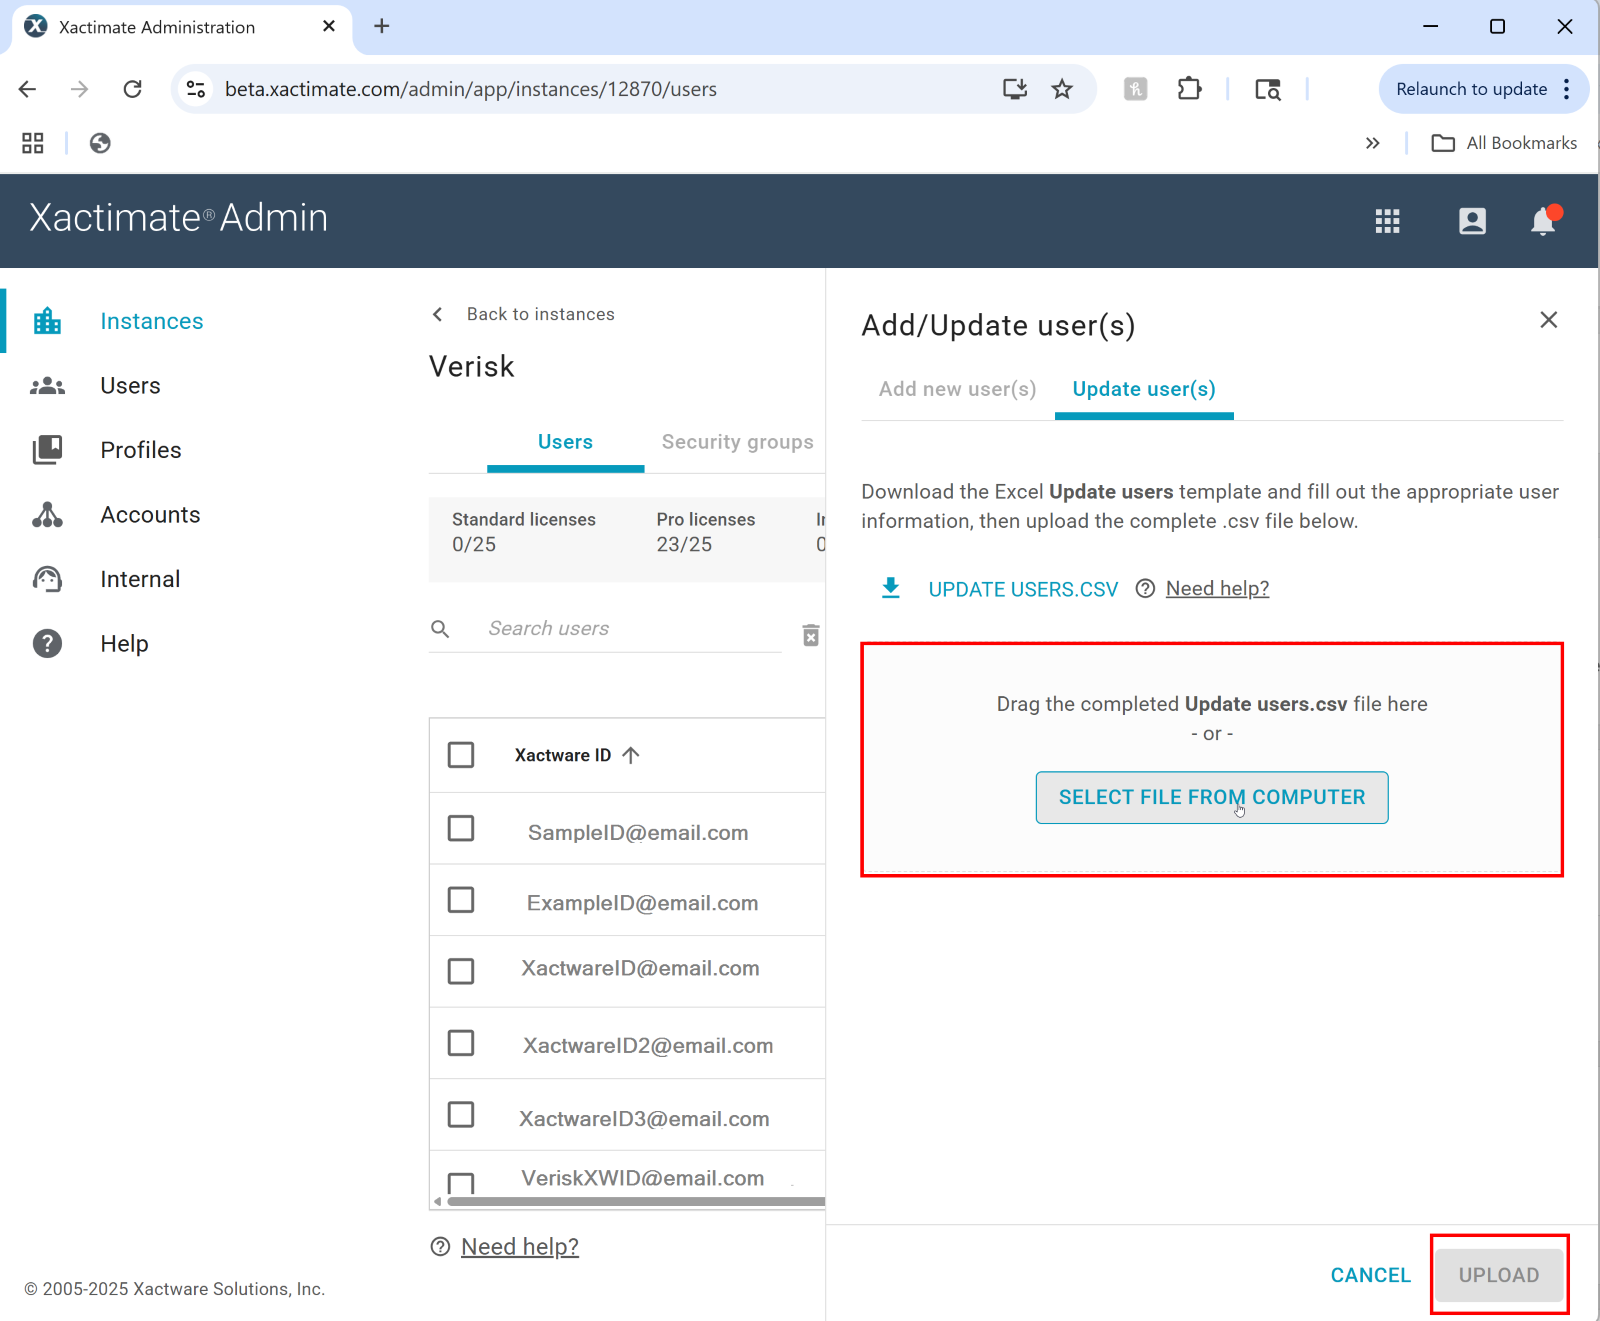
- Upload the completed Update users.csv file.
- Select Upload.
After the upload is complete, the users are updated and assigned as listed in the .csv file.