How to create a sketch in Xactimate mobile
 Updated
by
Heather Jones
Updated
by
Heather Jones
For instructions on any specific version of the following, please refer to the Xactimate training or to our support department.
How to open Sketch
To open Sketch, use the hamburger menu (three lines in the upper left) from within an estimate to navigate to Estimate. This opens to a page with two sides: Sketch and List View (both are visible at once on larger screens but appear as two screens on smaller ones). Below the Sketch option, select Start Estimate.

Flyout menu
All items that you can place in the sketch are available in the flyout menu (see Icons for Xactimate iOS for more information). When not open, it only shows the last-used item within a single circle. If the item is active, the circle is filled with blue, the item outline appearing white; if the item is not active, the circle is filled with white, the item outline appearing blue.
- To open the flyout menu, select the item in the circle.
- Select an item from the list or a different category.
- Select the specific item within the category.
- Place the item on the sketch by touching the place on the screen you want to place the item or touching and dragging (see the following sections for more details).
- Select Done to deselect the item.
Rooms
In the flyout menu, select the room icon and then, if not already selected, the Sketch Room icon.
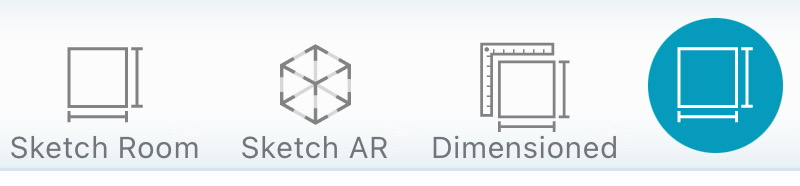
Touch the screen where you want one of the corners, and drag to where you want the opposite diagonal corner. You can also touch once to place a 12’8” by 12’8” room with the upper left corner appearing where you touched.
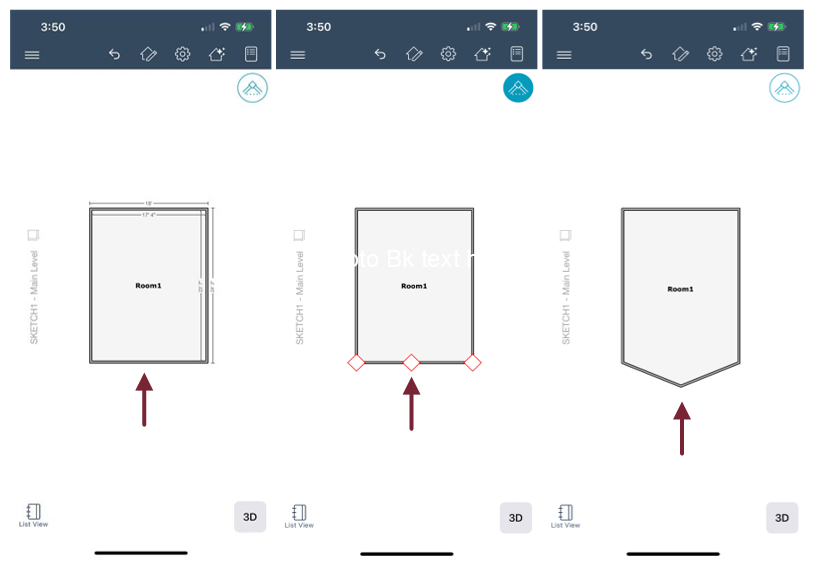
Modify rooms
To change the dimensions of a room, complete the following:
- Touch the wall you want to move.
- When that wall is highlighted with a red diamond appearing at each end, touch and drag the wall to the location you want.
- Touch anywhere else to deselect the wall.
- Repeat the process with any other walls you want to move.
Customize rooms
To add customization such as changing wall thickness and ceiling height or to flip the room dimensions, add photos, and more, select the room to open a menu at the bottom of the screen; then select the appropriate option:
Rotate: Select this to rotate the room clockwise by 22.5 degrees.
Flip Horizontal: Select this to flip the room horizontally.
Flip Vertical: Select this to flip the room vertically.
Camera: Select this to take photos and add them to the room.
Copy: Select this to copy the room (once copied, touch the white space to paste it).
Delete: Select this to remove the room.
Properties: Select this to change wall thickness, ceiling height, construction materials, and more. Make your modifications in the menu that appears by selecting the fields that need to change.

Doors
In the flyout menu, select the door icon and then, if not already selected, the icon for the appropriate type of door.

Touch the location on the wall where you want the default-sized door or touch and drag to use a custom width.
Modify doors
You can make modifications to the door you placed instead of deleting it and placing a new door.
Change the door width: Touch to select the door and then touch and drag the red diamonds to move each end of the door along the wall.
Move the door on the same wall: Touch to select the door and then touch and drag to the right location.
Move the door to a different wall: Select the door. Select copy (see Customizing doors). Touch the correct wall to paste it. Delete the original by selecting the trash icon.
Customize doors
To add customization such as changing the base height, deduction properties, door type, or more, select the desired door to open a menu at the bottom of the screen; then select the appropriate option:
Flip Vertical: Select this to flip the door vertically.
Flip Horizontal: Select this to flip the door horizontally.
Ruler: Select this to get a close-up view for resizing the door.
Camera: Select this to take photos and add them to the door.
Copy: Select this to copy the door (once copied, touch a wall to paste it).
Sketch AR Mode: Select this to start a new Sketch AR session for the connecting room (see Adding new rooms via Sketch AR in https://xactware.helpdocs.io/l/enUS/article/x0vec9ijst-sketch-arinfo).
Delete: Select this to remove the door.
Properties: Select this to change dimensions, door style and trim, and more. Make your modifications in the menu that appears by selecting the fields that need to change.

Windows
In the flyout menu, select the window icon and then, if not already selected, the icon for the appropriate type of window.

Touch the location on the wall where you want the default-sized window or touch and drag to use a custom width.
Modify windows
You can make modifications to the window you placed instead of deleting it and placing a new one.
Change the window width: Touch to select the window and then touch and drag the red diamonds to move each end of the window along the wall.
Move the window on the same wall: Touch to select the window and then touch and drag to the right location.
Move the window to a different wall: Select the window. Select copy (see Customizing doors). Touch the correct wall to paste it. Delete the original by selecting the trash icon.
Customize windows
To add customization such as the base height, deduction properties, window type, and more, select the window (this opens a menu at the bottom of the screen).
Flip Vertical: Select this to flip the window vertically.
Flip Horizontal: Select this to flip the window horizontally.
Ruler: Select this to get a close-up view for resizing the window.
Camera: Select this to take photos and add them to the room.
Copy: Select this to copy the window (once copied, touch a wall to paste it).
Delete: Select this to remove the room.
Properties: Select this to change dimensions, window style and trim, and more. Make your modifications in the menu that appears by selecting the fields that need to change.

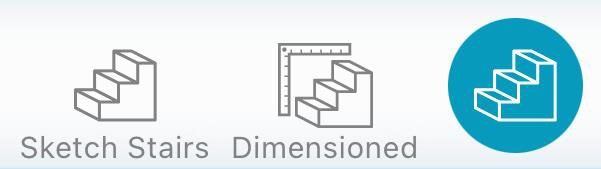
Stairs
Staircases are considered separate rooms and cannot be placed in existing rooms, only as a new room. Once placed, you can make any necessary adjustments to tread depth and height, railings, etc.
- In the flyout menu, select the staircase icon.
- If not already selected, the Sketch Stairs icon.
- Touch the screen where you want the bottom step and then touch the same place again.
- Drag the stairs to where you want the landing.
- Touch and drag to extent the square landing or touch once confirm the dimensions.
- Touch and drag again to add another flight or touch anywhere else to finish the staircase.
Modify stairs
To change the dimensions of a staircase, complete the following:
- Touch the wall you want to move.
- When that wall is highlighted with a red diamond appearing at each end, touch and drag the wall to the location you want.
- Touch anywhere else to deselect the wall.
Customize stairs
To add customization such as changing wall thickness and ceiling height or to flip the room dimensions, add photos, and more, select the desired door to open a menu at the bottom of the screen; then select the appropriate option:
Rotate: Select this to rotate the stairs clockwise by 22.5 degrees.
Compass: Select this to flip the stair orientation (to go up or down).
Flip Vertical: Select this to flip the room vertically.
Flip Horizontal: Select this to flip the room horizontally.
Camera: Select this to take photos and add them to the room.
Copy: Select this to copy the stairs (once copied, touch the white space to paste it).
Delete: Select this to remove the stairs.
Properties: Select this to change wall thickness, ceiling height, construction materials, and more. Make your modifications in the menu that appears by selecting the fields that need to change.

Roofs
In the flyout menu, select the roof icon and then, if not already selected, the icon for the appropriate type of roof.

Touch the screen where you want one of the corners, and drag to where you want the opposite diagonal corner. You can also touch once to place a 12’ by 12’ roof with the upper left corner appearing where you touched.
Modify roofs
To change the dimensions of a roof, complete the following:
- Select the roof by touching the name.
- Touch the white square in the center of the edge you are moving and drag it to the appropriate place.
- When that wall is highlighted with a red diamond appearing at each end, touch and drag the wall to the location you want.
- Touch anywhere else to deselect the wall.
- Repeat the process with any other walls you want to move.
Customize roofs
To add customization such as changing the roof type or slope or to flip the room dimensions, add photos, and more, select the roof to open a menu at the bottom of the screen; then select the appropriate option:
Rotate: Select this to rotate the roof clockwise by 22.5 degrees.
Compass: Select this to switch the orientation of the roof ridge.
Flip Horizontal: Select this to flip the roof horizontally.
Flip Vertical: Select this to flip the roof vertically.
Camera: Select this to take photos and add them to the roof.
Copy: Select this to copy the roof (once copied, touch the white space to paste it).
Generate Walls: Select this to create room walls based on the wall locations of the roof. The walls appear in a new level added below the roof level.
Delete: Select this to remove the roof.
Properties: Select this to change wall thickness, ceiling height, construction materials, and more. Make your modifications in the menu that appears by selecting the fields that need to change.

Wall tools
In the flyout menu, select the wall icon and then, if not already selected, the icon for the appropriate wall edit tool.

Square break
Use the Square Break tool (or Break tool) to add a corner in the you specify on a wall. To use it, complete the following:
- Select the Square Break tool from the flyout menu.
- Touch the location on the wall where you want the break. This splits the wall into two parts, divided at the location you specified.
- Select the square on the wall segment you want to move and drag it to the appropriate location.
Wall
Use the Wall tool to add a wall in the location you specify. To use it, complete the following:
- Select the Wall tool from the flyout menu.
- Touch the location where you want the wall to start and then drag to the end of the wall.
- To add a connected wall, either repeat Step 2 (ending with the far end) or touch the screen where you want the far end.
- When done with connected walls, either touch the end of the last wall or end the last wall anywhere along an existing wall to enclose the room.
Vertex
Use the Vertex tool to add a corner, or joint, in the wall. To use it, complete the following:
- Select the Vertex tool from the flyout menu.
- Touch the location on the wall where you want to add a corner/vertex/joint.
- Touch and drag the new vertex to the desired location.
Missing wall
Use the Missing Wall tool to add openings in walls such as half walls, arches, and window-like cut-outs. To use it, complete the following:
- Select the Missing Wall tool from the flyout menu.
- Touch and drag along the wall where you want to add the opening.
- Touch anywhere else to deselect the tool.
Xactimate automatically sets it as a rectangular opening 6’8” tall. To modify this, touch the missing wall and then the properties icon in the lower-right corner of the screen. Make changes as necessary.