What's new in Xactimate online
 Updated
by
Jill Bowers
Updated
by
Jill Bowers
If an Xactimate release includes any major changes that affect your product experience, we highlight them here to provide you with updates. To view greater details on these changes (when necessary), select the article links included with each update.
For a complete list of changes, please see the release notes on the eService Center.
April 2026
March 2026
October 2025
XactAI photo descriptions
Xactimate now incorporates AI to help you create descriptions for photos in your projects. When enabled, Xactimate creates labels and descriptions for photos that do not already have them. but you must review and approve (or change) the generated content before completing the project to preserve the added text. Any AI-generated text that you do not approve or change is hidden once you complete the project.
April 2024
Feb 2023
XactXpert
XactXpert is a new way to inspect estimates as your project is in progress. You can review alerts (including Violations, Warnings, and Cautions) in the XactXpert side drawer and address or bypass them as the estimate is being worked on. To learn more about XactXpert in Xactimate online, review these articles.
Oct 2023
Time & Materials
Often shortened to T&M, Xactimate Time and Materials is now available to help estimate service providers that work on large projects, such as commercial projects. We created Xactimate Time and Materials to make larger projects easier to estimate compared to the traditional version of Xactimate.
Dec 2022
December 2022
Third-party pricing
When you request third-party pricing for line items, our partners use the latest data and algorithms to provide accurate, up-to-date pricing.
Users are now informed via Notifications when inventories are sent to their XactNet address. The notifications are actionable, so users can add inventories to existing or new projects.
Users can now export inventories to other XactNet addresses.
Nov 2022
Aug 2022
XactContents search added to Xactimate online
XactContents search is now available in the new Xactimate online in User Preferences under the General tab. Users can refine their search by designating a country, marking one or more preferred languages, and entering other information.
Users are now informated via Notifications when inventories are sent to their XactNet address. THe notifications are actionable, so users can add inventories or existing or new projects.
Users can now save multiple search tilers in the new Xactimate online. Saved filter are also searchable so they can be easily used more than once.
April 2021
Valuations in Xactimate online
Users can now create Valuation estimate types in the new Xactimate online. Valuations created in the new Xactimate online open in the 360Value website.
Feb 2021
The new Xactimate online
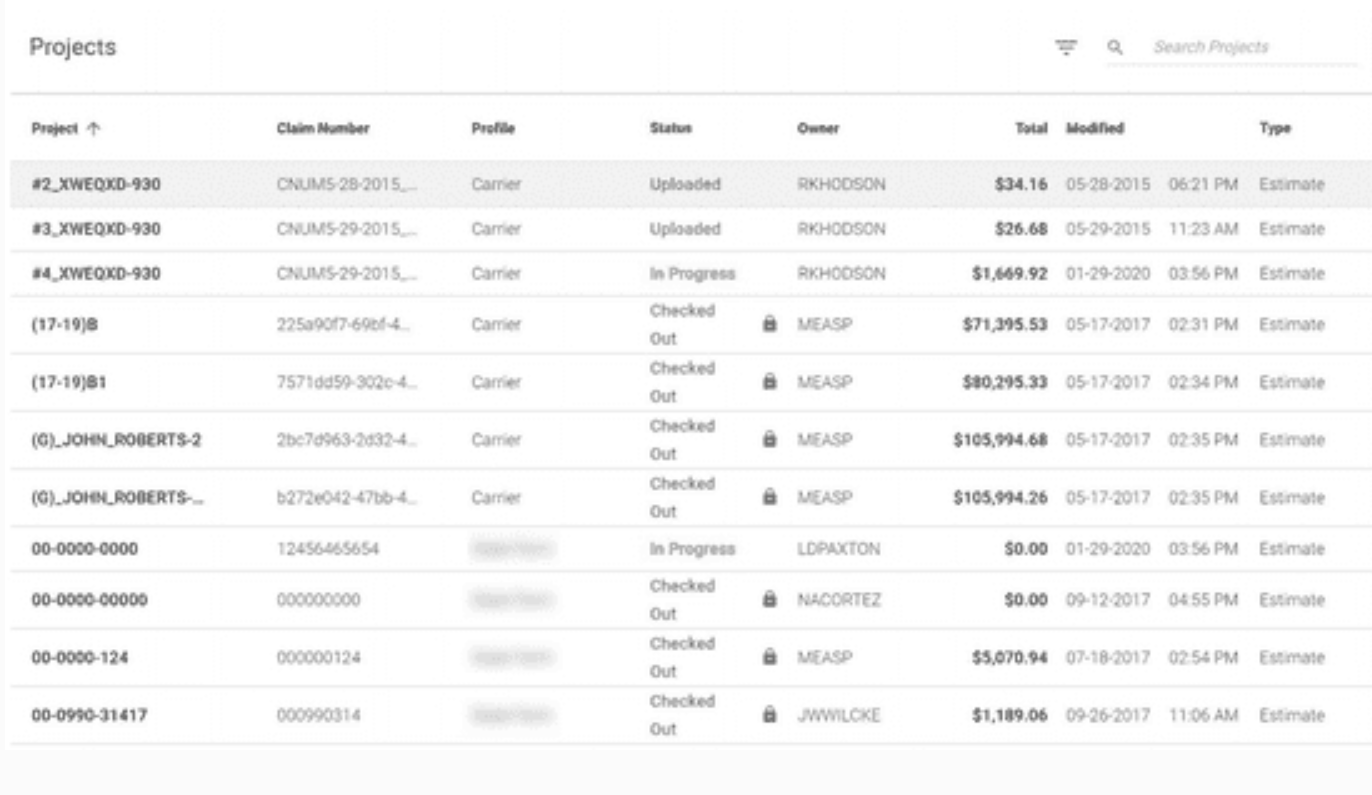
A new way to manage projects
The Projects page displays a list of estimates associated with your instance. By default, these projects are organized in alphabetical order by name. If you'd prefer, you can arrange your projects by claim number, profile, owner, estimate total, or modified date. Simply click the corresponding column headers on the table to arrange your list.
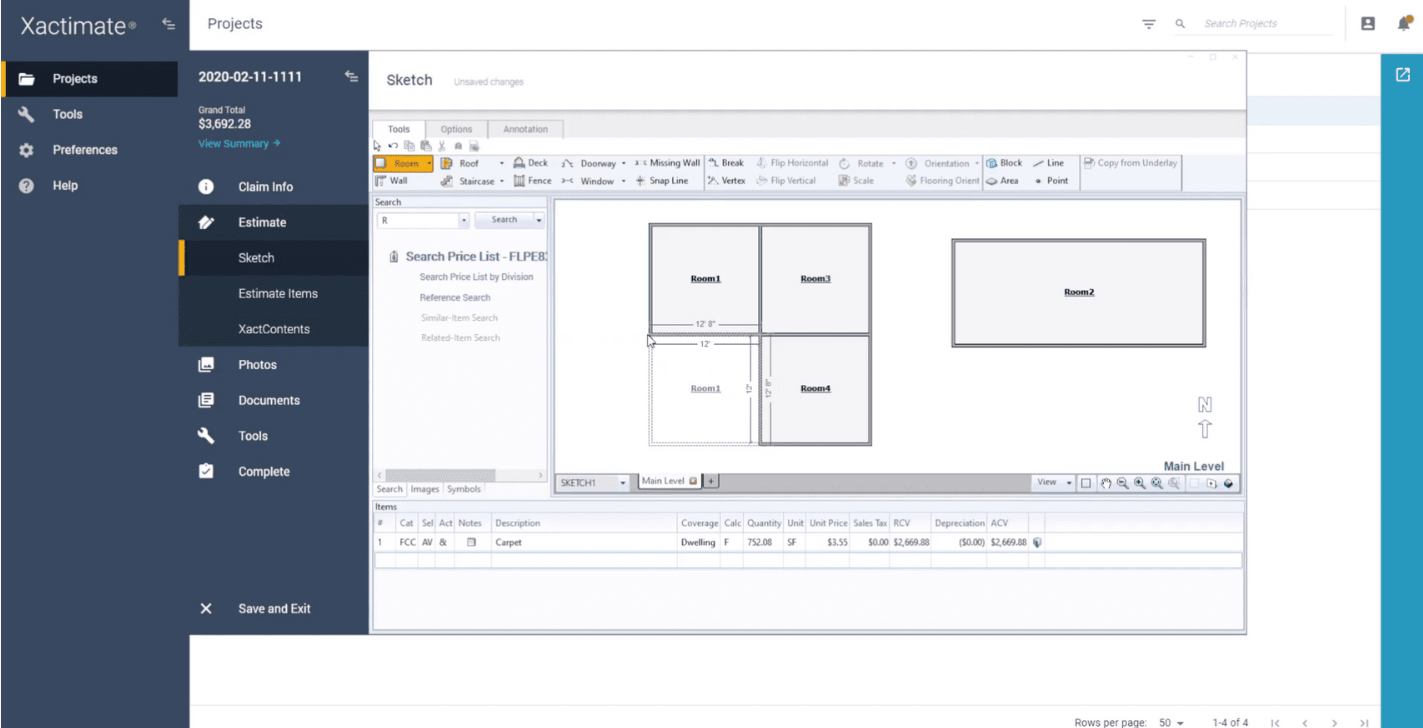
Updated look and feel, same functionality.
Once you've opened a project in the new Xactimate online, you can get to work using the same Xactimate functionality you're used to, like using Sketch, adding line items, and uploading photos.
No migration necessary
The new version of Xactimate online uses the same instances we use today, so there's no need to migrate data, users, or projects.
The new Xactimate online Estimate Writer
As part of the new Xactimate online, we’ve created the Xactimate online Estimate Writer for Windows powered by Xactimate desktop code. The Xactimate online Estimate Writer is simple. You only need to install it once, and it’s self-updating, so you won’t need to worry about downloading new releases or program updates.
October 2020
Configure security groups in Xactimate Admin
To keep your customer data and claim information secure, you need to control who has access to sensitive information. By creating security groups in Xactimate Admin, you decide what information users can see and edit, including proprietary company information, customer data, and other claim material.
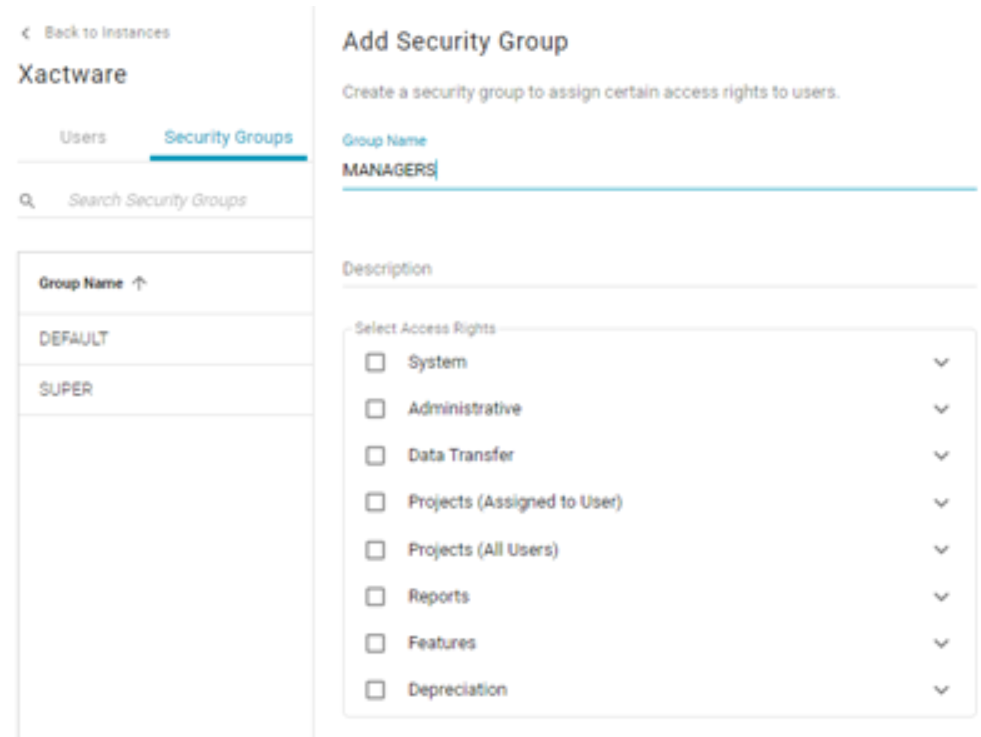
Add security groups
- Login to Xactimate Admin.
- If you have more than one instance, select the instance you want to open.
- Click on the Security Groups tab.
- Click (+) Add Security Group, which is above the right of the table.
- A form appears on the right.
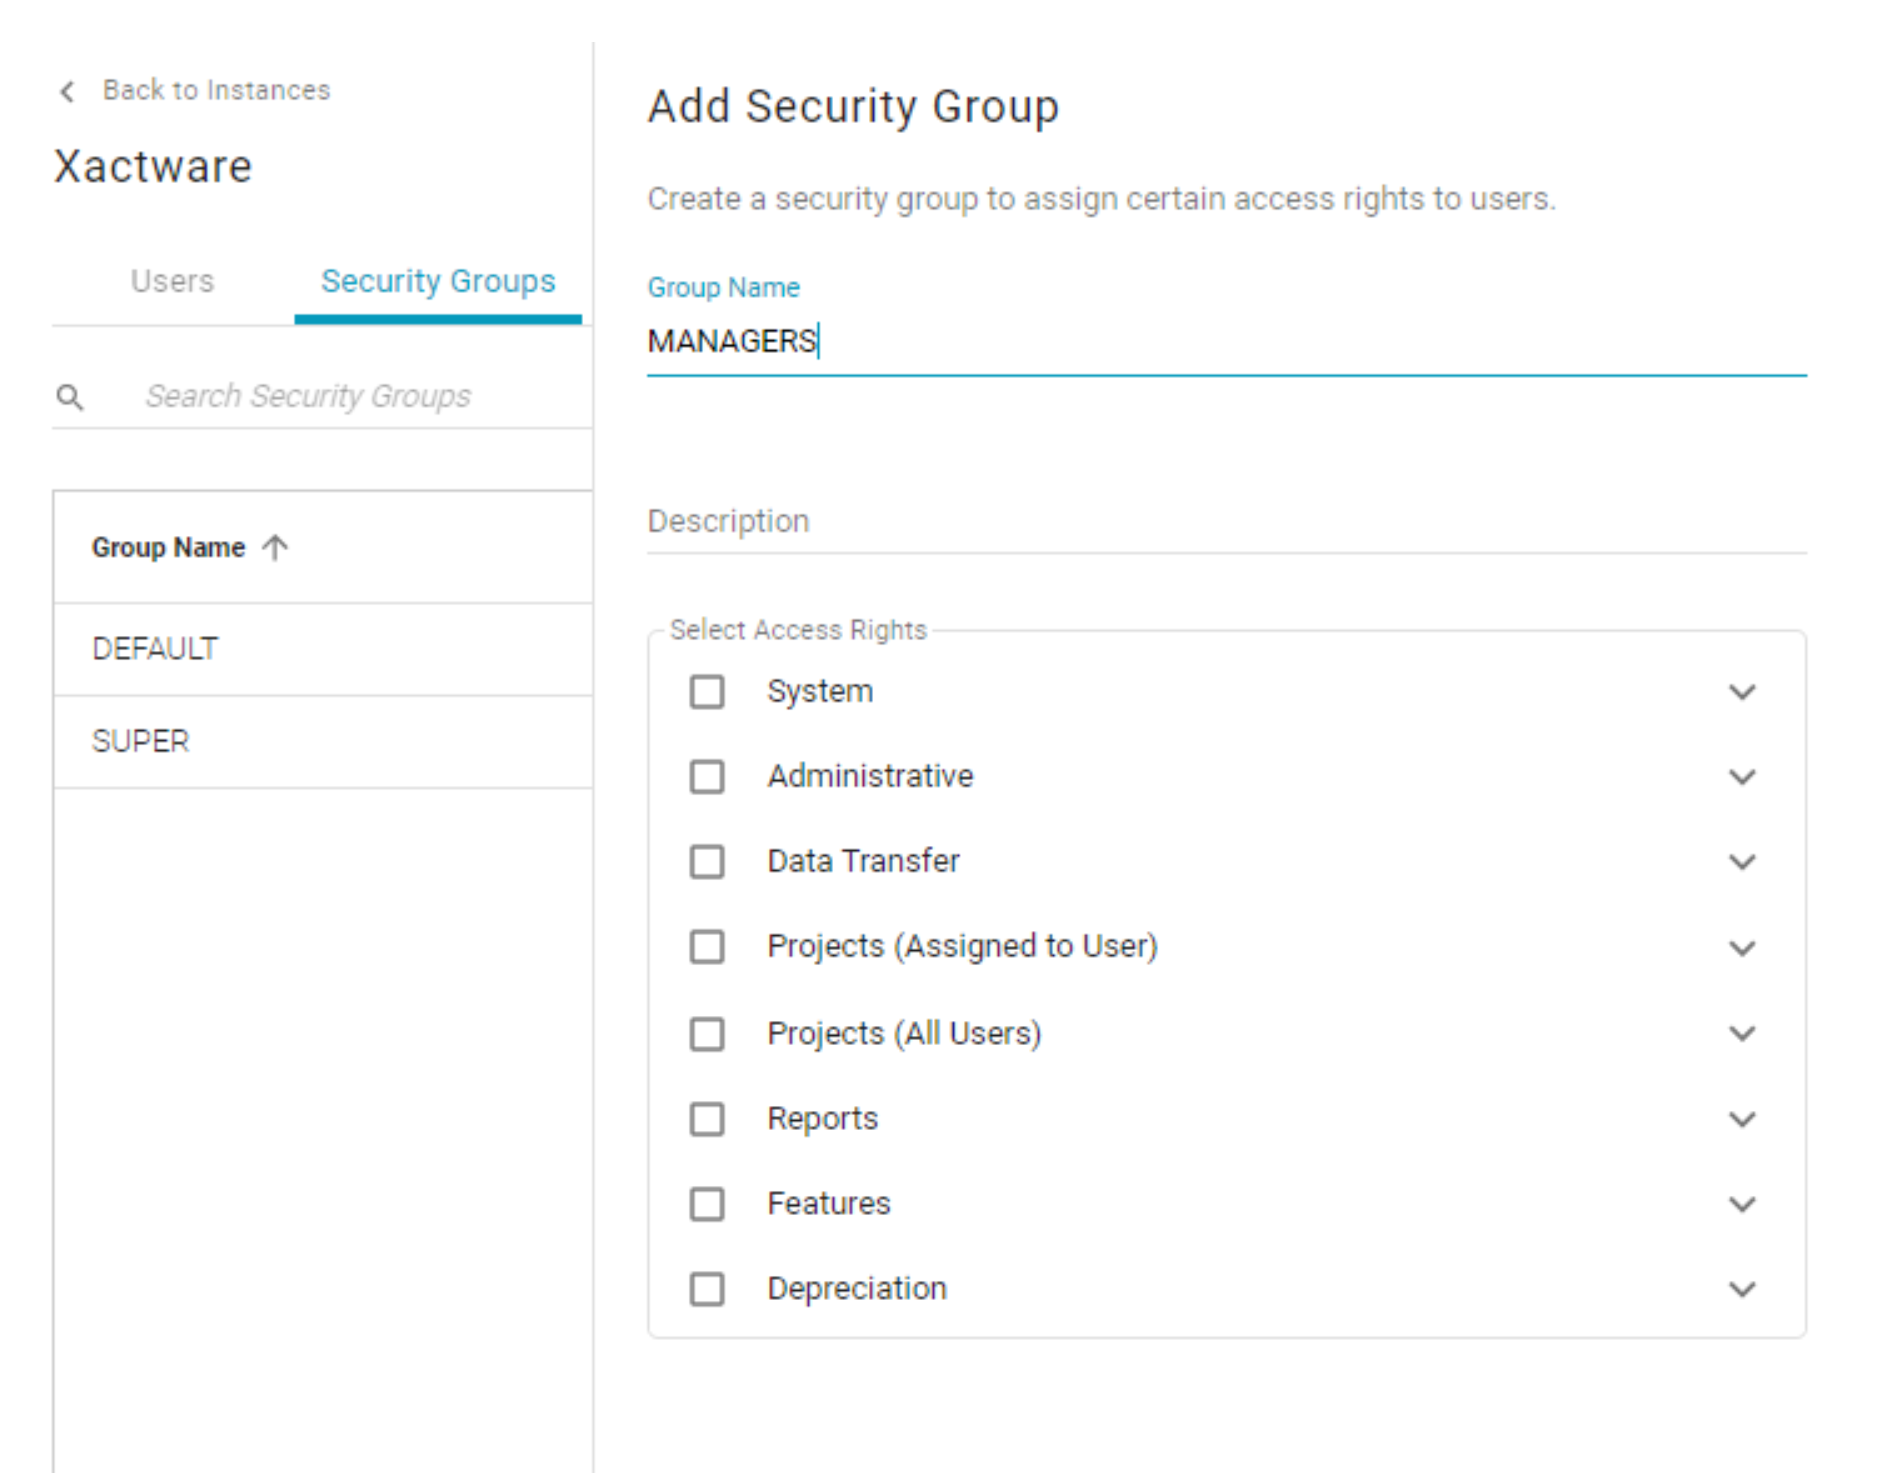
- Name the group.
- Add a description.
- Choose the access rights you want available to users in this group. You can assign an entire category by checking the corresponding box to the left, or click the dropdown arrow to the right of each row to view and select more specific options.
- Click Save.
Assign users to security groups
- In the Users tab, select a user from the table.
- A form asking for user information appears on the right of the screen.
- Scroll down to Security Groups and check boxes next to the groups you’d like to assign to the user. You can also deselect groups in this list to remove users from security groups.
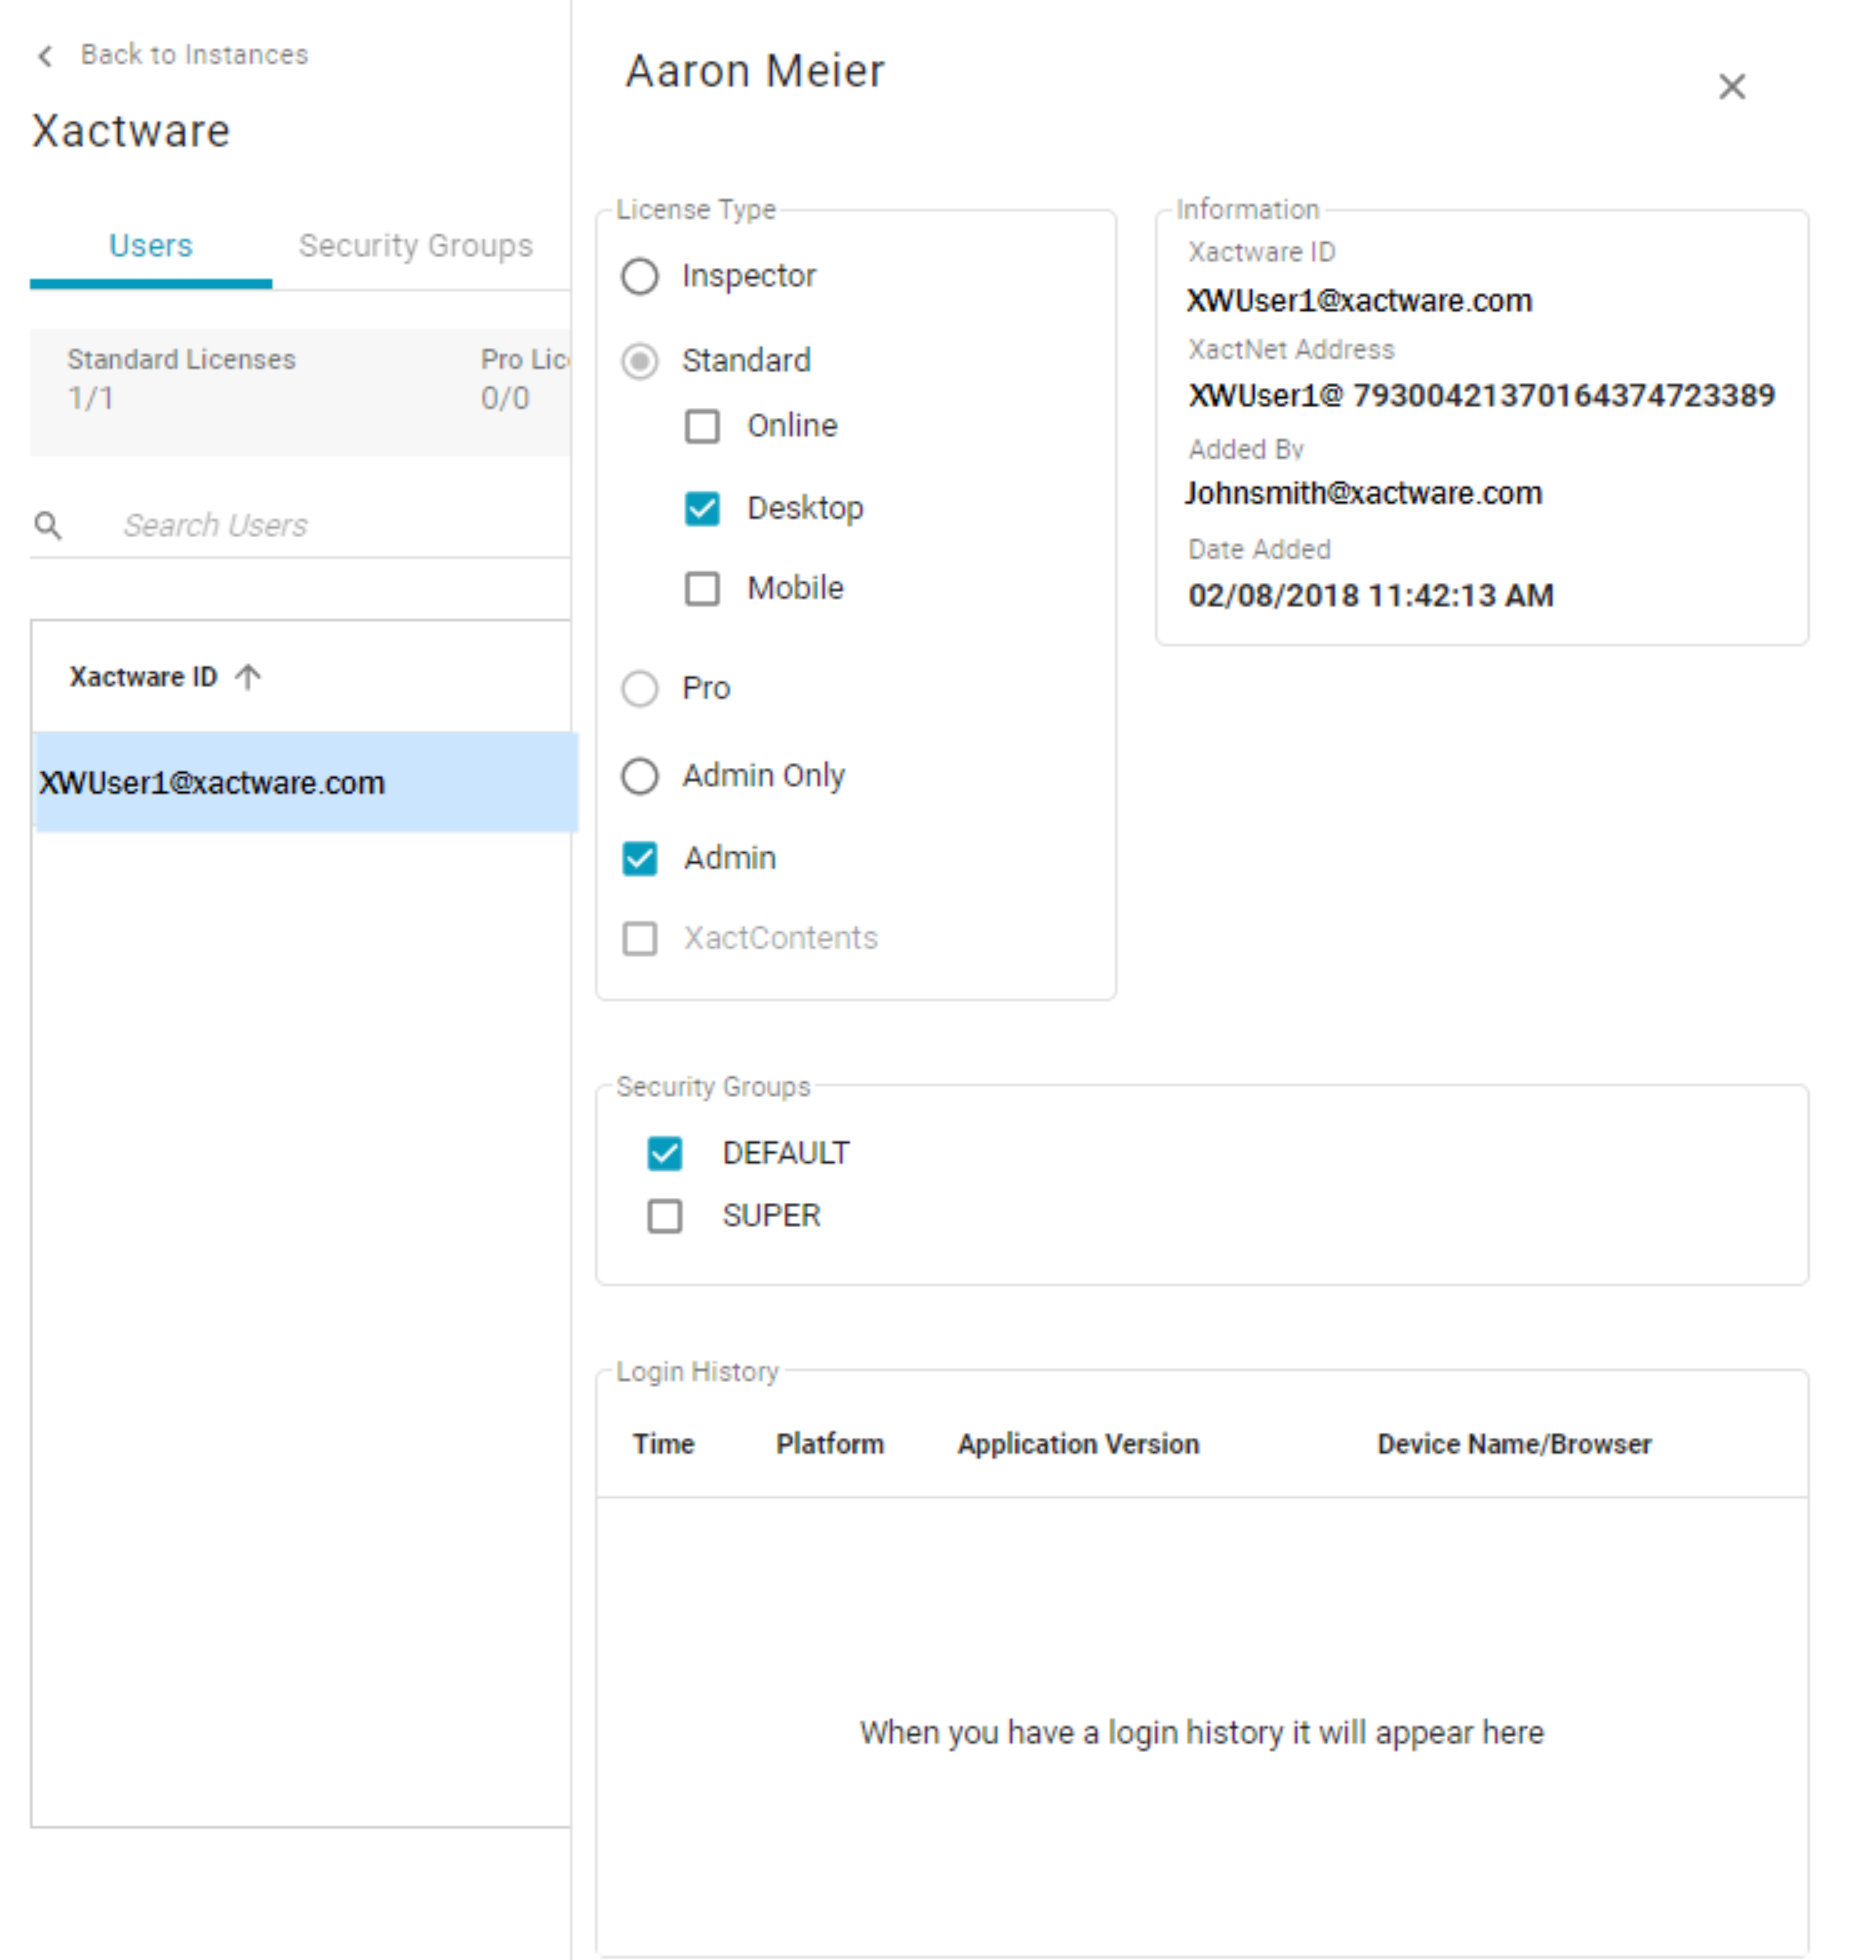
- Your changes save automatically.
Edit and delete security groups
- Click on the Security Groups tab.
- Select a group from the table.
- A window with group information appears on the right.
- To change group information, make edits in the window as needed and click Save.
- To delete the group, hit the Delete Group button at the bottom of the page. When a Security Group is deleted, it is automatically unavailable to users who were assigned to it.
- Alternatively, you can delete a security group by hovering over the table and clicking the trash icon on the far-right side of the group’s row.