Add a new group to an estimate in X1
 Updated
by
Heather Jones
Updated
by
Heather Jones
When it is impractical or unnecessary to create a sketch, you can use the grouping pane to create and manage rooms, group them together, and add items to rooms, stairs, and groups, etc. The grouping pane works similarly to a file tree, with a main folder and folders within, for however many levels are appropriate.
To add a new group (or room) to an estimate:
- Open the estimate.
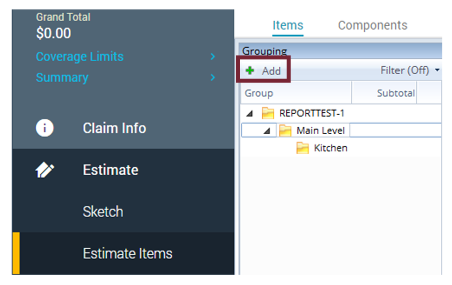
- Navigate to Estimate > Estimate Items.
- If not already open, open the Items tab.
- In the Grouping pane, select a group (or room) to establish the level at which the new one will be added.
- Select Add at the top of the Grouping pane.
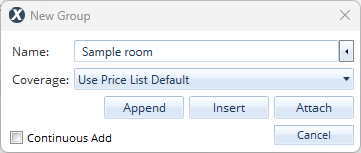
- In the New group dialog box that appears, enter a name.
- Select a coverage from the dropdown list.
- To add several rooms, select Continuous add.
- To add the room, select Append, Insert, or Attach (whichever is appropriate).
- Append: Adds the room on the same level as the highlighted room; the room appears below the highlighted room.
- Insert: Adds the room on the same level as the highlighted room; the room appears above the highlighted room.
- Attach: Adds the room as a member of the highlighted group of rooms.