Create profile forms in XactAdmin
 Updated
by
Heather Jones
Updated
by
Heather Jones
Xactimate forms allow users to add information directly to the form to provide additional information for the estimate reviewers. Profile owners can also use forms to guide users through their expected business flow. The specific forms available depend on the project’s profile. Profile forms are forms created specifically for your profile and controlled in XactAdmin.
Please note that we do not describe fields and logic in detail, but if you want help creating forms, please reach out to us via the Chat with us button in the eService Center.
When you create these forms in XactAdmin, you can apply them to your profile and use them in any project in the profile in any Xactimate platform to gather important information.
To create profile forms:
- In the left navigation menu in XactAdmin, select Profiles.
- Select the appropriate profile from the table.
- Select the Forms tab.
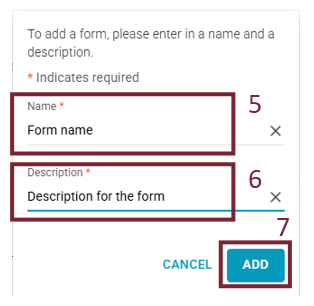
- Select Add form. A pop-up window appears.

- In the window, enter a name for the form.
- Enter a description.
- Select Add. This opens a new window.
Add groups
- Select Add Group (in the Navigator panel on the right) to add a form group to the left side of the page.
- Under Group Name, enter the group name.
- If helpful, modify the Group ID. The Group ID helps you identify the group when entering logic for the form.
- If appropriate, enter the logic for the group. The logic you enter determines whether certain groups or fields are visible or hidden. See ____ for more information.

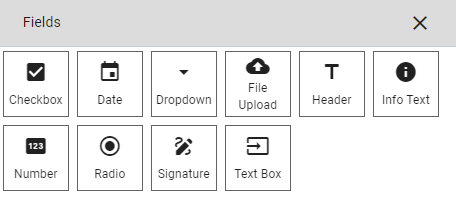
Add fields
- When ready to add fields to a group, in the Navigator panel on the right, under the appropriate group name, select Add Fields.
- Repeat these steps as needed. There is no limit to the number of groups or fields you can add to forms.
- When your form is ready, select Publish.
Notes on logic
The logic used in the forms creator is generally used only to determine which fields or groups appear based on certain conditions and whether they have a prefilled value. The logic is generally very similar to logic used in Boolean searches or in spreadsheets. If you are unsure how to write your logic, contact Support via the Chat with us button in the eService Center.
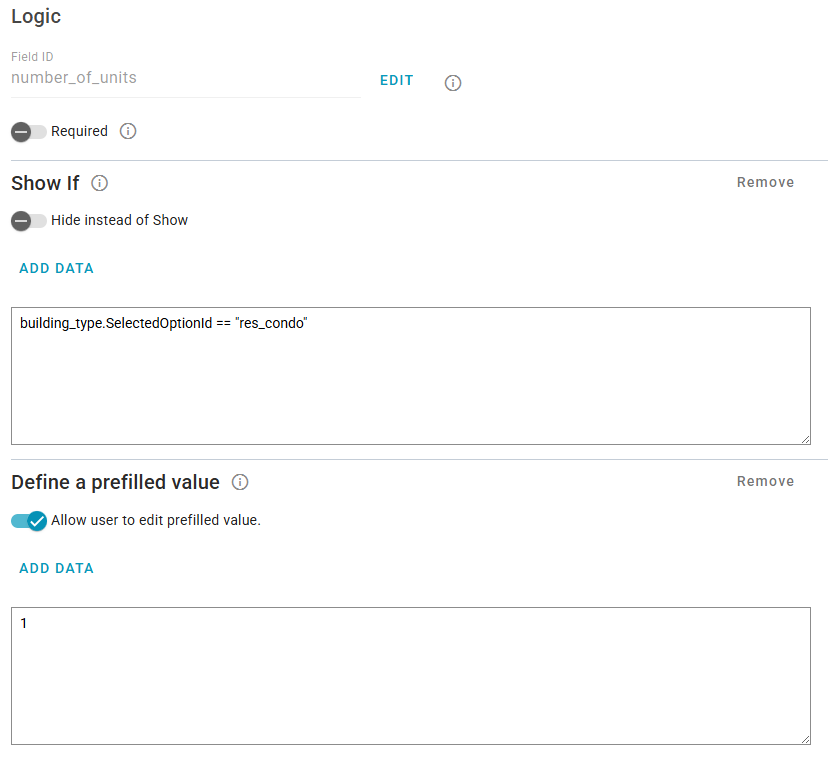
Groups and some fields include only the Logic and Show If sections; other fields include a Define a prefilled value section. The following is a brief overview of these sections:
• Field ID / Group ID: This field is used as a tag or title for the field or group so you can refer to it in the logic.
• Show If: This section lets you define when the field or group appears in the form. You can select Add Data for suggestions when creating your logic.
• Define a prefilled value: This section allows you to add text to a field and determine whether or not users can modify the field.