Add or edit company headers in Xactimate online
 Updated
by
Jill Bowers
Updated
by
Jill Bowers
Company headers appear at the top of Xactimate project documents, and often include a company name, logo, and other information.
Follow the instructions below to select, add, or edit company headers in Xactimate online.
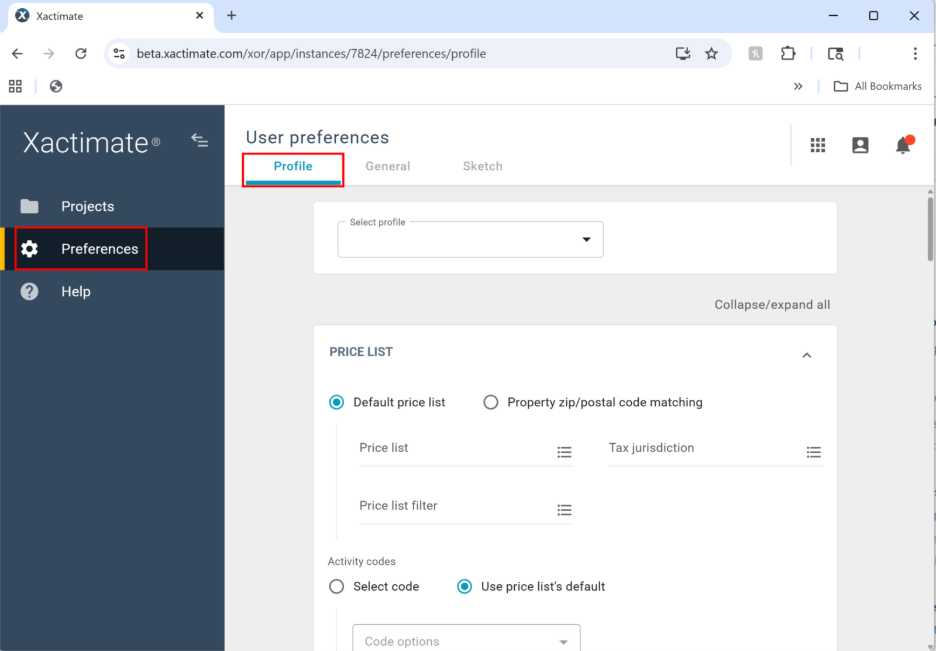
- In Xactimate online, select Preferences.
- Confirm you are on the Profile tab.
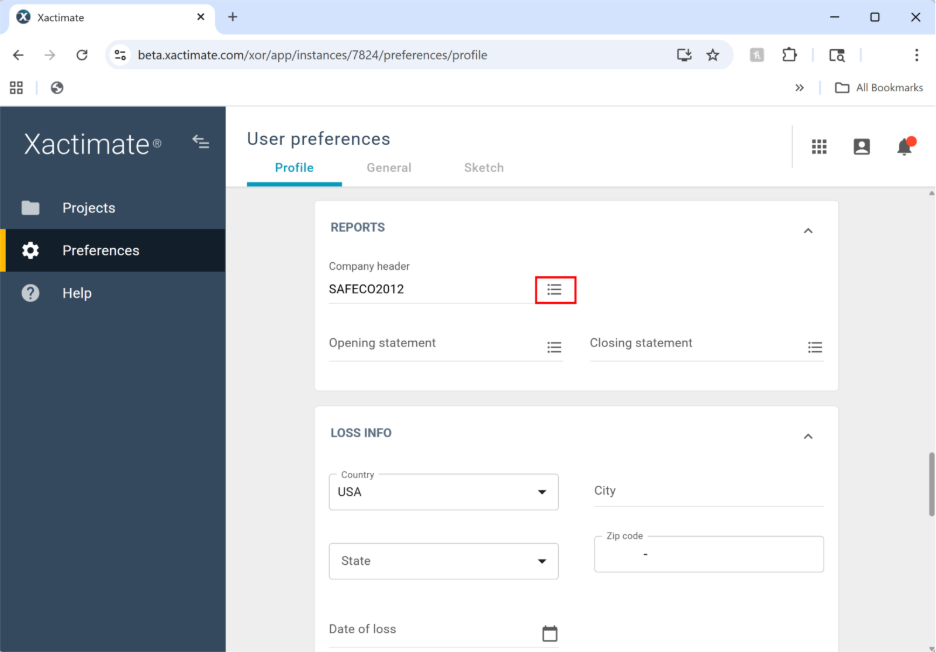
- In the Reports section, select the Menu icon next to the Company header field. This opens the Select company header window.
Note: You may need to scroll down to find the Reports section.
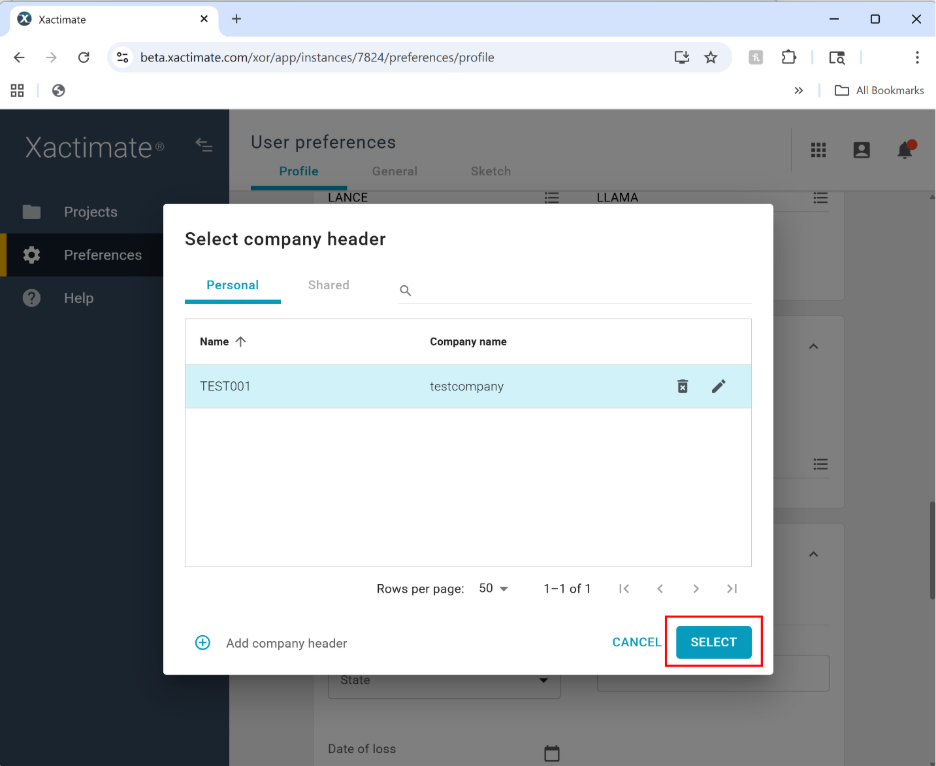
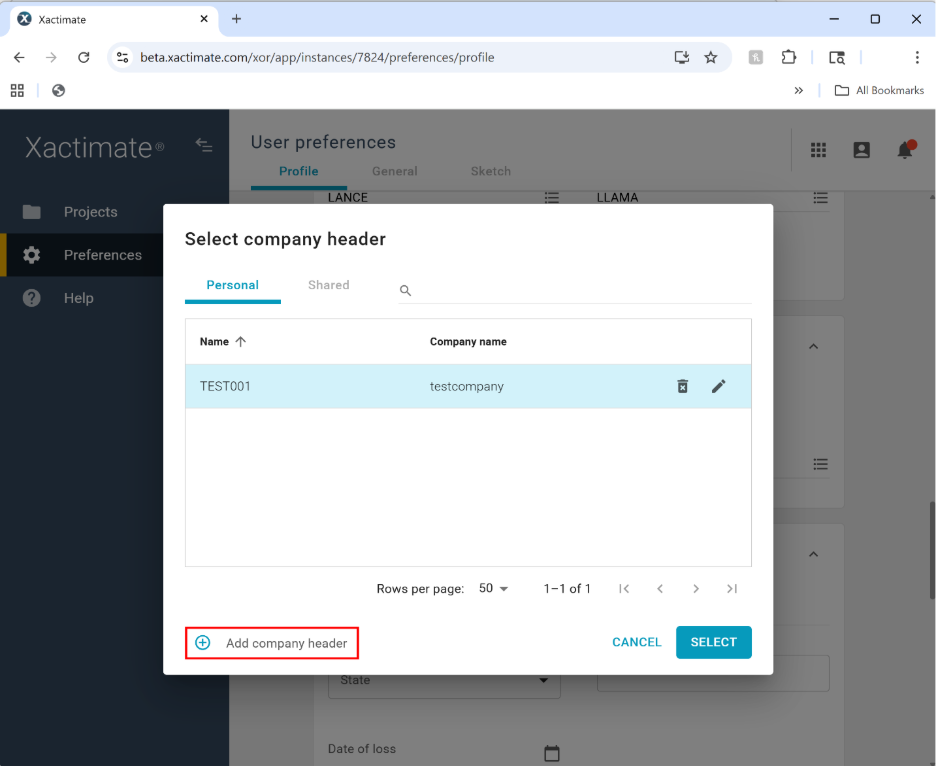
From here, you can select, edit, create, or delete company headers.
Select company header
- Highlight a company header in the table.
- Click Select.
Edit company header
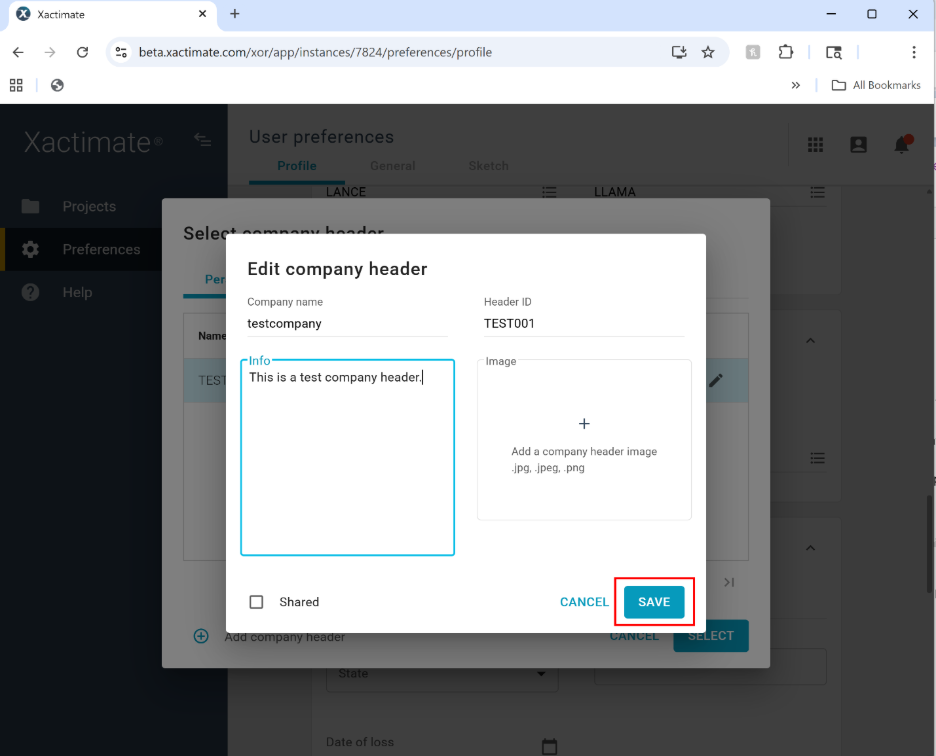
- Hover over or select the row of the desired header.
- Select the Edit icon. This opens the Edit company header window.
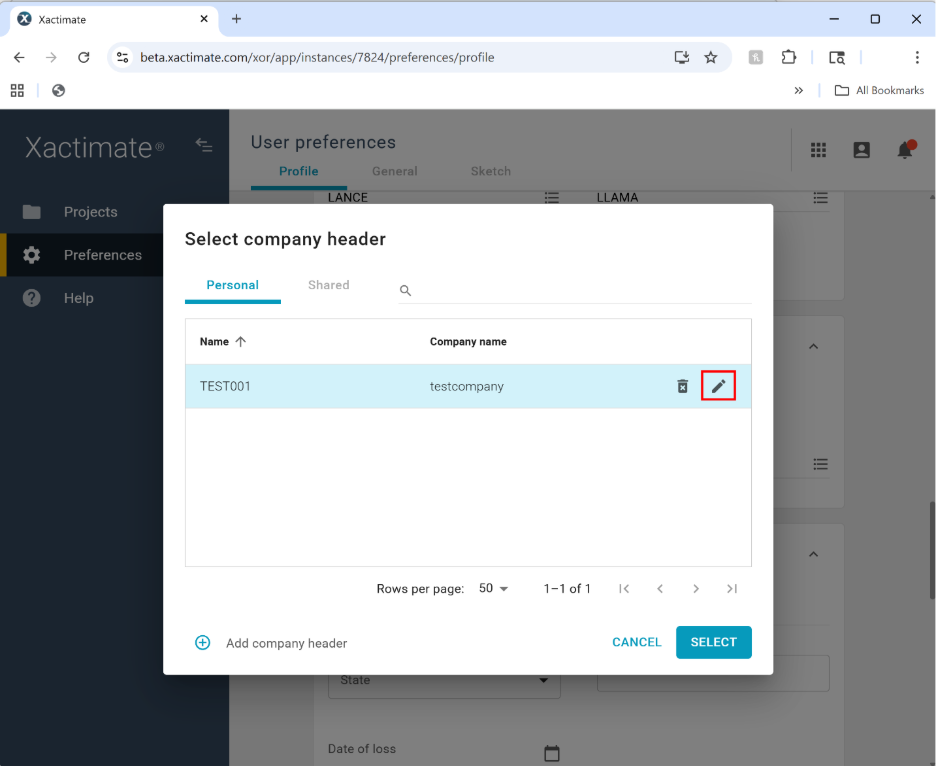
- Edit the company name, header ID, image, and company info, as needed.
- Select Save to keep your changes.
Delete company header
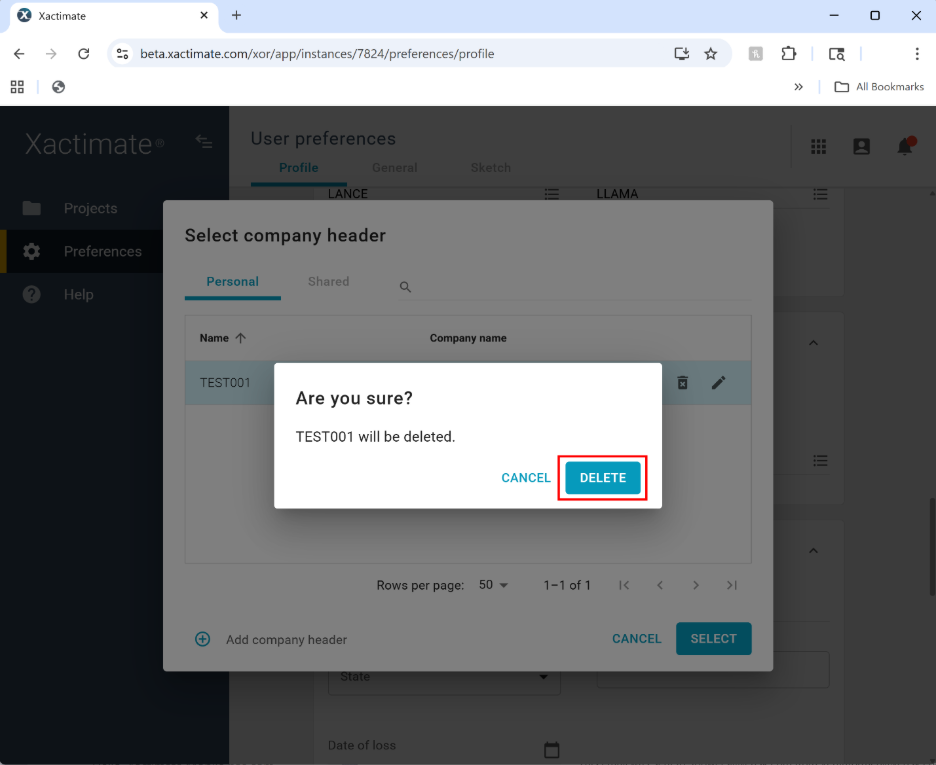
- Hover over or select the row of the desired header.
- Select the Delete icon.

- A confirmation window opens. Select Delete.
Create and add company header
- Select Add company header. This opens the Add company header popup window.
- Enter the company name, header ID, image or logo, and a description.
- Select Save. This closes the popup window.
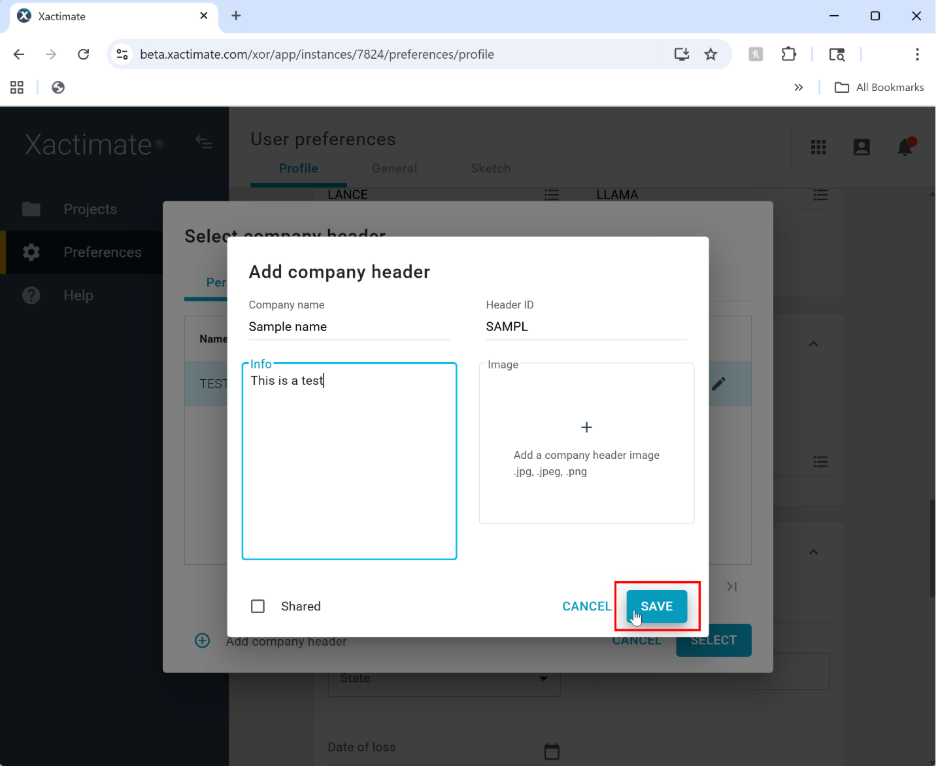
- Select the new header in the table
- Click Select to save it as the company header.