Adjuster license numbers in Xactimate Admin
 Updated
by
Jill Bowers
Updated
by
Jill Bowers
Users can enter adjuster license numbers in the Preferences section of Instances in Xactimate Admin. Using adjuster license numbers helps ensure that adjusters are compliant with certain legal requirements.
Allow multiple adjuster licenses
Before you and other users in your instance can add multiple license numbers to claim reps, you must first activate the option in the Configuration tab. To do so, follow the steps below.
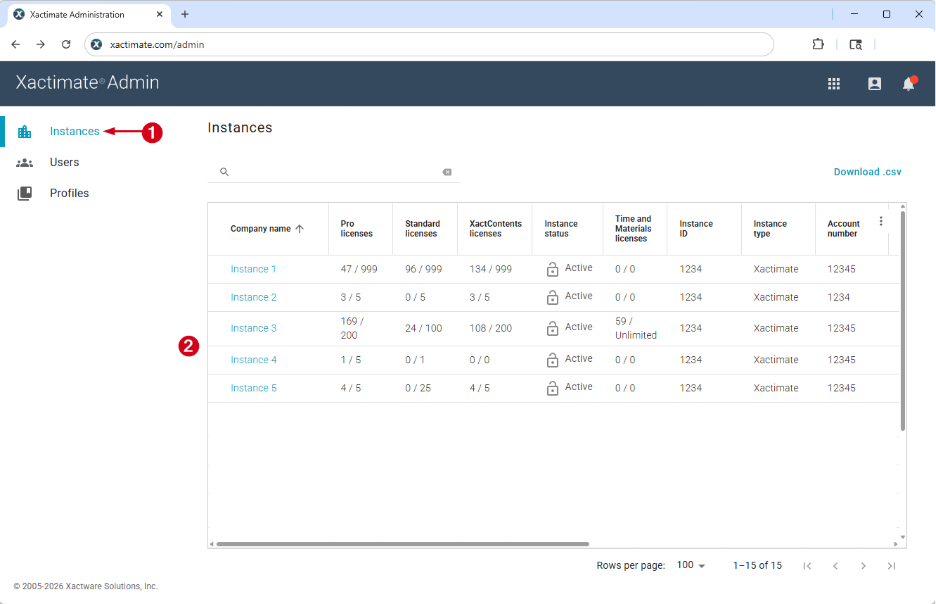
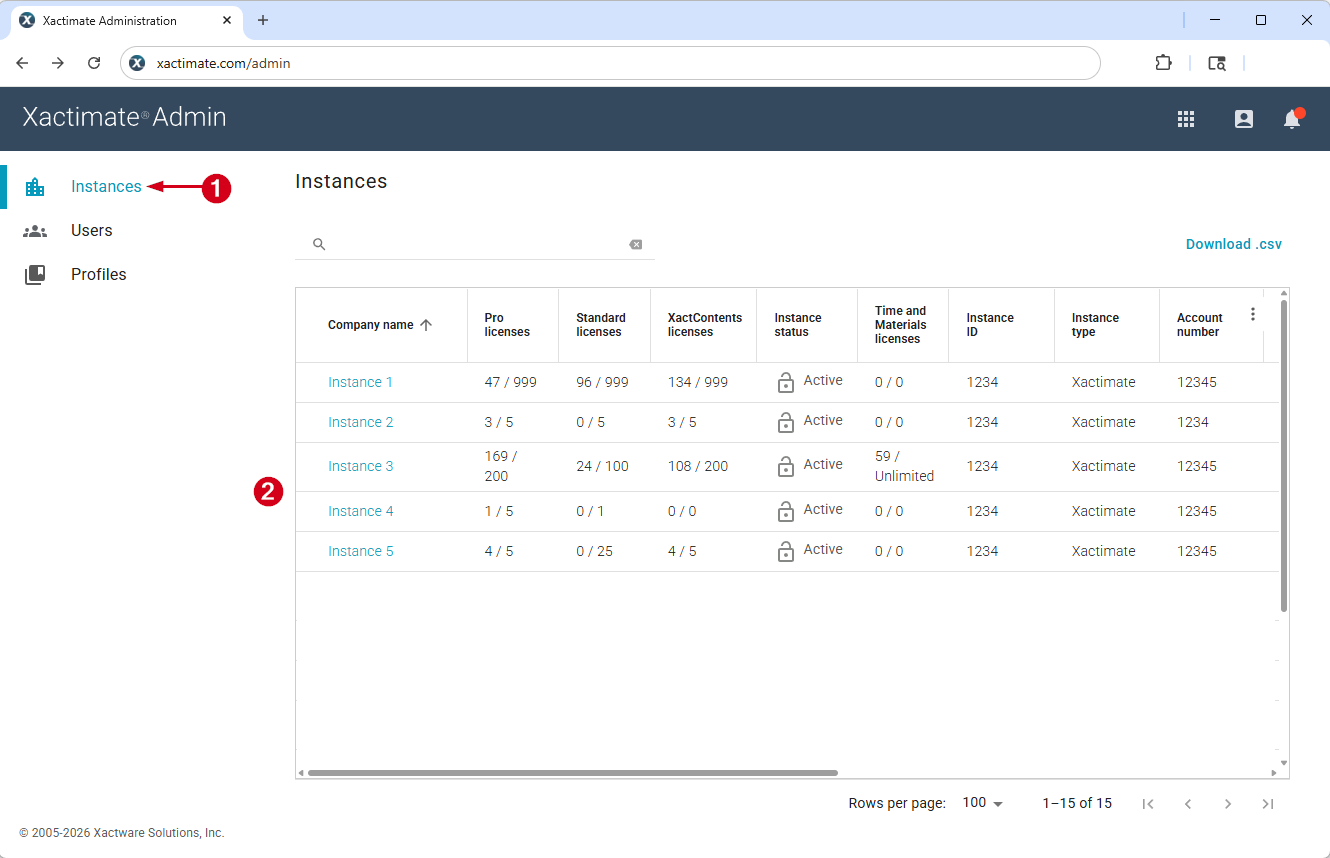
- From within Xactimate Admin, select Instances.
- Select your instance from the Instances table.
Note: If you have only one instance, no Instances table appears and you are taken directly to the Users tab.
- Select Configuration.
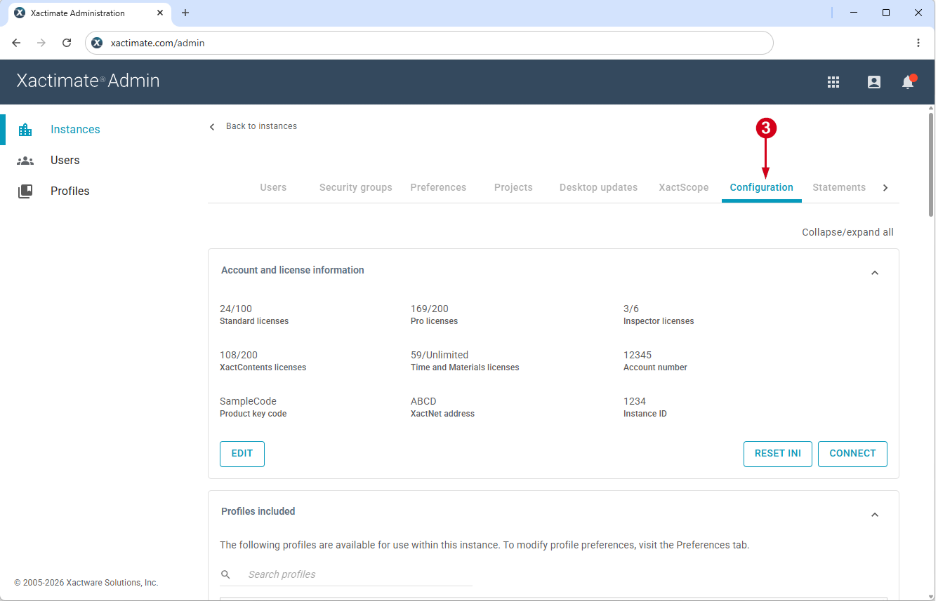
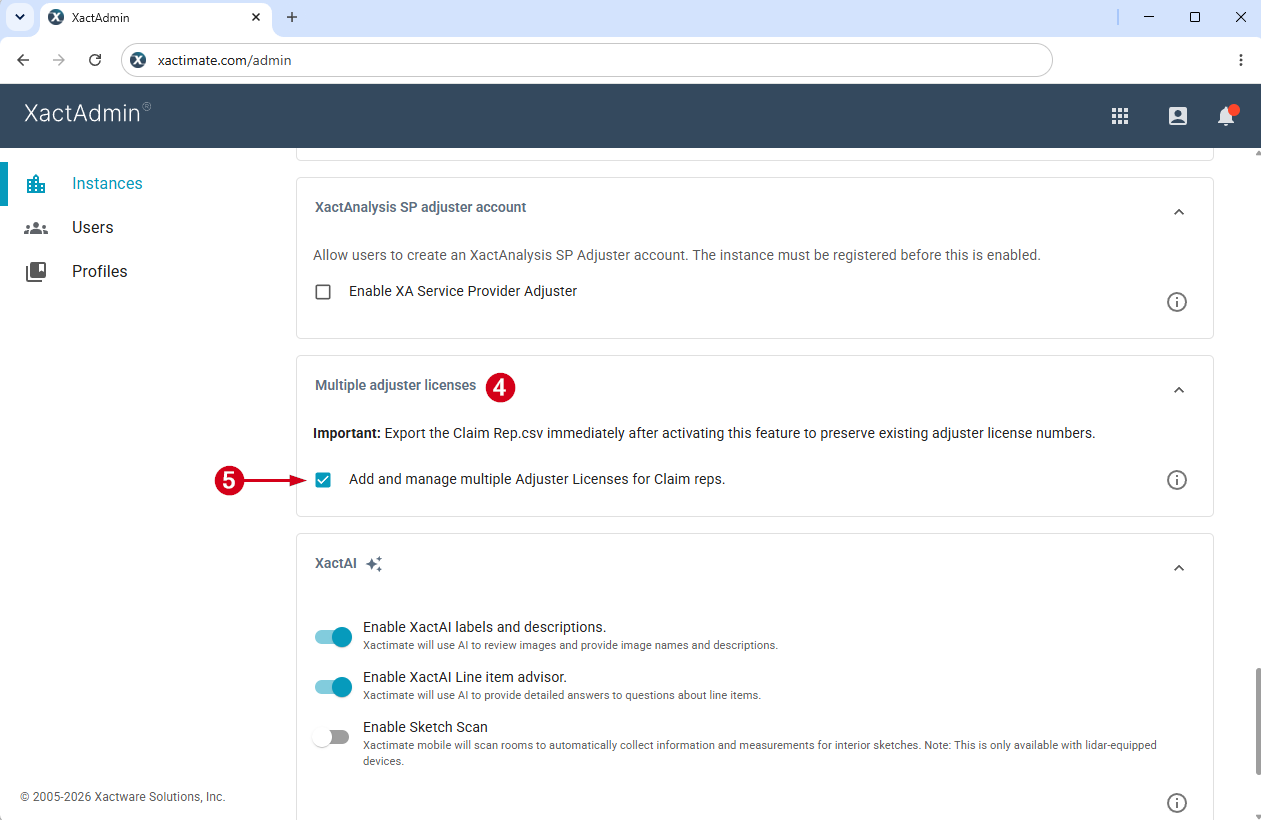
- Locate the Multiple adjuster licenses section.
Note: Depending on your screen settings, you may have to scroll down.
- Select the Add and manage multiple Adjuster Licenses for Claim reps option.
Add new adjusters
Xactimate Admin users can easily enter adjuster numbers when adding new adjusters by following the steps below.
- From within Xactimate Admin, select Instances.
- Select your instance from the Instances table.
Note: If you have only one instance, no Instances table appears and you are taken to the Users tab.
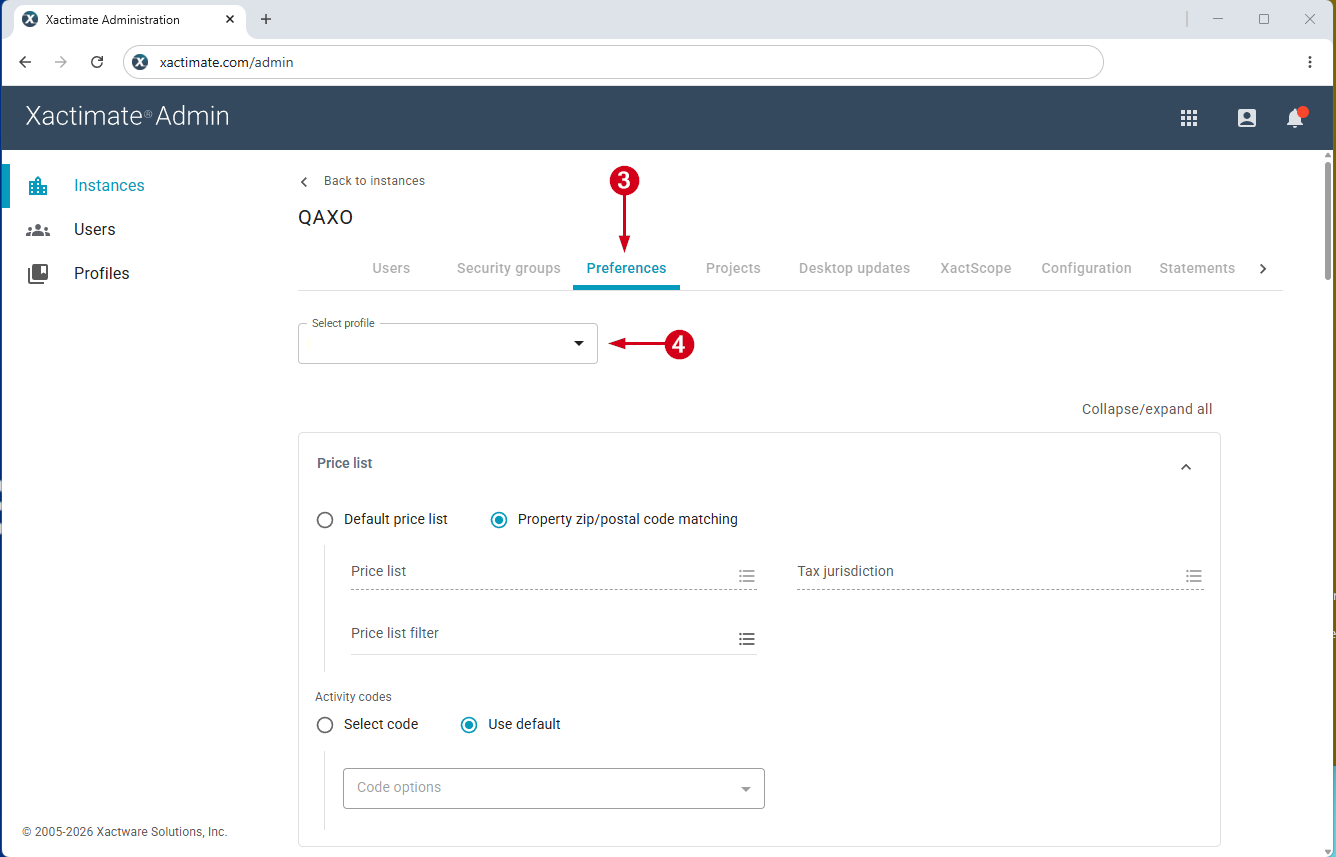
- Select Preferences.
- Select your profile from the drop-down list.

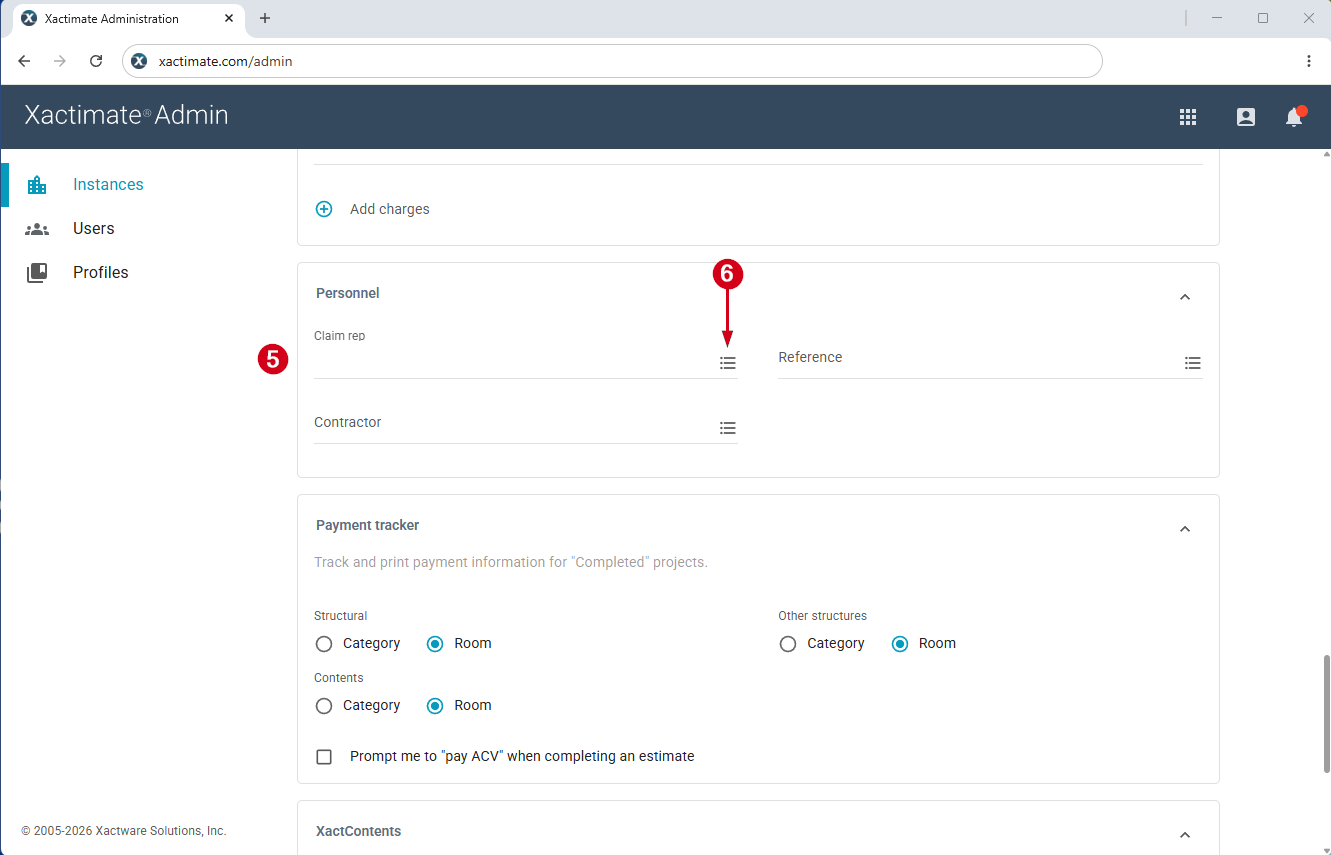
- Scroll down to the Personnel section.
- Select the menu icon to the right of the Claim rep field. A Select claim rep dialog appears.

- Select Add claim rep. This opens the Add claim rep box.

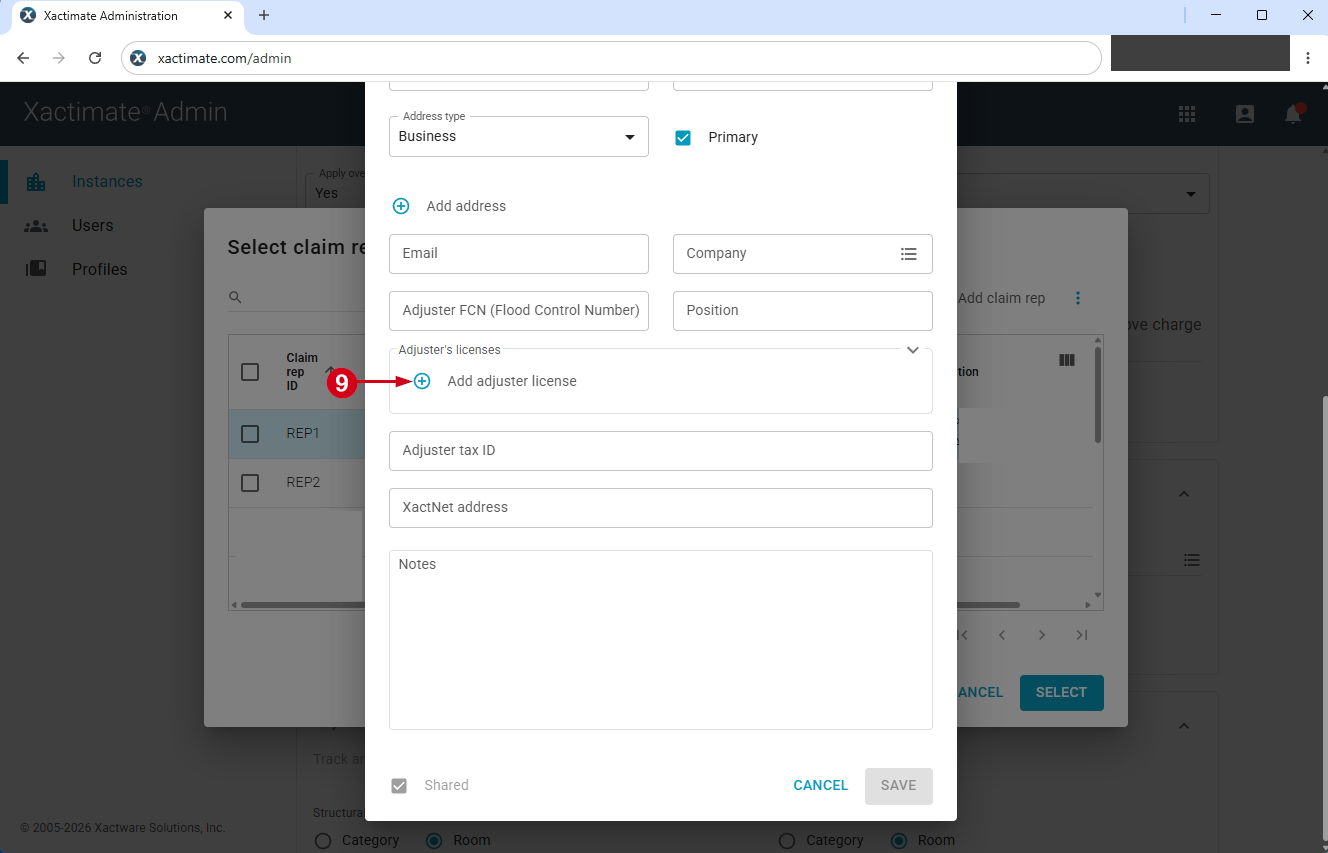
- Fill out the Add claim rep form with information about the new claim representative.
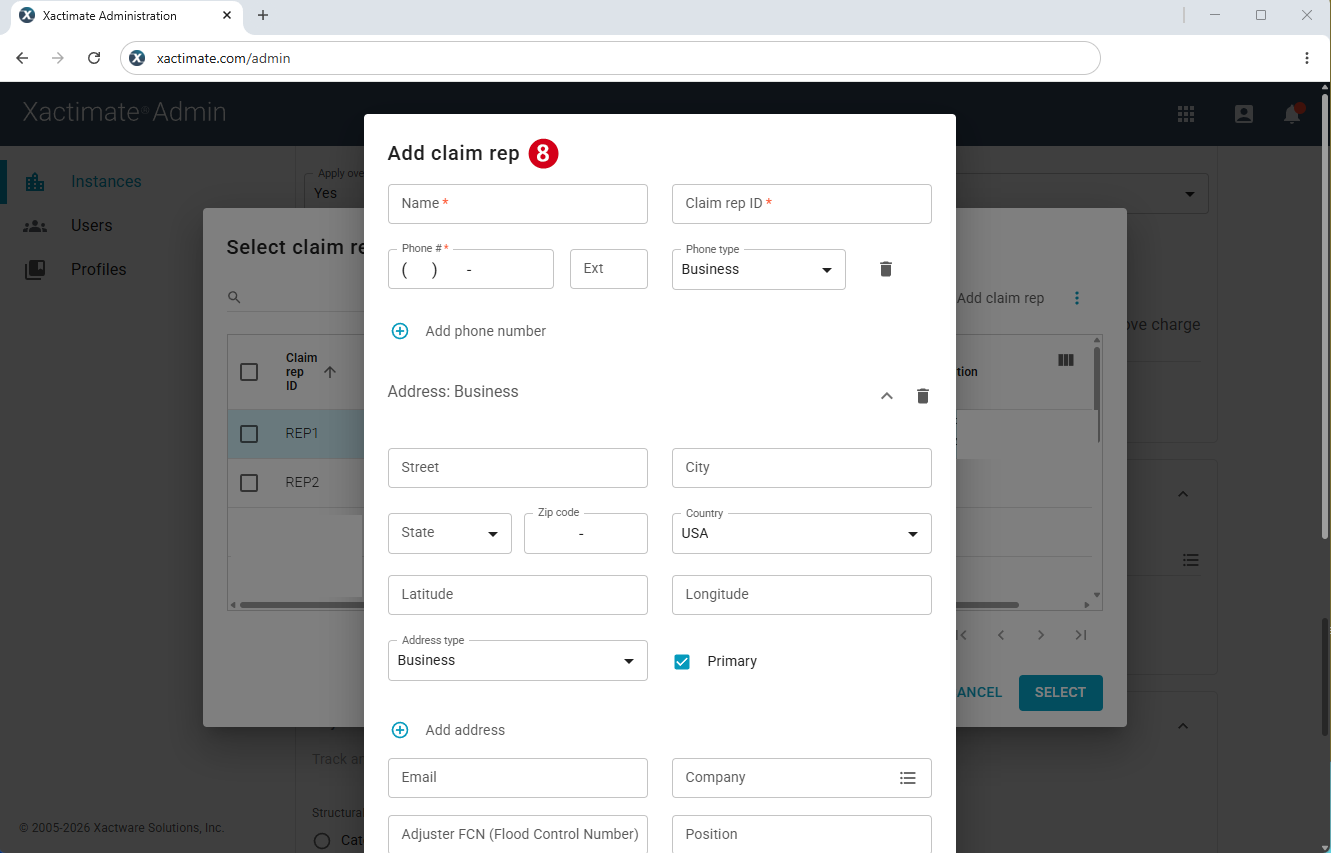
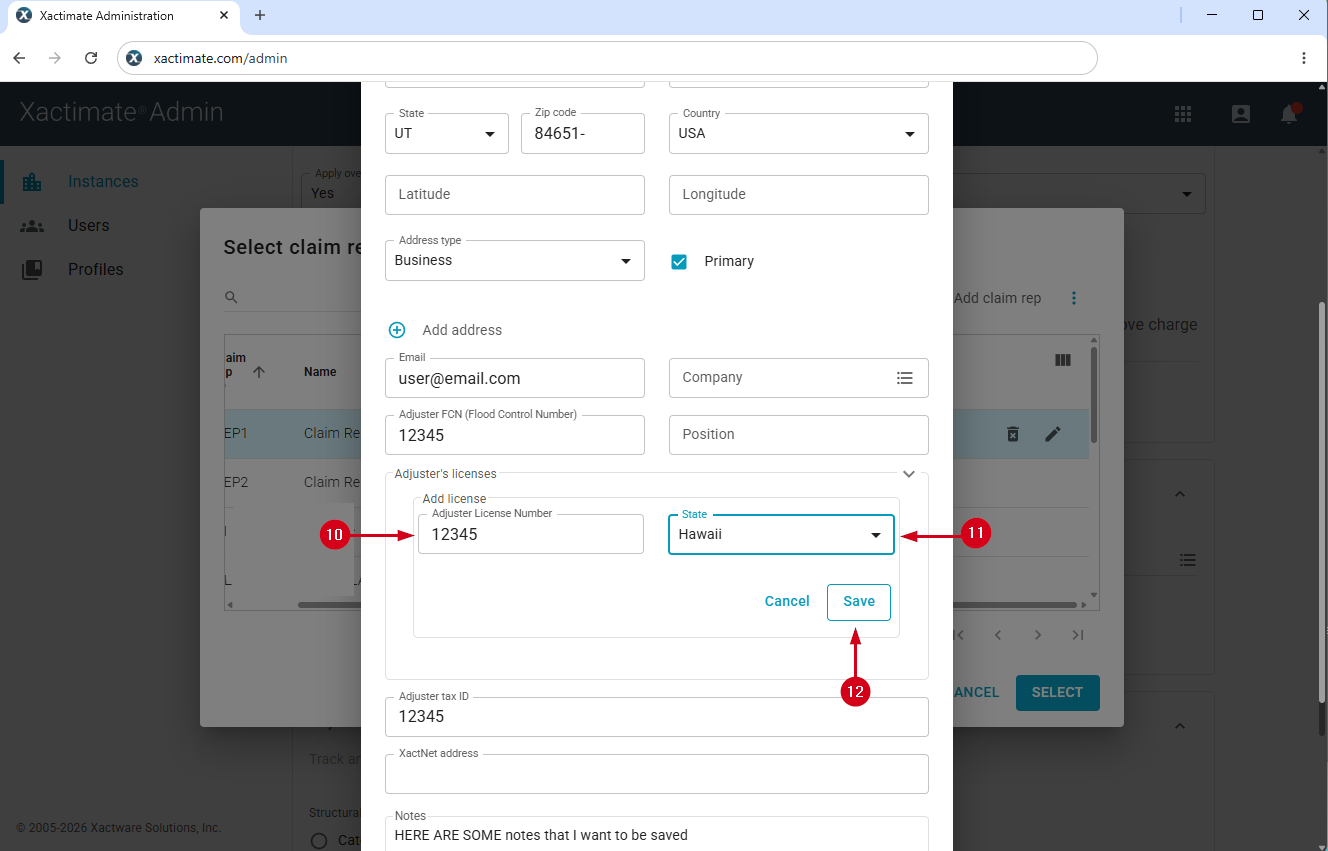
- To add adjuster’s licenses, select Add adjuster license in the Adjuster’s licenses section. A new field called Add license appears.
Note: Depending on your screen settings, you may need to scroll down.

- Enter the adjuster license number.
Note: Spaces are not allowed in adjuster license numbers.
- Enter the state in which the license was assigned.
Note: You must enter the state before you can save your changes.
- Select Save.
Edit a claim representative’s adjuster number(s)
Users can also edit the adjuster license numbers of existing adjusters.
- From within Xactimate Admin, select Instances.
- Select your instance from the Instances table.
Note: If you have only one instance, no Instances table appears and you are taken directly to the Users tab.

- Select Preferences.
- Select your profile from the drop-down list.

- Scroll down to the Personnel section.
- Select the menu icon to the right of the Claim rep field. A Select claim rep dialog appears.
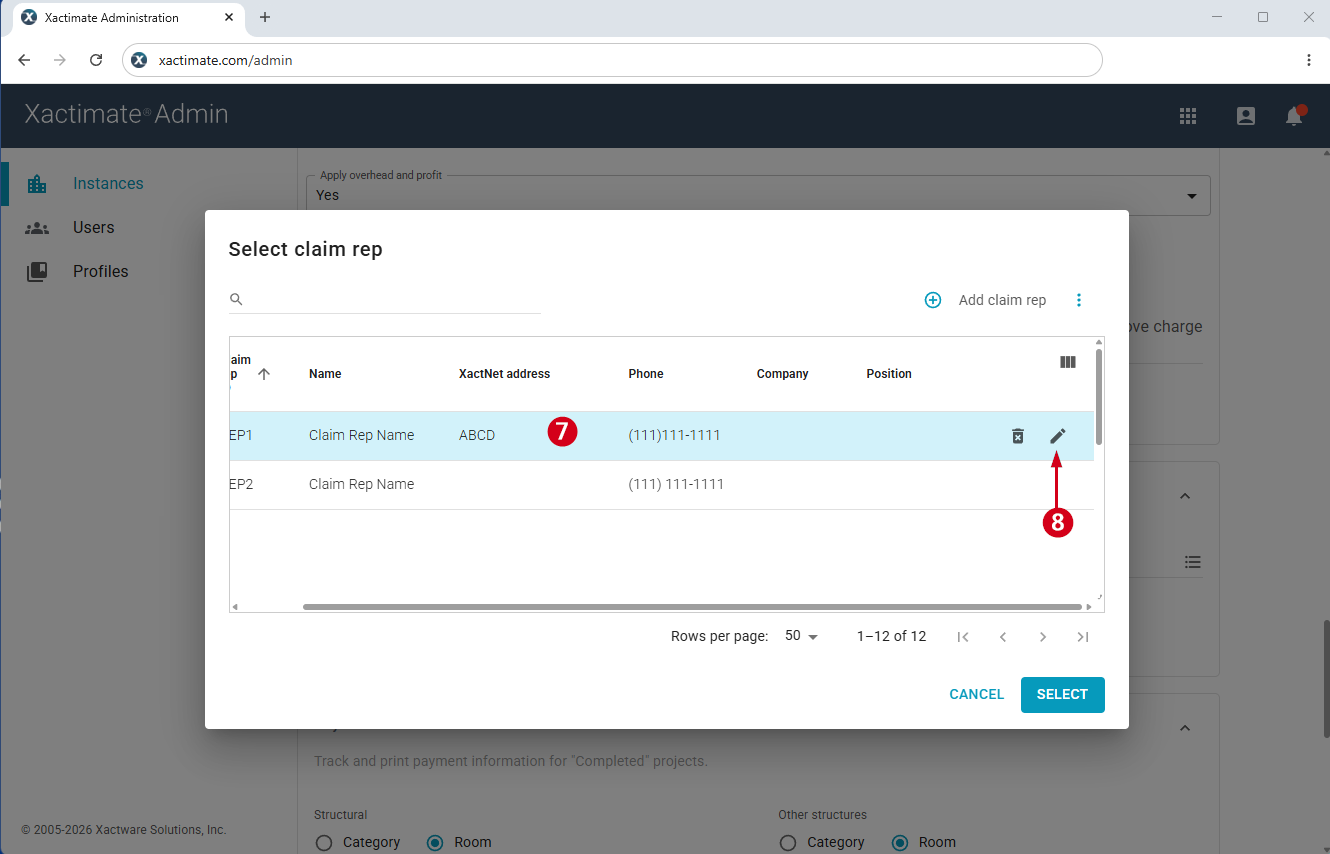
- Select the row of the claim representative you want to edit to make the Edit and Delete icons appear.
Note: You may need to scroll to the right to see these icons.
- Select the Edit icon to open the Edit claim rep pop-up window.
- Select Add adjuster license.
- Enter the adjuster’s license number.
- Select the state in which the license was issued.
- Select Save.

Add multiple adjuster licenses in bulk
Users can associate multiple adjuster numbers with a single claim representative, which helps ensure that estimates comply with state-specific legal requirements. This is especially beneficial for claim representatives who work across different states.
- From within Xactimate Admin, select Instances.
- Select your instance from the Instances table.
Note: If you have only one instance, no Instances table appears and you are taken directly to the Users tab.
Note: Prior to uploading multiple adjuster licenses, the Multiple Adjuster Licenses option must be checked. To learn more, visit the Allow multiple adjuster licenses section at the top of this document.
- Select Preferences.
- Select your profile from the drop-down menu.
- Scroll down to the Personnel section.
- Select the menu icon to the right of the Claim rep field. A Select claim rep dialog appears.

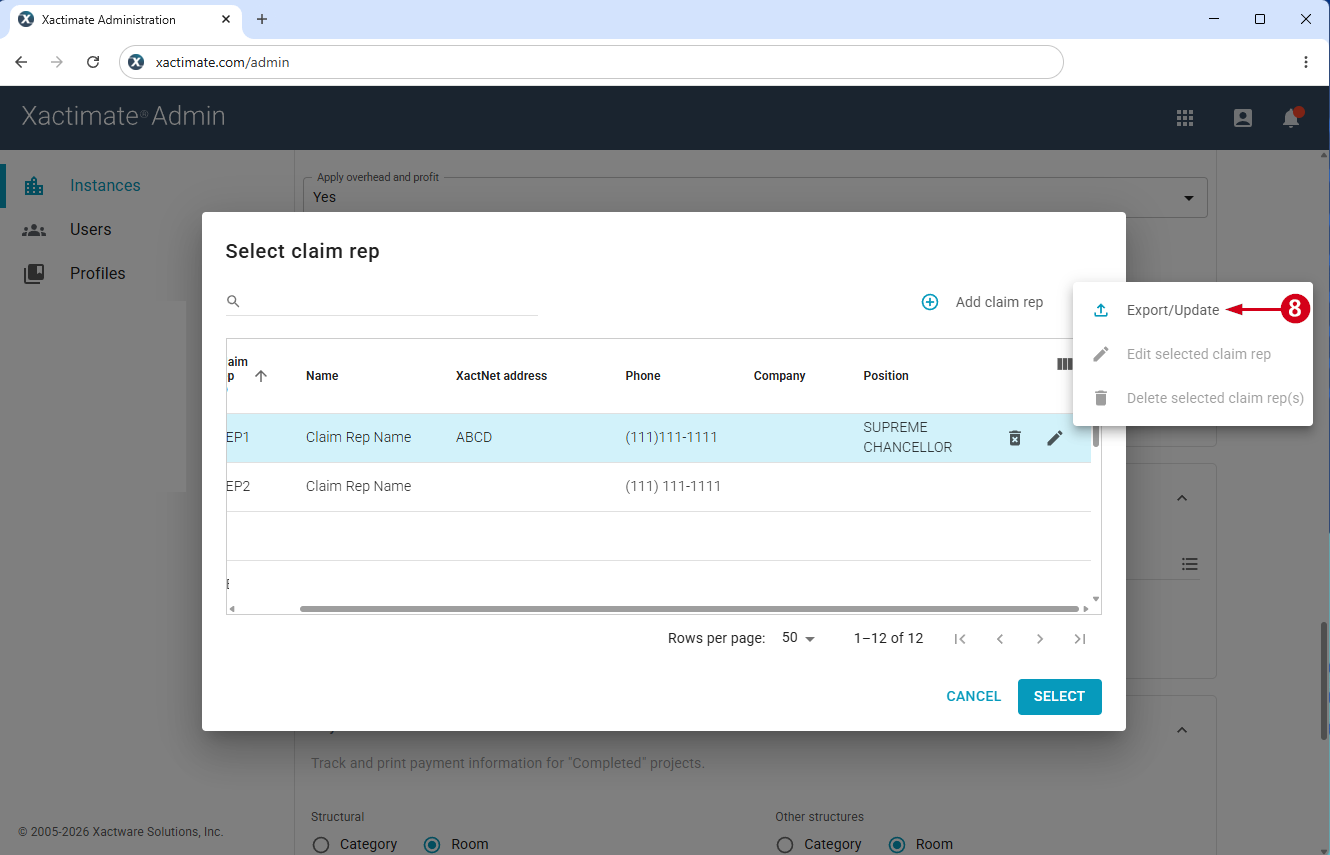
- Select the three vertical dots icon above the upper-right corner of the table.
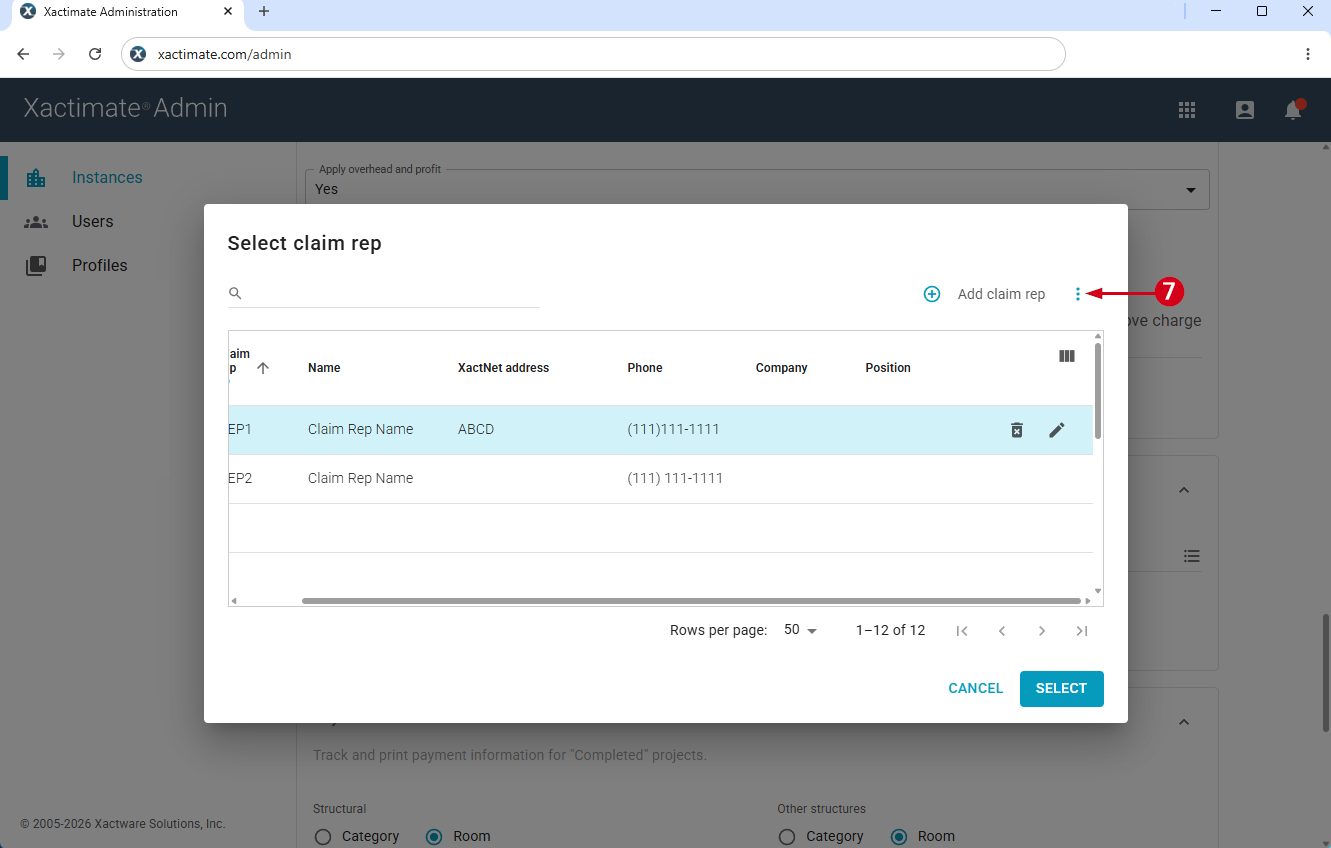
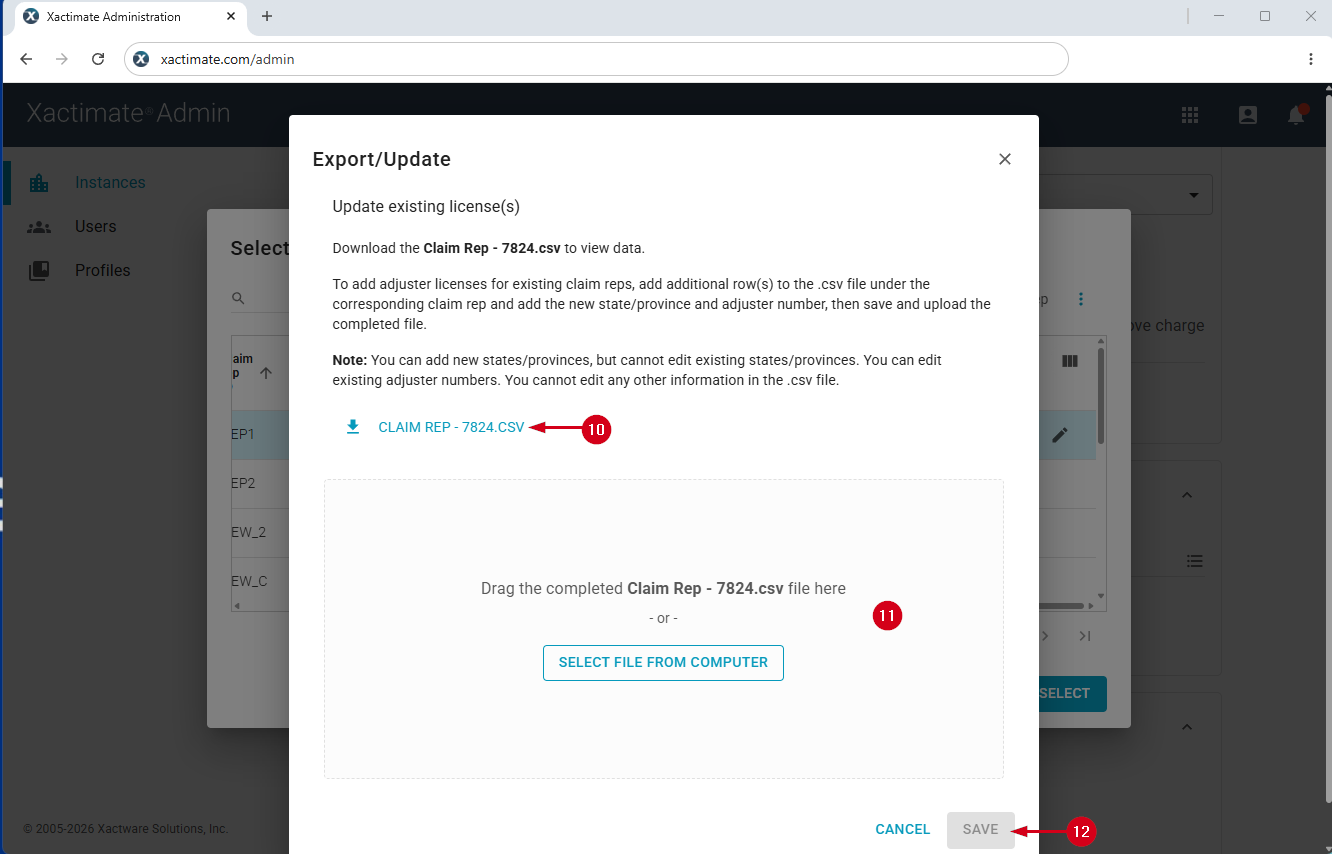
- Select Export claim reps contacts. This opens the Export/Update Claim Rep(s) window, where you can download information on all claim representatives.
Note: To only download information on certain claim representatives instead of all claim representatives, select the checkbox next to each desired contact prior to selecting Export claim reps contacts.
- Select Claim Rep .CSV to download the Add licenses Excel sheet.
- Fill out the spreadsheet. When downloading and filling out the spreadsheet, keep the following information in mind:
- We include the instance ID in the file name.
- Only the first three columns of the spreadsheet are editable for this process: Claim Rep ID, State/Province, Adjuster Number
- Each claim rep must have the State/Province and Adjuster Number fields filled in. If this information is not included, a warning appears when you upload the .csv to Xactimate. You can choose to ignore this warning or go back to the .csv and enter the missing information or remove the corresponding rows.
- Drag the completed file into the Export/Update Claim Rep(s) form.
Note: Alternatively, select the Select File From Computer option, select the file from the file browser, and select Open.
- Select Save.
Note: If there are any errors in the file, a warning appears at the bottom of the window. You can either fix these errors and reupload the file or ignore the warning and continue the upload.