Sketch AR in Xactimate mobile (iOS)
 Updated
by
Heather Jones
Updated
by
Heather Jones
Once you open Sketch AR, follow the prompts on the screen to complete the sketch. You can find more details here on how to complete each step.
At any point, you can select the list icon ( ) in the lower right to go to a specific step in the process or select the next icon (
![]() ) to move to the next step. You can also select the settings icon (
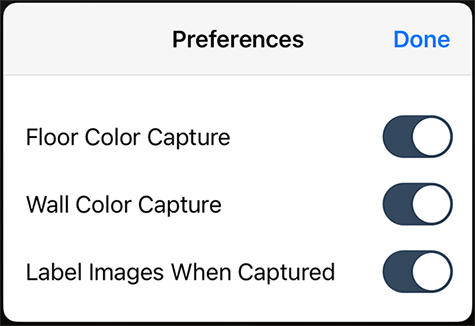
) to move to the next step. You can also select the settings icon ( ) in the lower left to toggle floor and wall color capture and image labeling.
Set the floor height
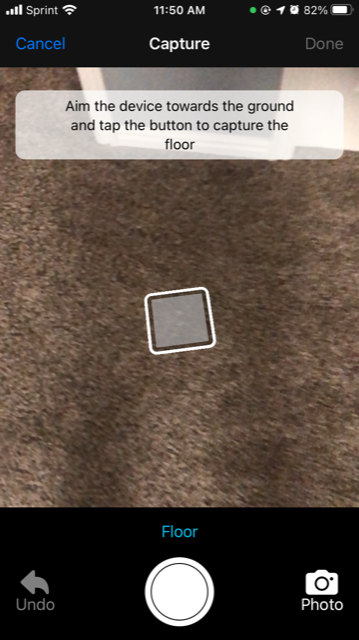
Capture the floor as instructed to establish a basepoint for the room height.
Walls
Once you capture the floor, Sketch AR starts the wall capture. You have two options for capturing the walls:
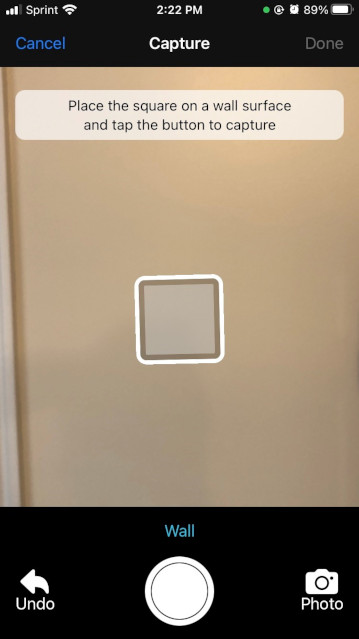
Single capture
Angle the device so the square appears over the wall and tap the capture button.
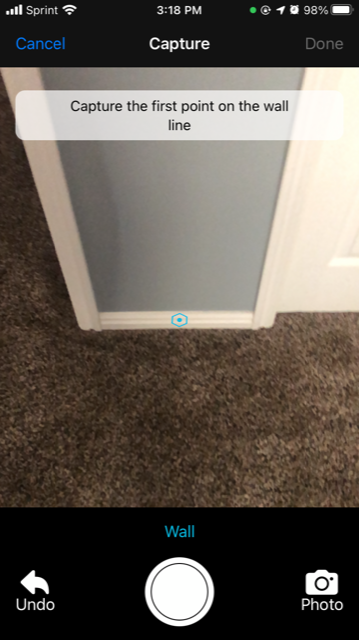
Line capture
If the square does not appear, use the line option: angle the device so the hexagon appears where the wall and floor meet. Tap the capture button and angle the device to another similar point for the same wall. A line appears between the first point and your current position. Tap the button again to complete the capture for that wall.
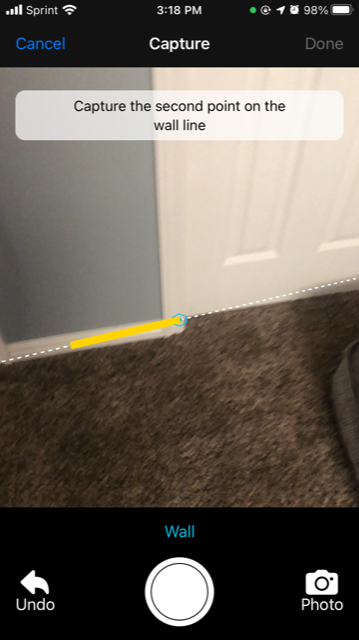
In some cases, rooms are not clearly separated. This can be the transition between a hallway and a staircase or where two rooms flow into each other. In such cases, use the line capture method to capture two points along the line where the wall would be located if it were there. Flooring transitions can make this easy. Make sure the opening is added at the same point in both rooms so that the rooms connect properly. When you finish your capture, add a missing wall to both sides (explained later).
Continue around the room to capture all the walls until the perimeter is complete. When you have finished capturing the perimeter, tap the arrow in the bottom right corner (![]() ), which opens a Measure Ceilings window, which opens a Measure Ceilings window where you can select the type of ceiling.
), which opens a Measure Ceilings window, which opens a Measure Ceilings window where you can select the type of ceiling.
Wall height
If you select the generic option, Xactimate records an eight-foot ceiling and moves to the next step; if you select another option, the screen automatically marks the outline of the floor and adds a line from the corner directly up or down to the target. Angle the device so the line goes to the corner of the ceiling and tap the capture button. After you record the walls and wall height, tap the arrow again to proceed to the wall openings.

Auto Capture
Auto Capture is only available for devices that have a lidar sensor in the camera. If your device has lidar, and you want to use Auto Capture, view the instructions here.
Wall openings
Sketch AR automatically opens to the door capture mode, but you can freely switch between Door, Window, and Missing Wall by sliding the carousel just above the capture button. Xactimate uses doors and missing walls to connect the rooms appropriately.
Doors
Capture first one corner of the door and then capture the opposite diagonal corner.
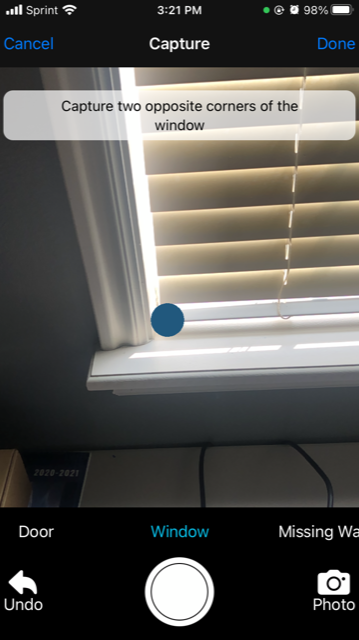
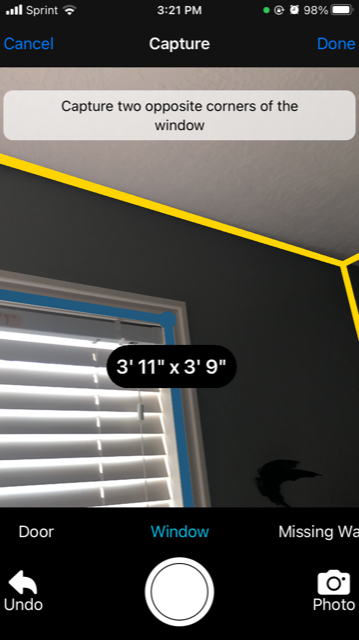
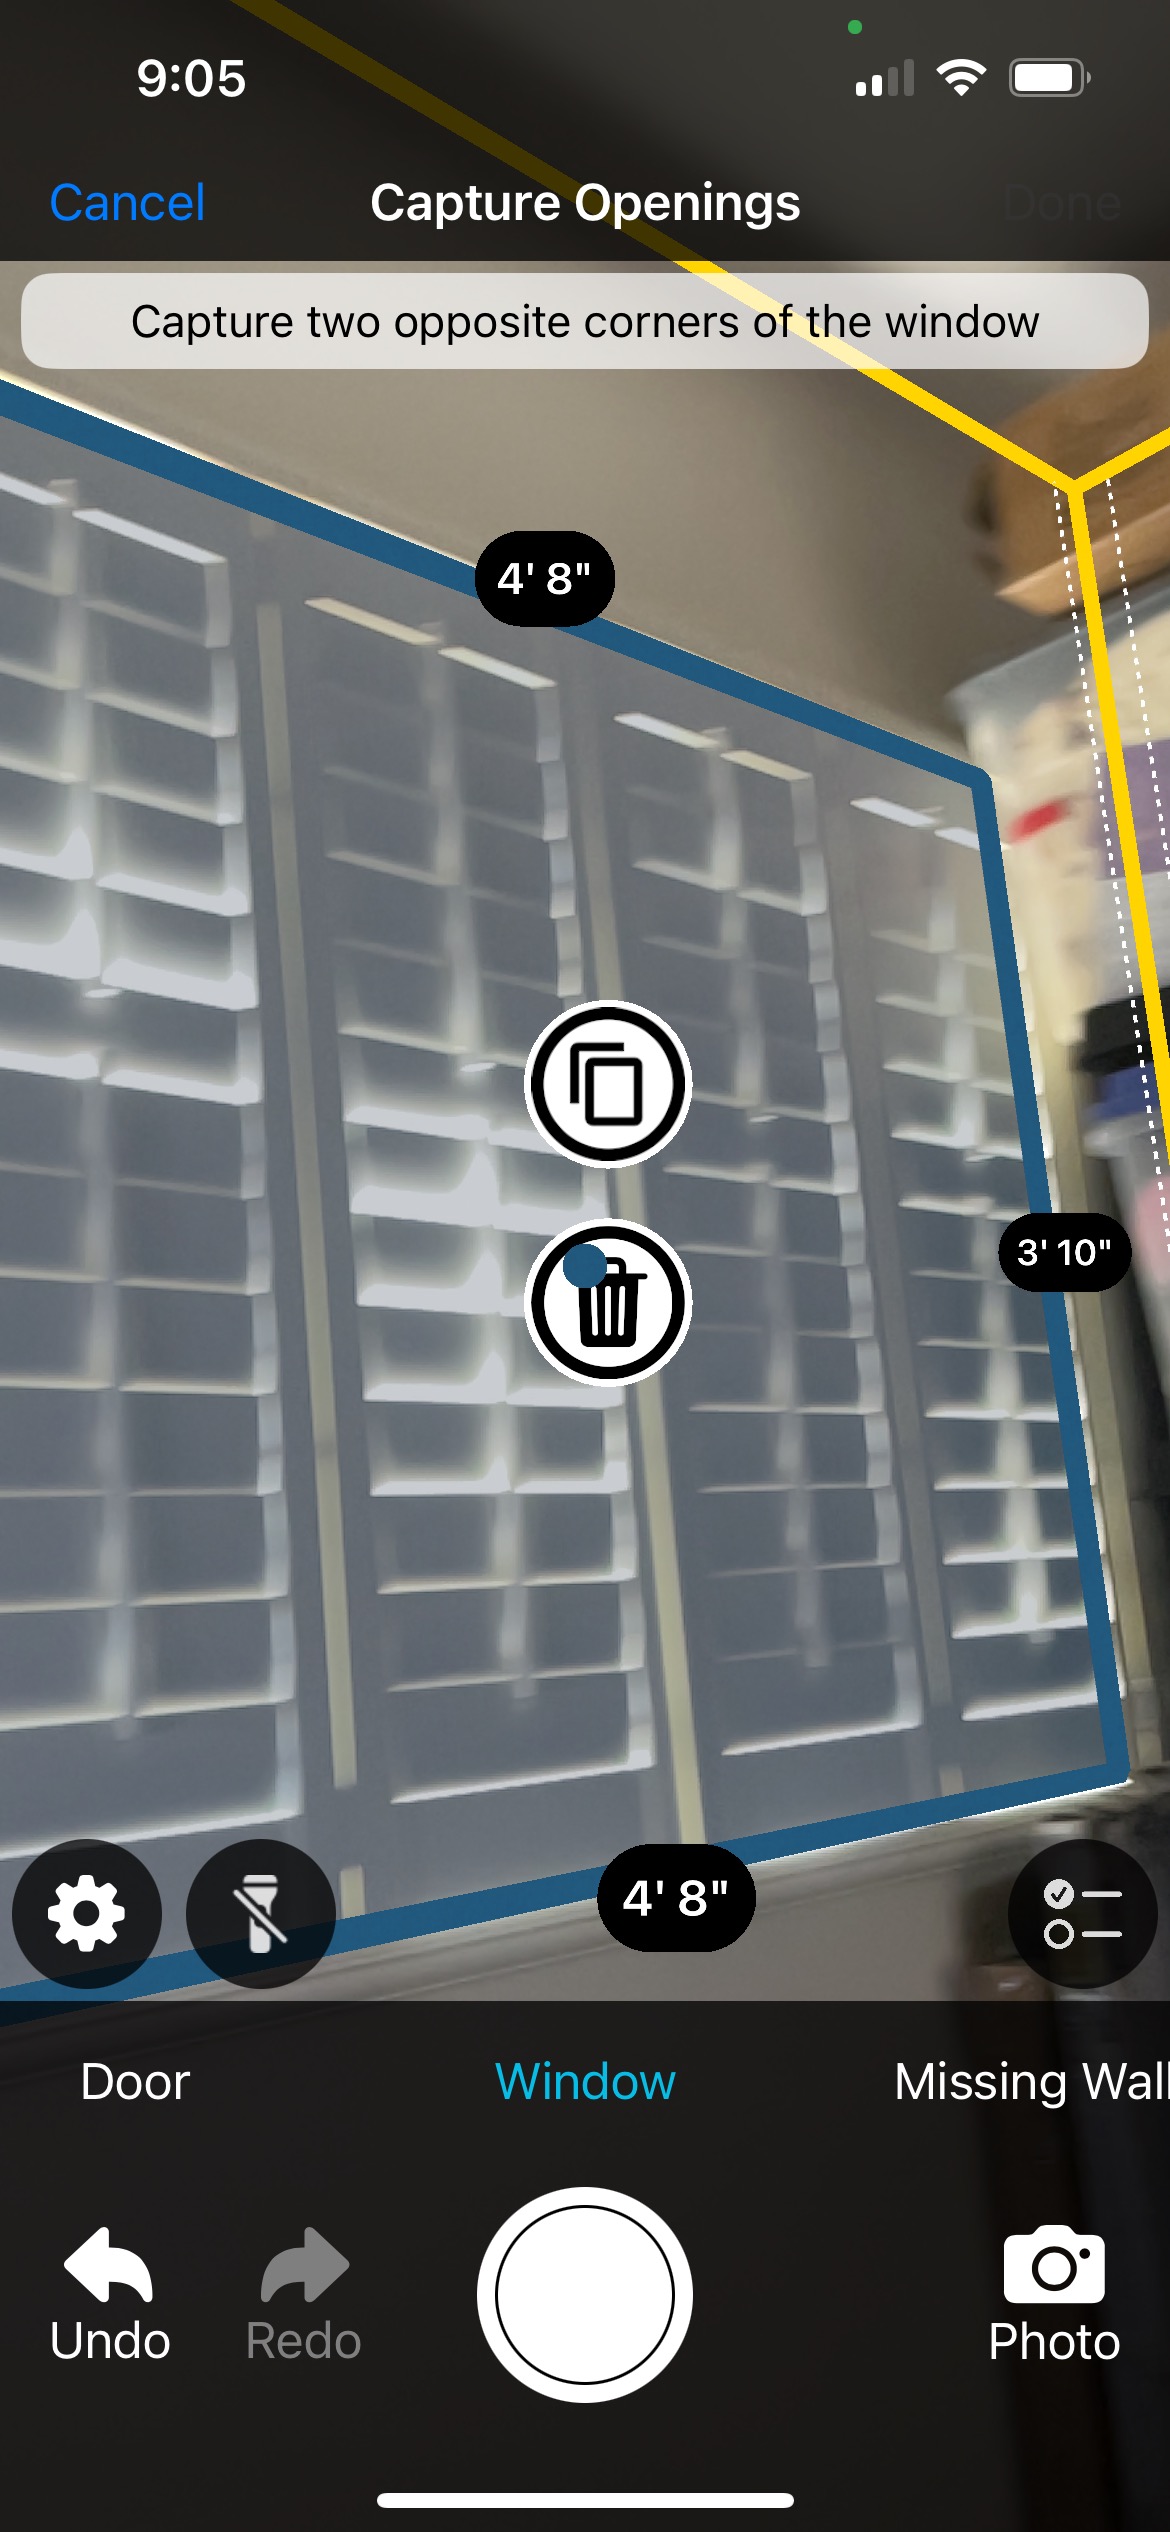
Windows
Capture first one corner of the window and then capture the opposite diagonal corner.
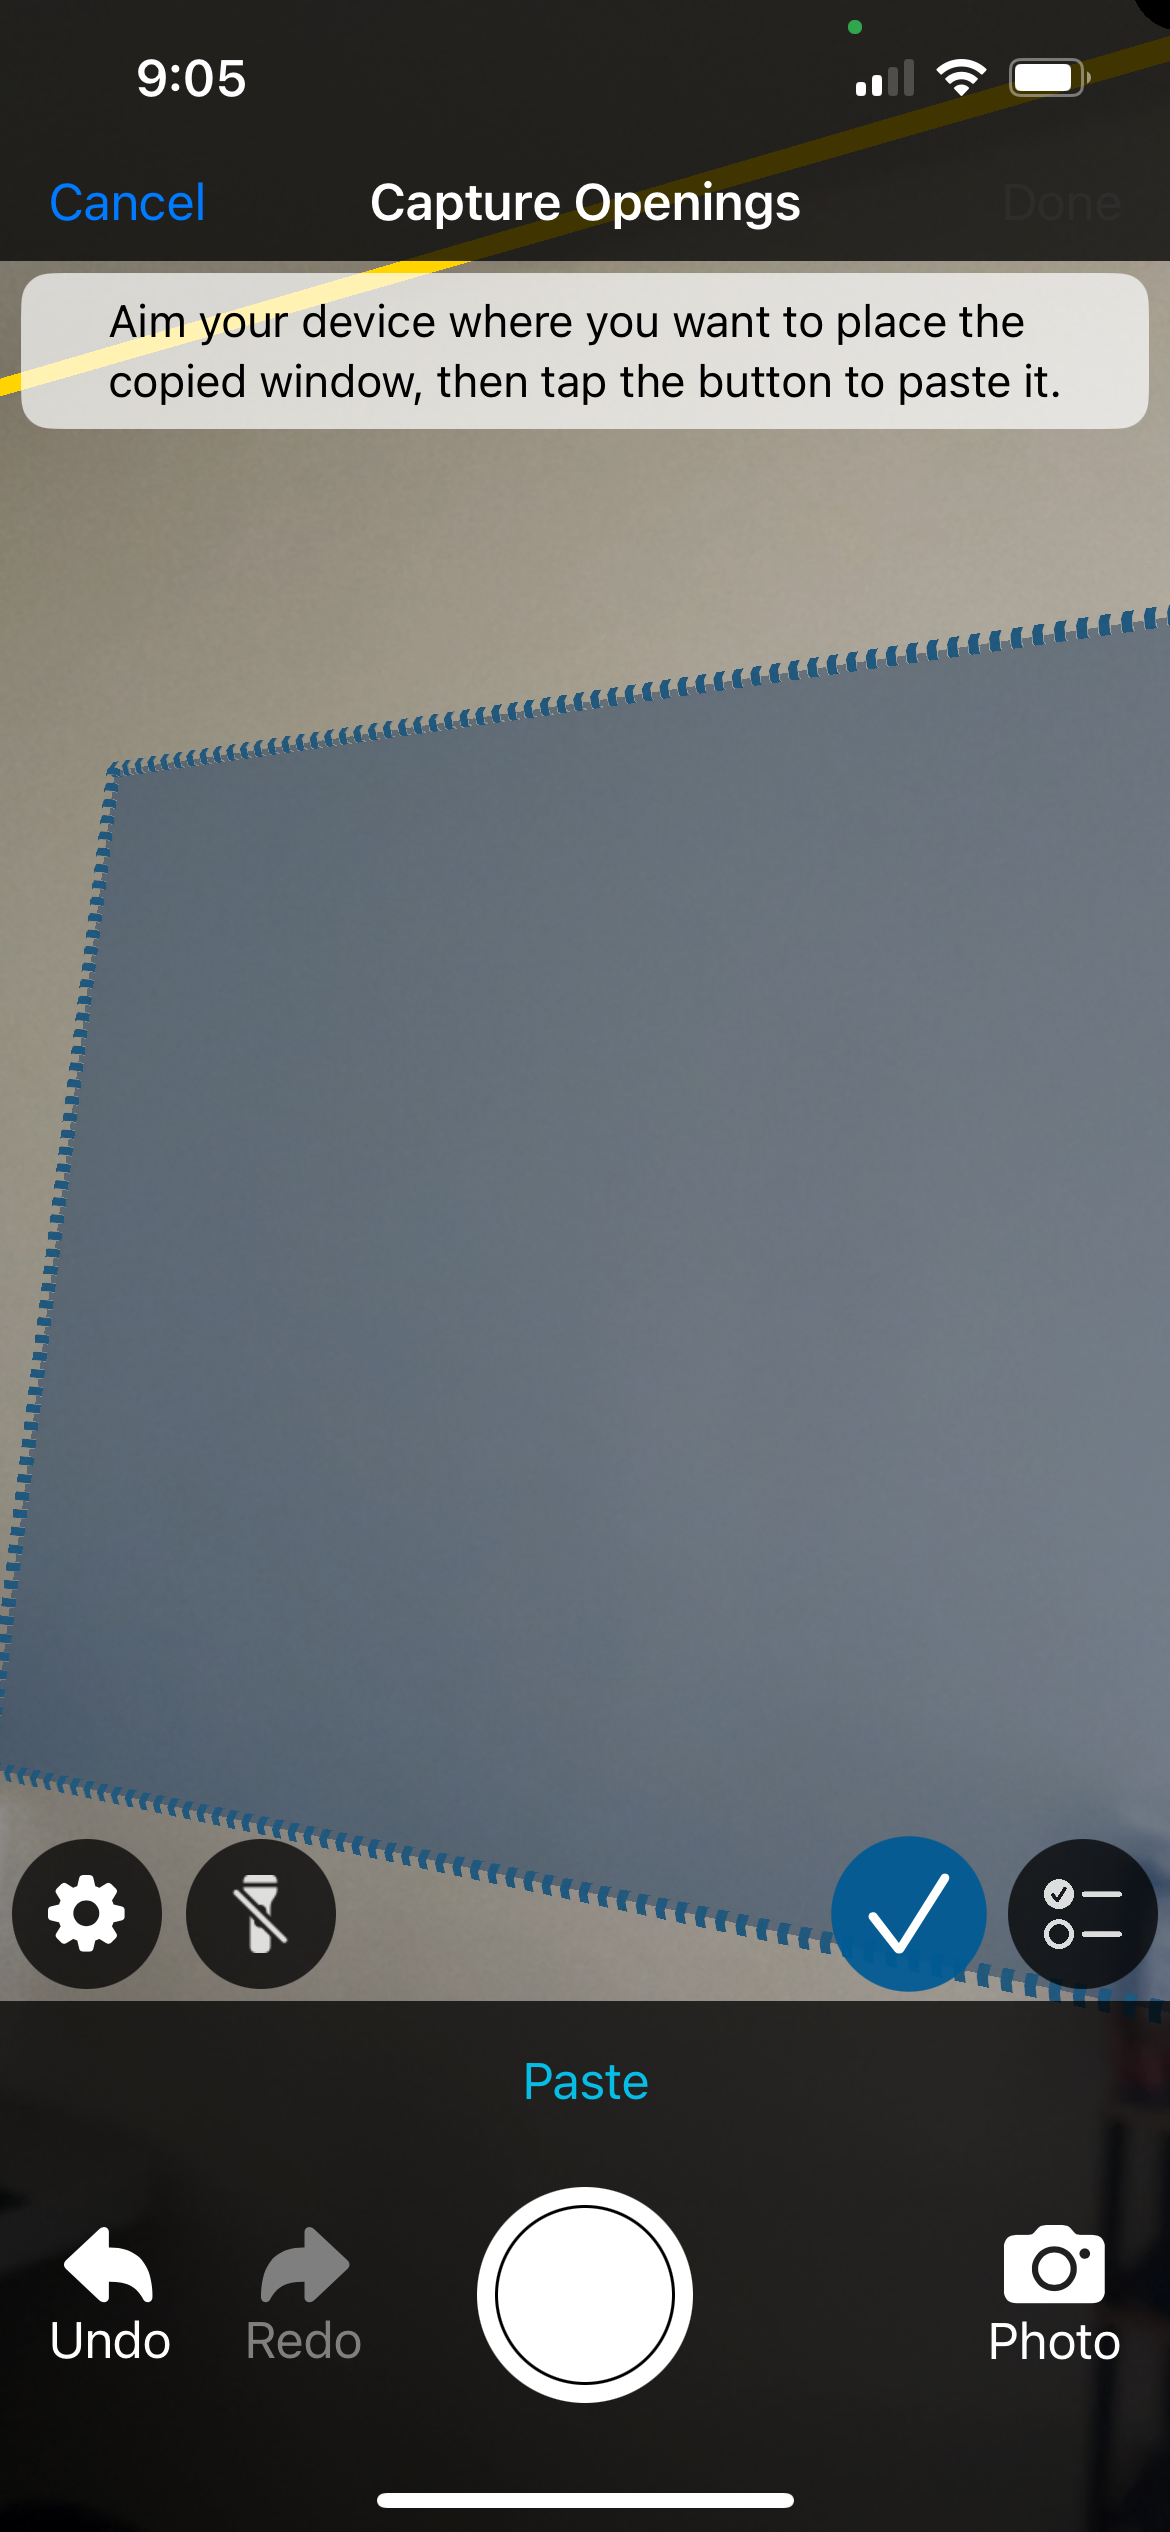
If there are multiple windows of the same size, you can copy the window you just created and paste it to another location in the room. To do so, select the copy icon ( ) on the completed window, pan to the next window, and tap the capture button.
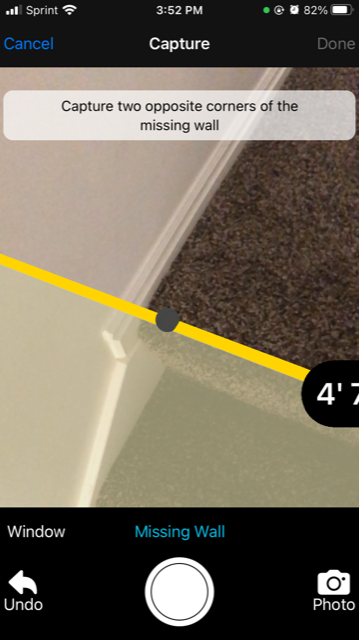
Missing walls
Capture wall openings by using the missing walls capture (even if you already recorded the wall when creating the room perimeter) so that the openings are deducted from the square footage of the walls.
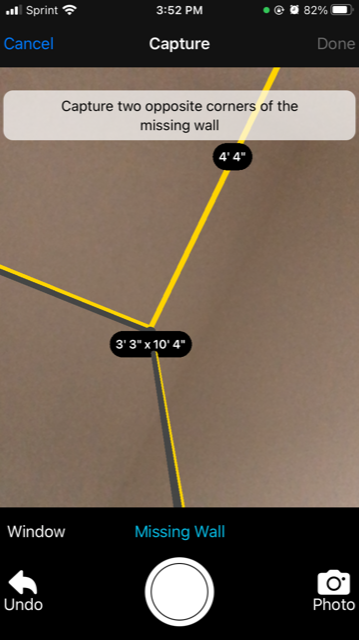
For missing walls that are not end-to-end, select Missing Wall, and capture first one corner of the opening and then capture the opposite diagonal corner.
For end-to-end walls, you can point the camera at the missing wall and tap the capture button when the rectangle appears on the screen to mark that wall as missing.
Modifying openings
You can change missing walls to doors, and vice versa, by selecting the edit icon ( ) on the completed wall opening and making the change in the Opening window.
If you need to modify the dimensions after capturing an opening, you can move individual edges:
1. Move the device so the edge or dimension line you need to move is in the center of the screen.
2. Tap the adjustment arrows button (![]() ) when it appears on the dimension line.
) when it appears on the dimension line.
3. Move the edge where you need it by moving the device.
4. Tap the capture button when the location is correct.
Additional captures
You can add all of the following through Sketch AR while completing the main sketch:
- Areas of Interest in Sketch AR
- Cabinets in Sketch AR
- Photos in Sketch AR
- Adding stairs in Sketch AR
- Contents capture with Sketch AR
- Closets in Sketch AR
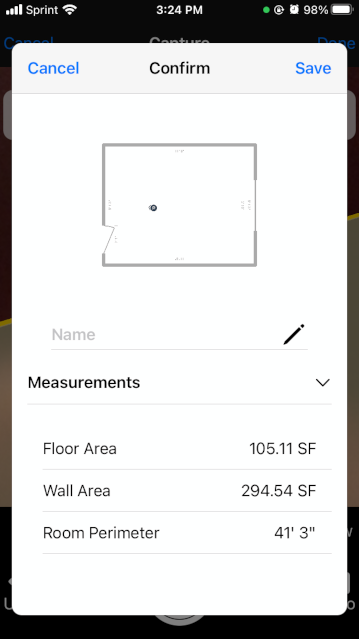
Completing a room
Once finished capturing the room, tap Done on the top right to open the Sketch preview. Here, you can review the area and perimeter as well as name the room. Tap the sketch to minimize the measurements and expand the sketch; you can rotate or zoom in and out from here by using two fingers on the screen and bringing them together or moving them apart. When you finish, tap Save.
Sketch AR then displays a diagram of the rooms you have captured so far. If you need to rename the room or add a door or missing wall, tap the edit icon ( ) at the center of the room. Select the appropriate option and make your changes. If you need to redo the room, delete it and recapture it.
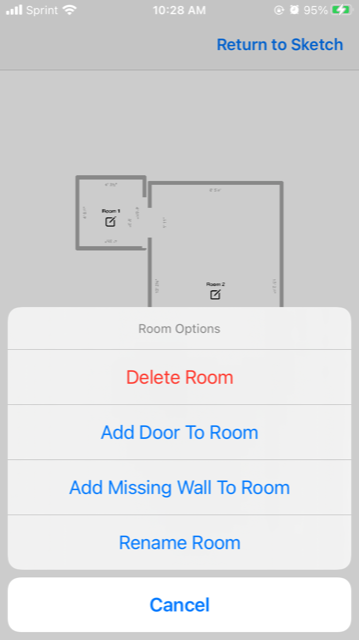
If the room is correct, either tap Return to Sketch to end the Sketch AR session and return to Sketch or tap the add button ( ) in the appropriate doorway to start Sketch AR for the connecting room.
Repeat the process for all the necessary rooms, and tap Return to Sketch to end the Sketch AR session and return to Sketch. When you complete a connecting room, Sketch asks you which door you entered through so it knows how to connect rooms. If you select the wrong opening and it connects the rooms incorrectly, you can select Undo to go back and select the opening again. All the rooms you captured automatically import to Sketch, and you can make any necessary edits as usual.
Editing
If you realize that you need to capture additional data after you have returned to Sketch, you can resume the most recent Sketch AR session: open Sketch AR again and choose Resume when given the option, but be aware that when you return to Sketch again, the original sketch is on one level and the updated sketch on another. You can adjust as necessary in Sketch by removing one or the other.
If you are adding rooms that are not connected to the existing Sketch AR, then choose New instead of Resume. This creates a completely new sketch on a different level.
If you need to access or remove older levels, select the home sketch icon ( ). To remove a level, slide it left to reveal the Delete button (either tap that button or continue sliding). To make a level active, tap it. Tap Done to return to the sketch.