Add and delete users in XactAdmin
 Updated
by
Jill Bowers
Updated
by
Jill Bowers
Manage users
Add users
Follow the steps below to add and assign users to instances.
Add users in the Instances tab
- From within XactAdmin, select Instances.
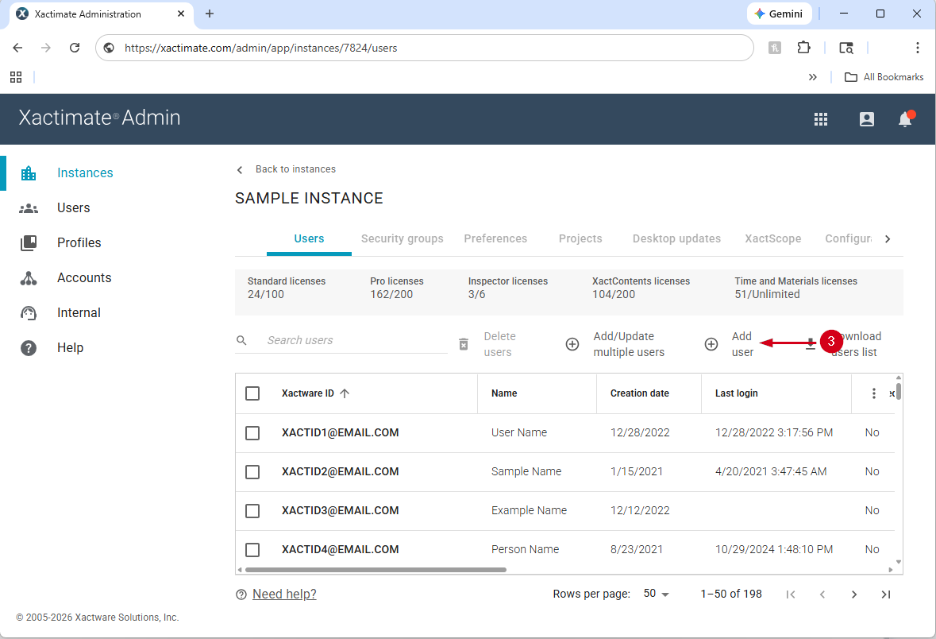
- Select your instance from the table. This opens the Users tab.
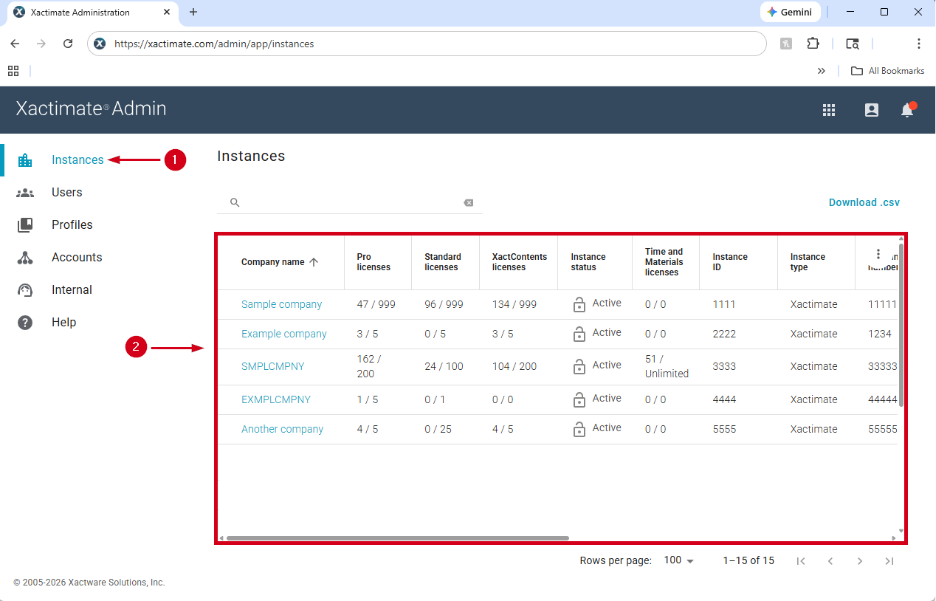
Note: If you have access to only one instance, the Users tab opens automatically.
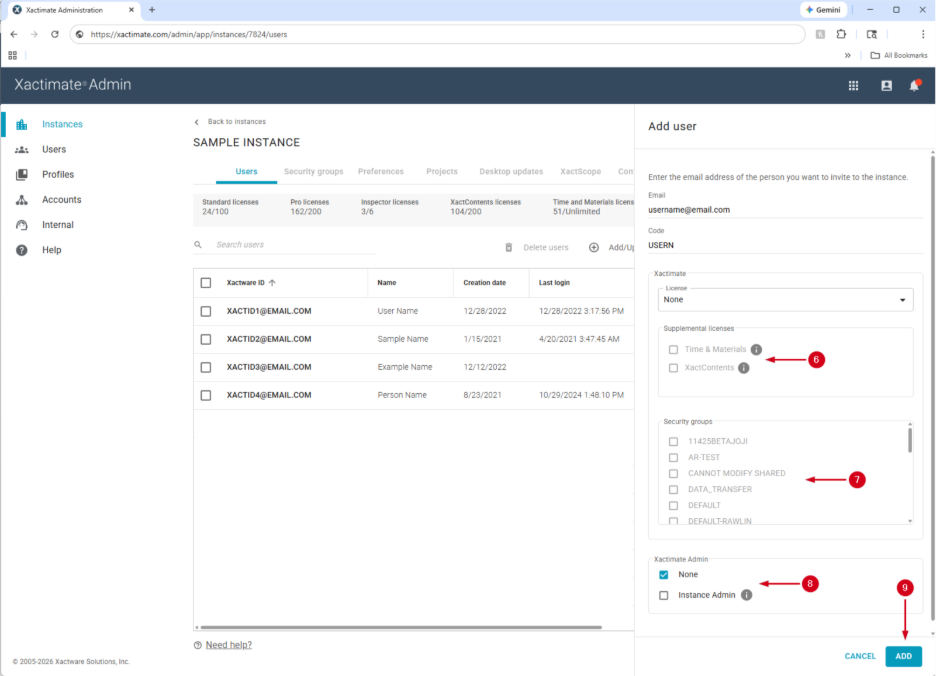
- Select Add user. This opens a side drawer.
- Enter the user’s email address. The user code automatically populates.
Note: If desired, you can edit the user code. It can be up to eight characters, and allows letters A-Z, numbers 0-9, and the characters: ._-$
- Choose the instance to which to add the user from the Instance name list.
- Select the user’s license type. Options include:
- None: The user does not have access to any form of Xactimate.
- Inspector: The user has access to Xactimate mobile, but they have limited rights and no administrative authority.
- All platforms (pro): The user can access Xactimate online, desktop, and mobile platforms.
- Online only (standard): The user can only access Xactimate online and cannot access Xactimate mobile or desktop.
- Mobile only (standard): The user can only access Xactimate mobile and cannot access Xactimate online or desktop.
- Desktop only (standard): The user can only access Xactimate desktop and cannot access Xactimate online or mobile.
- Select any supplemental licenses assigned to the user.
- Assign the user to a security group.
- Select None or Instance Admin.
- Select Add.
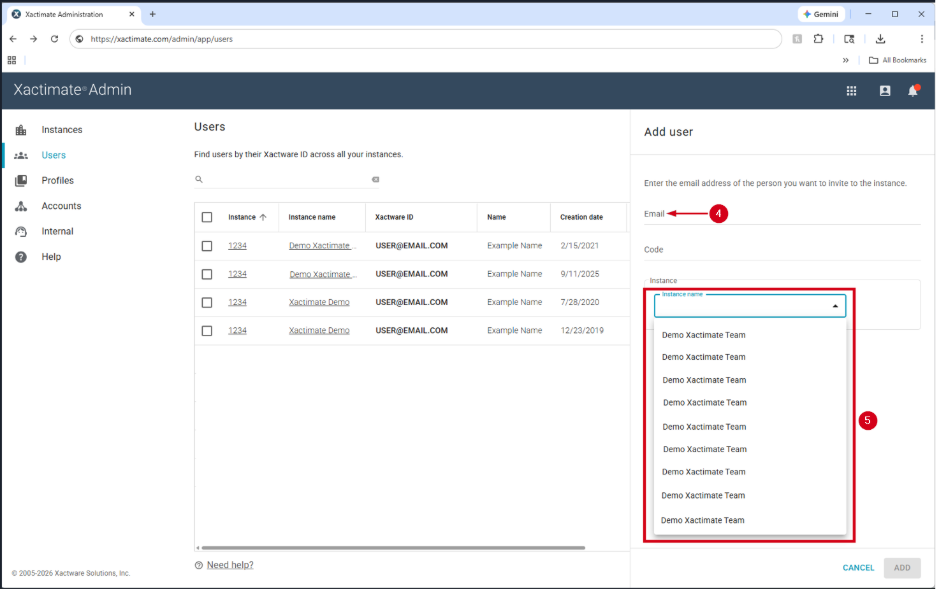
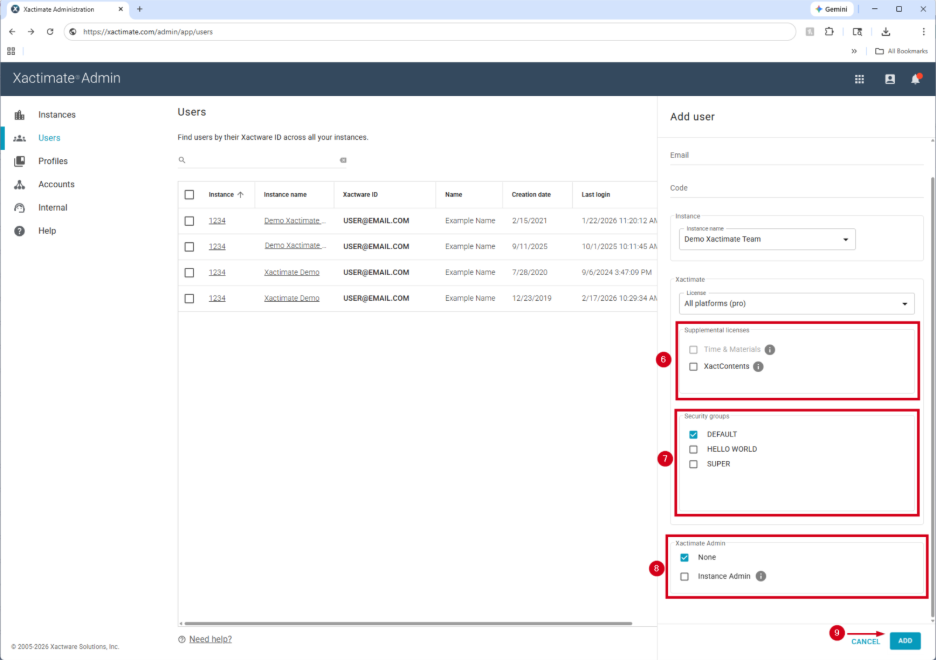
Add users in the Users tab
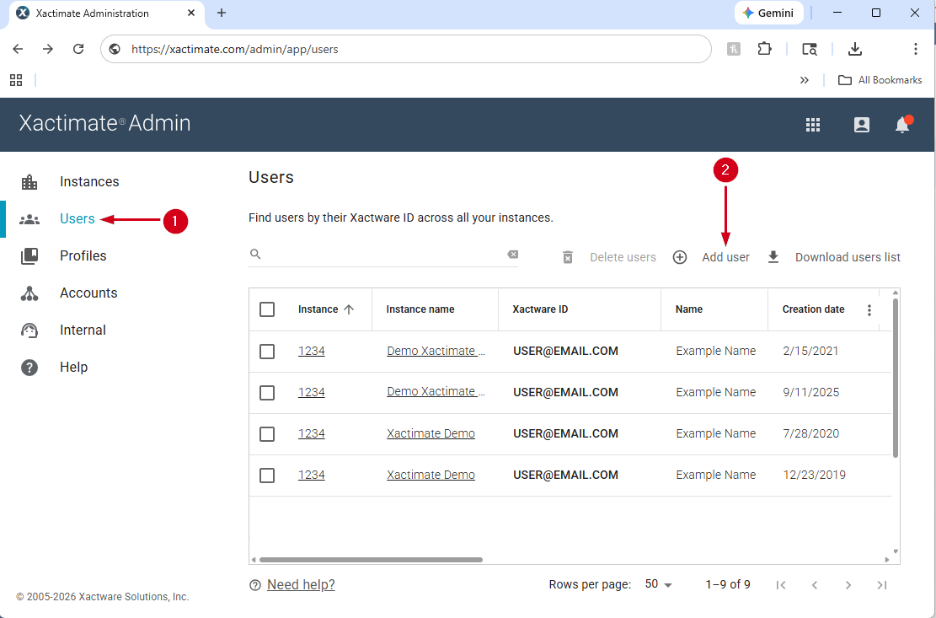
- From within XactAdmin, select Users.
Note: The Users tab is only available for Instance admins who own more than one instance. Select Add user. This opens a side drawer.
- Enter the user’s email address. The user code automatically populates.
Note: If desired, you can edit the user code. It can be up to eight characters, and allows letters A-Z, numbers 0-9, and the characters: ._-$
- Choose the instance to which to add the user from the Instance name list.
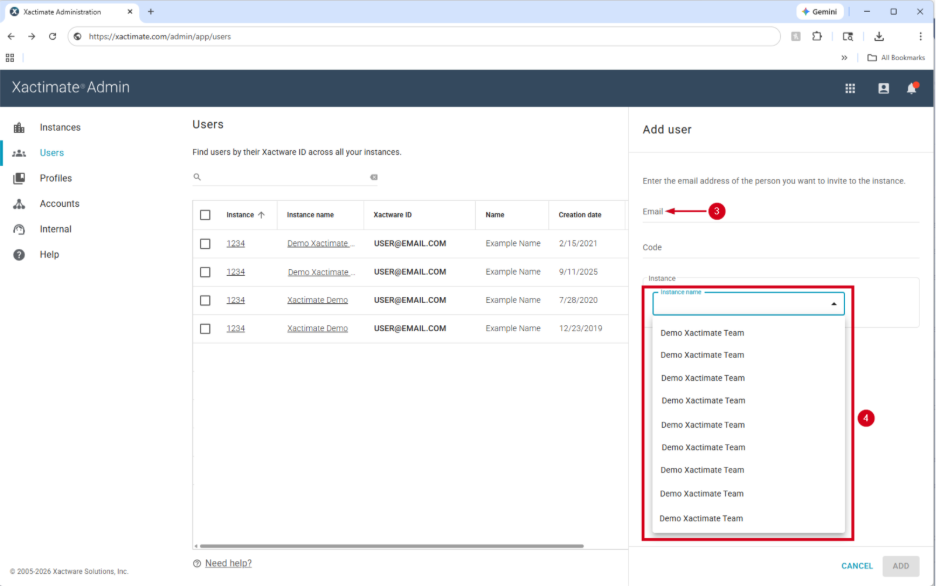
Note: Only instances you own appear in the dropdown menu.
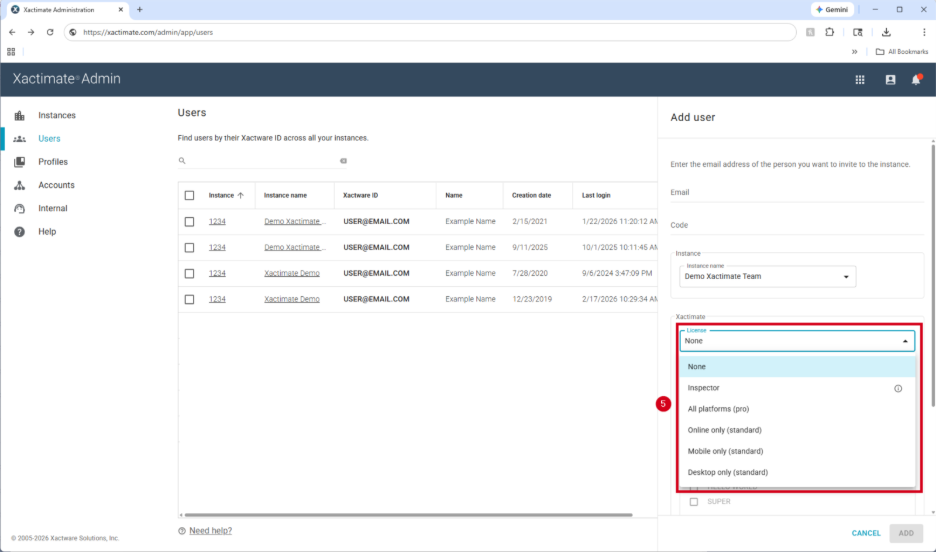
- Select the user's license type. Options include:
- None: The user does not have access to any form of Xactimate.
- Inspector: The user has access to Xactimate mobile, but they have limited rights and no administrative authority.
- All platforms (pro): The user can access Xactimate online, desktop, and mobile platforms.
- Online only (standard): The user can only access Xactimate online and cannot access Xactimate mobile or desktop.
- Mobile only (standard): The user can only access Xactimate mobile and cannot access Xactimate online or desktop.
- Desktop only (standard): The user can only access Xactimate desktop and cannot access Xactimate online or mobile.
- Select any supplemental licenses assigned to the user.
- Assign the user to a security group.
- Select None or Instance Admin.
- Select Add.
Delete users
To remove users from your instance or profile, follow the instructions below.
Note: Deleting a user only removes them from your instance or profile; you cannot delete the user’s Xactimate account altogether.
Note: If the user has an XactAnalysis SP license, their access to XactAnalysis may need to be revoked. Contact Support via chat in the eService Center or by phone at 1-800-710-9228 for help removing users from XactAnalysis.
Delete users in Instances
- From within XactAdmin, select Instances.
- Select your instance from the table. This opens the Users tab.
Note: If you have access to only one instance, the Users tab opens automatically.
- Select a user from the table. This opens a side drawer.
Note: Alternatively, select the Delete icon in the user row. This opens a dialog box prompting confirmation. Select Delete to finish removing the user.
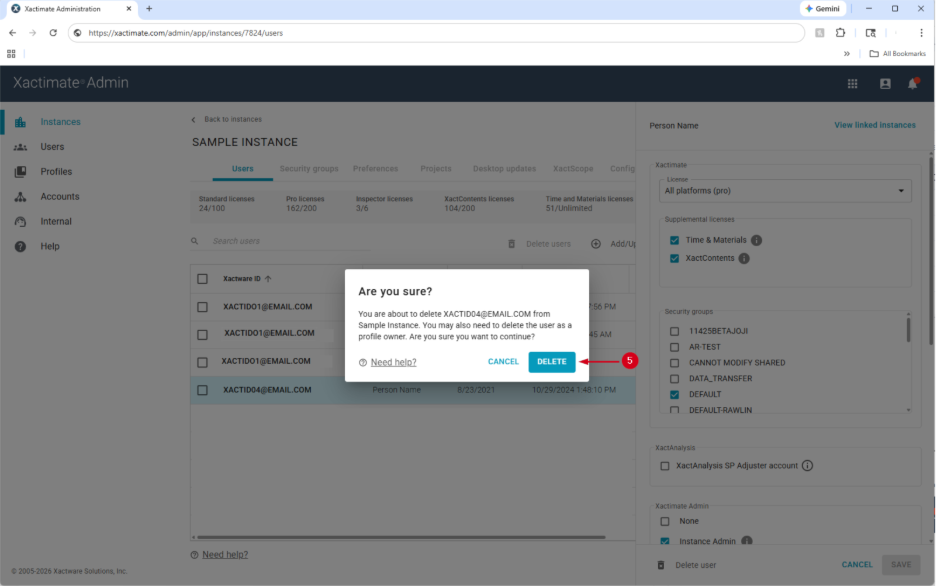
- Select Delete User. A dialog box appears.
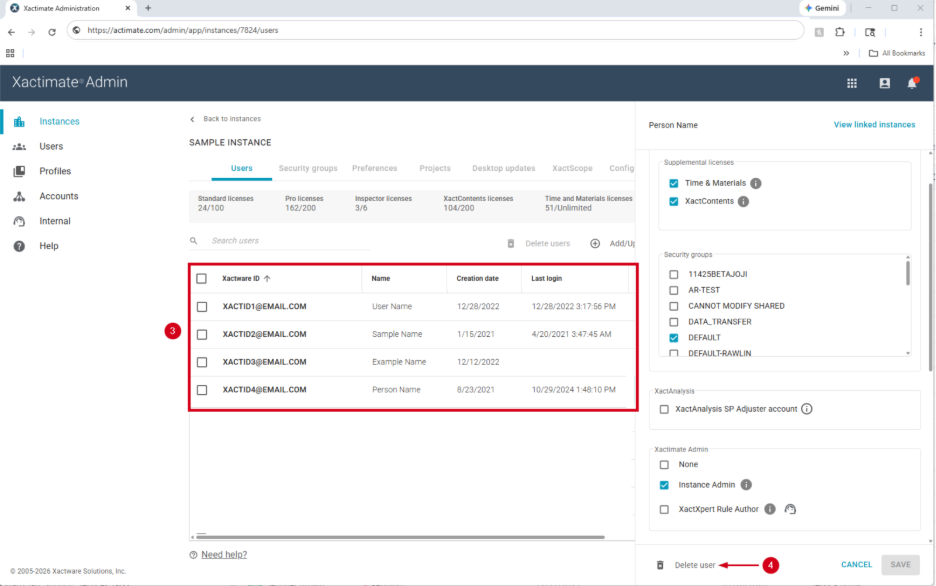
- Select Delete.
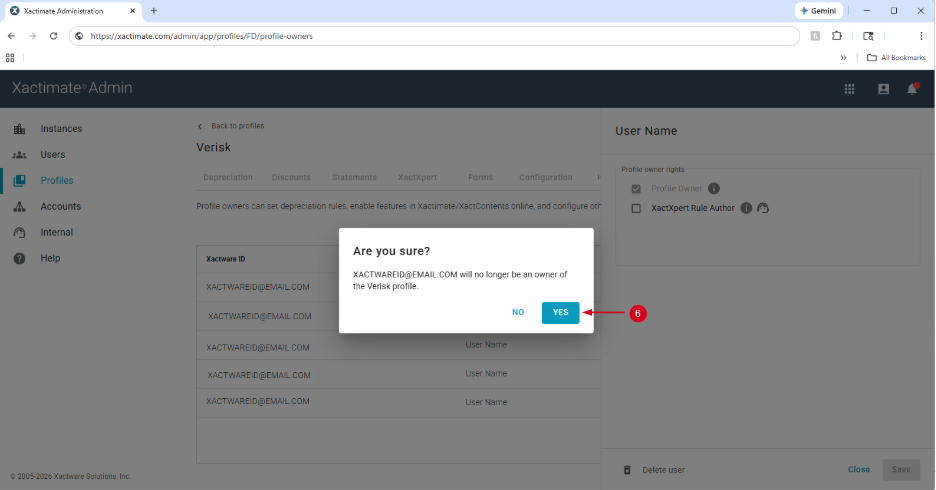
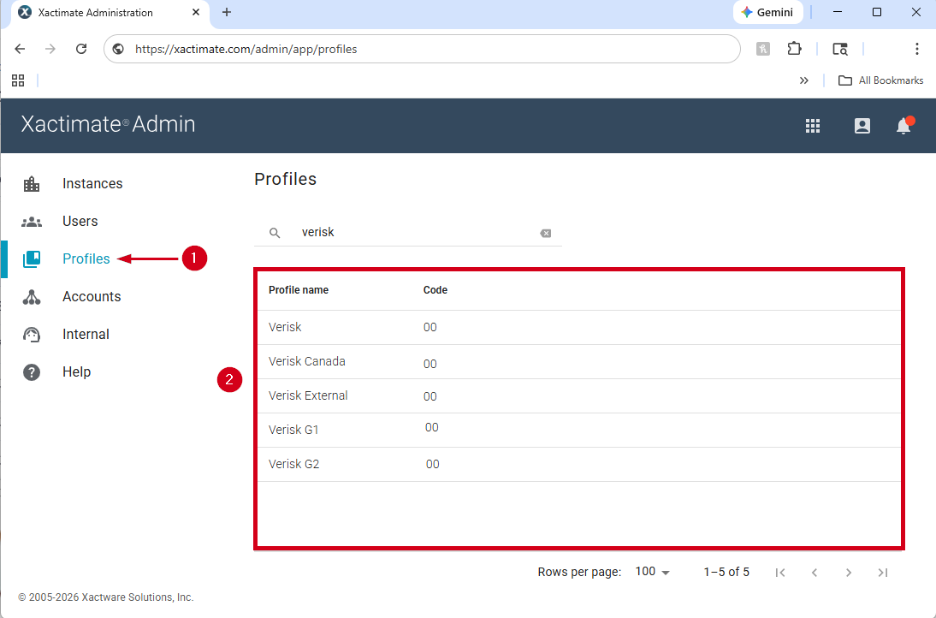
Delete users in Profiles
- From within XactAdmin, select Profiles.
- Select your profile from the table. This opens the Depreciation drawer.
Note: If you have access to only one profile, the Depreciation drawer opens automatically.
- Select Profile owners.
Note: Depending on your screen settings, you may need to scroll to the right to see Profile owners.
- Select a user from the table. This opens a side drawer.
Note: Alternatively, select the Delete icon in the user row. This opens a dialog box prompting confirmation. Select Yes to finish removing the user.
- Select Delete user. A dialog box appears.
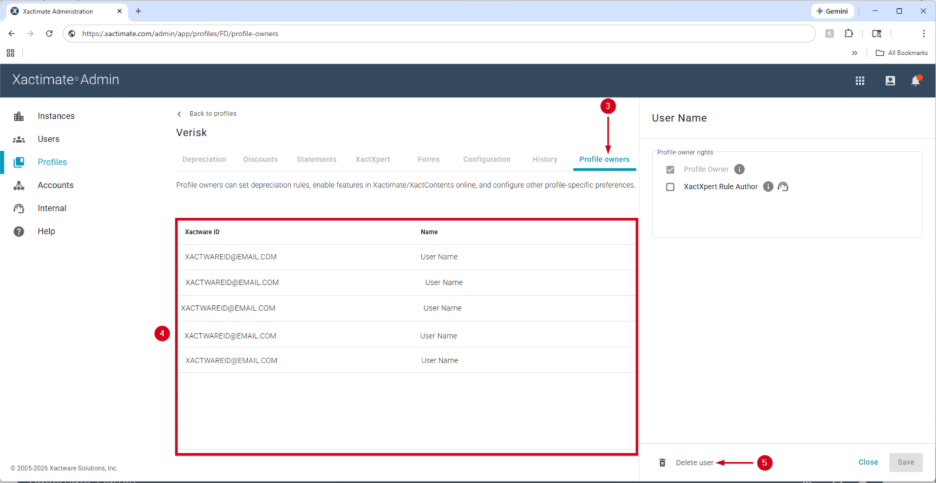
- Select Yes.