Enter receipts
 Updated
by
Jill Bowers
Updated
by
Jill Bowers
Standard receipts
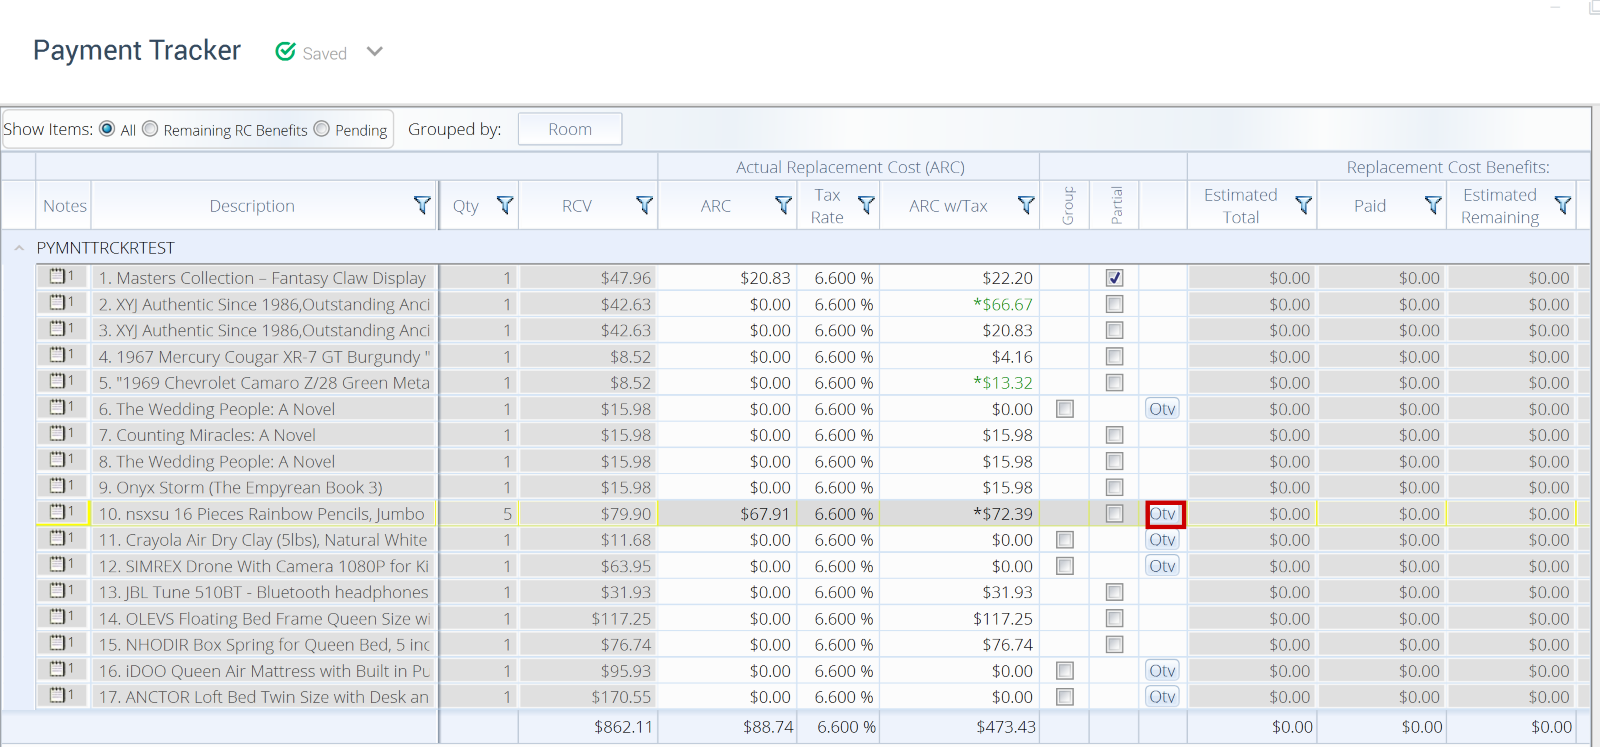
As the insured begins replacing items, they will send you receipts, and you can enter the actual replacement cost (ARC) totals from the receipts into Payment Tracker. To enter the ARC, follow these steps:
- In an open project, navigate to Tools > Payment Tracker.
- Ensure you’re on the Worksheet tab.
- Find the item that needs the receipt, then double-click on the corresponding box in the ARC w/Tax column of the table.

- Enter the receipt amount.
- Press Enter on the keyboard.
Partial receipts
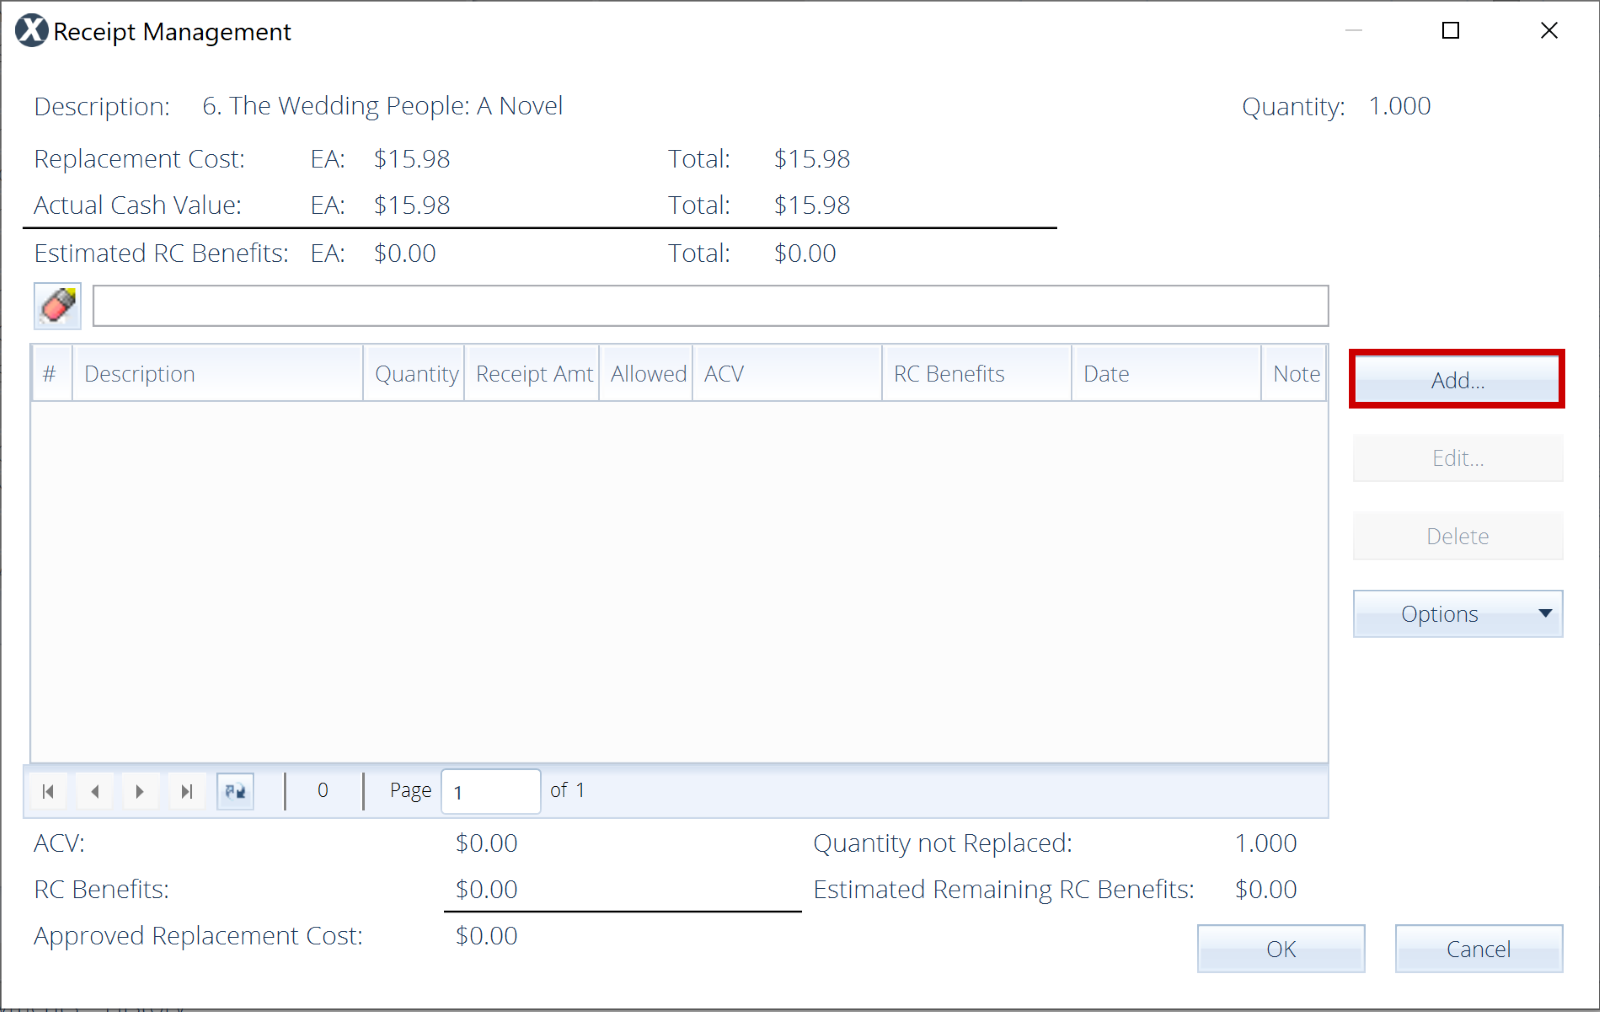
Some receipts may include only part of the total quantity reported in a line item that needs to be replaced. For example, if four books were lost, the insured may choose to replace two at Retailer A and two at Retailer B. This means you will receive two partial receipts for the same line item. To enter partial receipts:
- Select the Qty button for the specific item. The Receipt Management dialog box opens.
- Select Add.
- Enter a description, the number of items replaced, and the total price of selected items before tax.
- Add a note in the Note/Comment box, if needed.
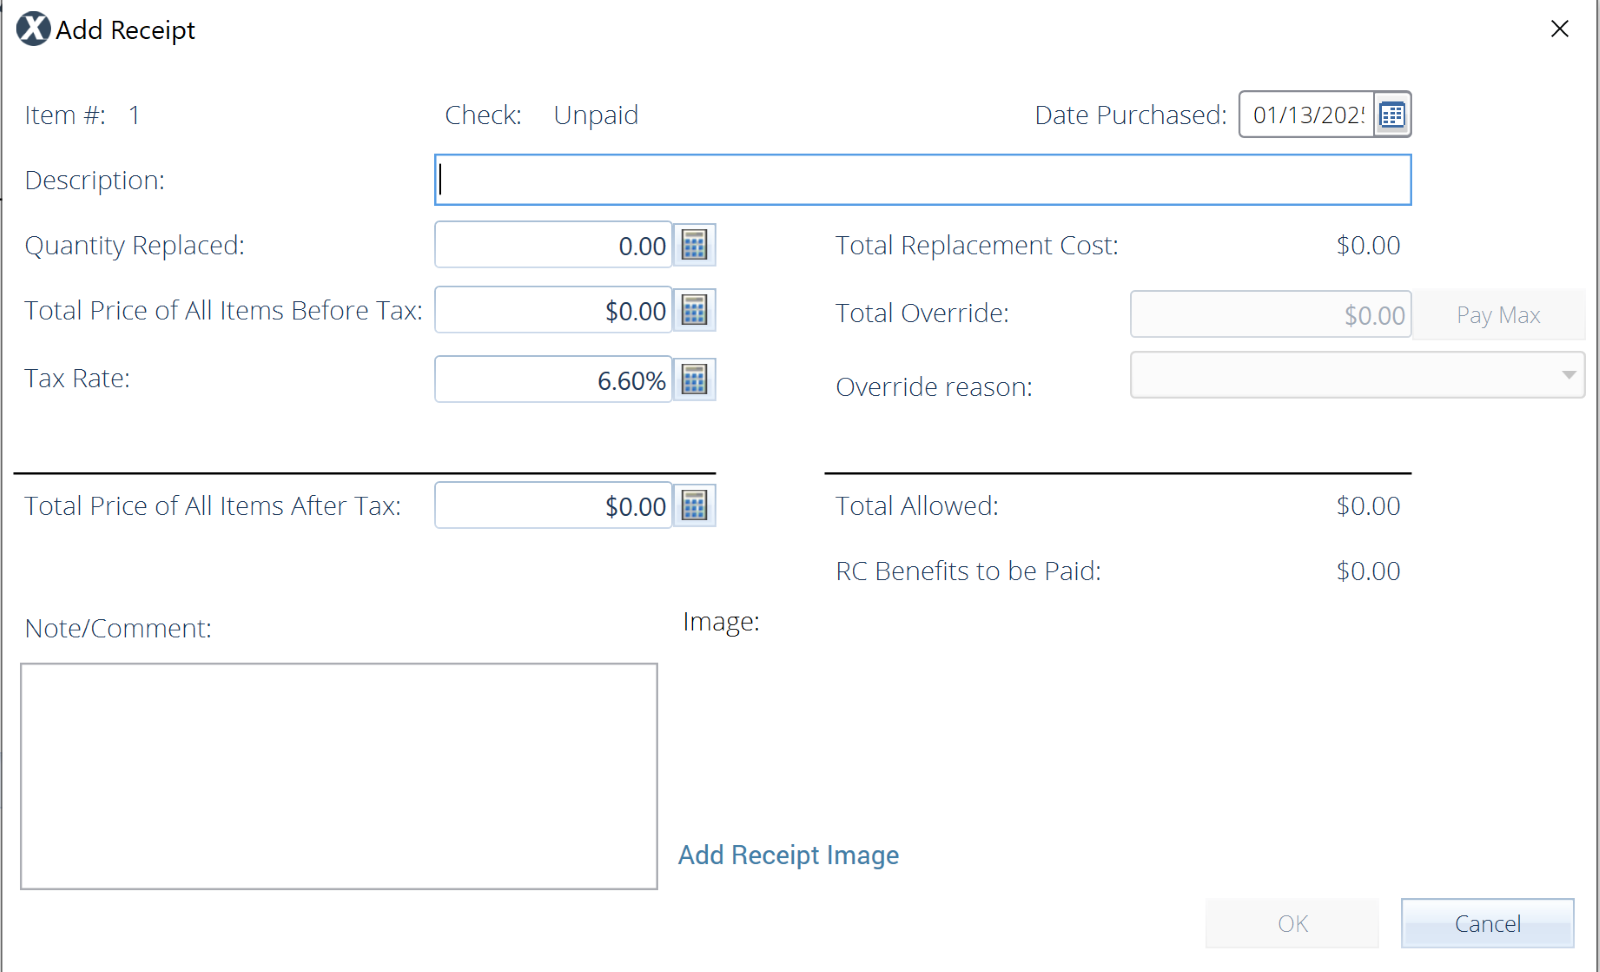
- Select Add Receipt Image to open the file selector.
- Select the appropriate image.
- Select Open to attach the receipt image and close the file selector.
- Select OK.
- If you have another receipt for this line item, repeat steps 2 through 8.
- When you’re finished adding receipts for this line item, select OK in the Receipt Management window.
Grouping items on one receipt
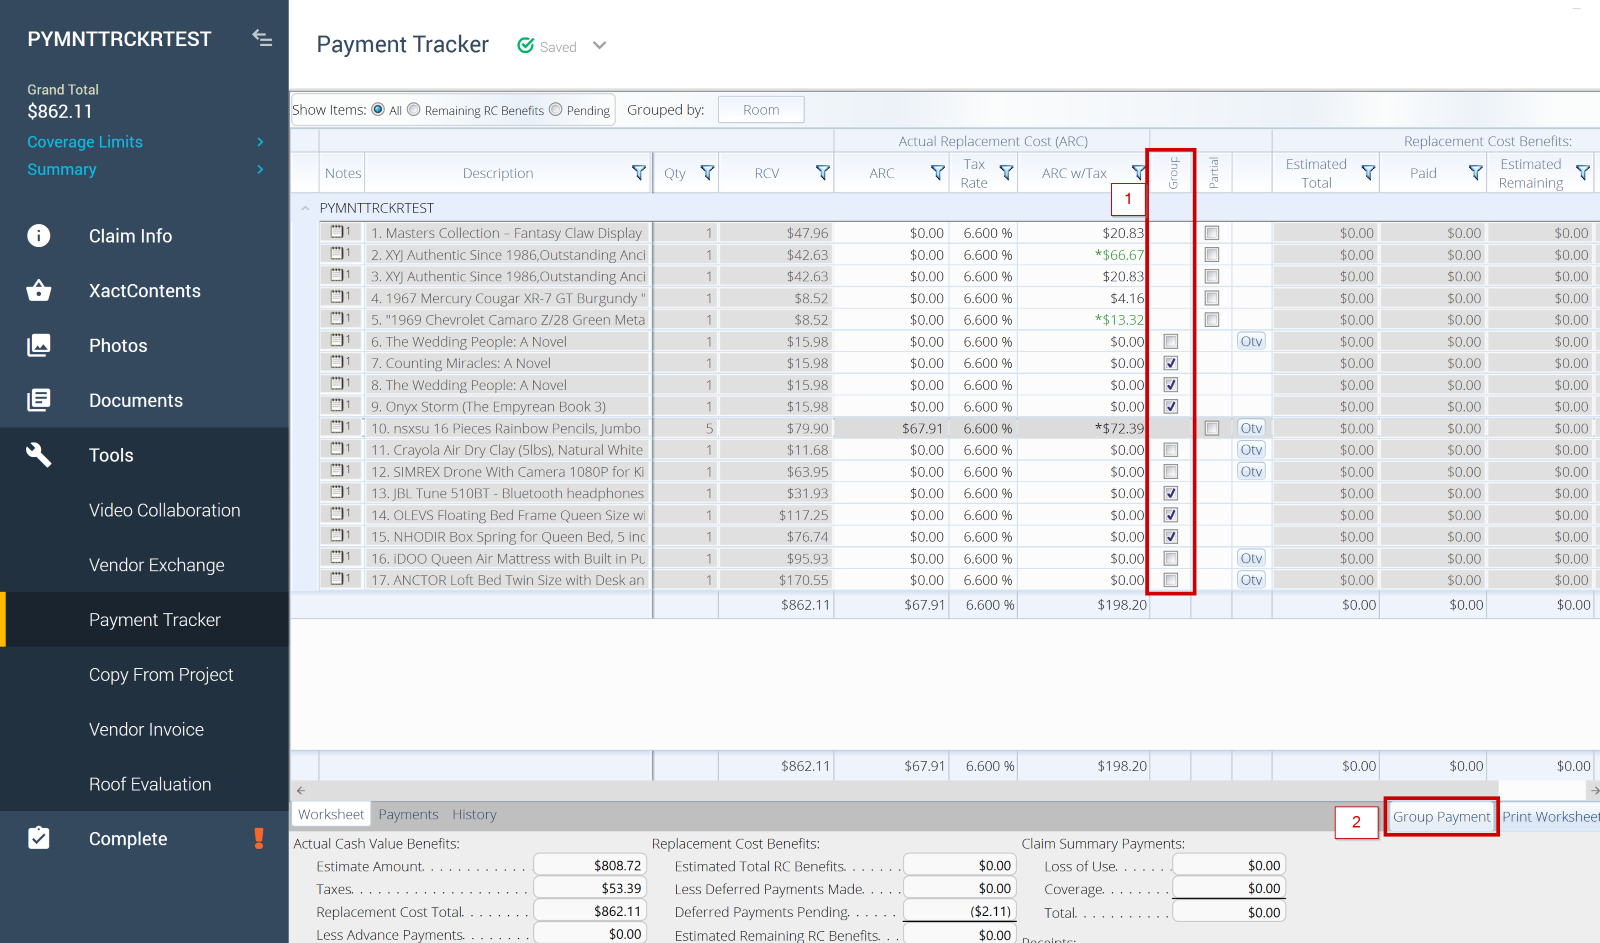
Frequently, customers purchase more than one replacement item in one transaction, so multiple items are on the same receipt. Follow these steps to group those items so they can share a receipt in the system:
- In an open project, navigate to Tools > Payment Tracker.
- Ensure you’re on the Worksheet tab.
- Select the Group checkbox for each item listed on the receipt.
- Select Group Payment. The Group Payment dialog box opens.
- Enter a name for the receipt.
- Enter the receipt total.
- Enter any additional information, as needed.
- Select OK.