Request price lists in Xactimate online
 Updated
by
Heather Jones
Updated
by
Heather Jones
Because Xactimate online syncs automatically, price lists do not have to be downloaded into your instance or profile; this automatically happens for you. However, if you want to change the assigned price list for a project (if you have one) or select an initial price list, you can select an available one or request an additional one by using the following steps.
Select an available price list
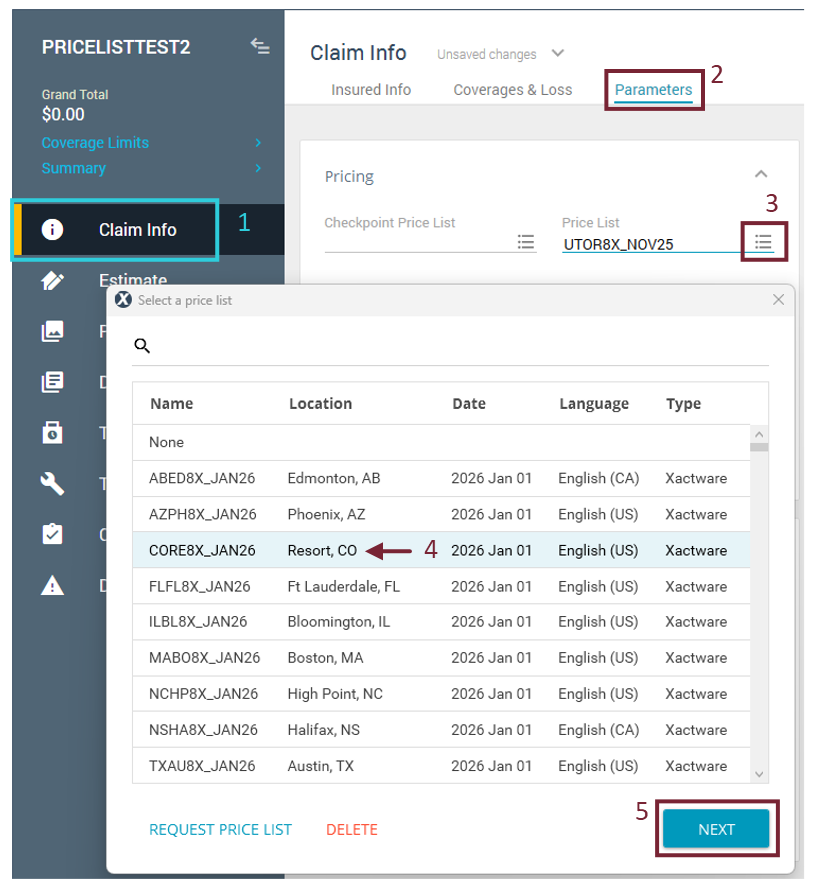
- Within your project’s left navigation menu, select Claim Info.
- At the top of the screen, select the Parameters tab.
- In the Price List section, select the list icon for the Price list field. The Select a price list dialog box then appears.
- In the Select a price list window, choose the appropriate price list.
- Select NEXT.
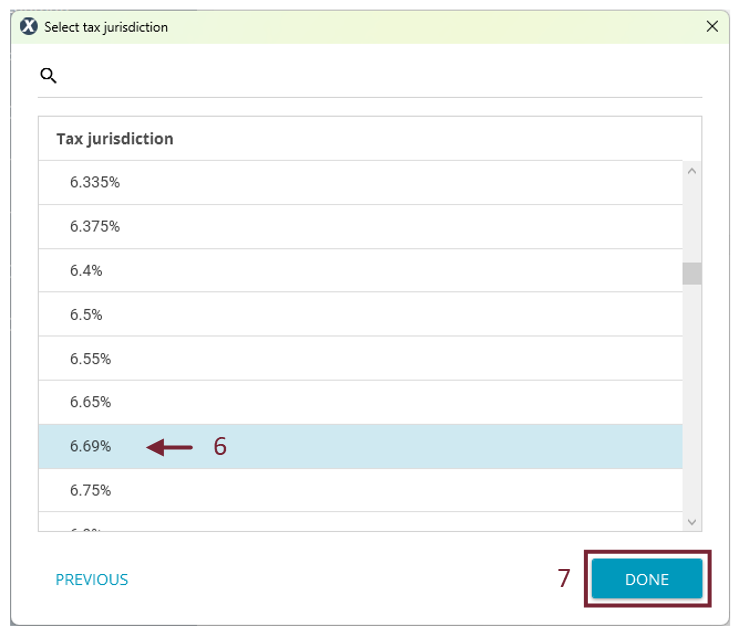
- Select your tax jurisdiction.
- Select DONE.
Request a price list
- Within your project’s left navigation menu, select Claim Info.
- At the top of the screen, select the Parameters tab.
- In the Price List section, select the list icon for the Price list field. The Select a price list dialog box then appears.
- Select REQUEST PRICE LIST. The Request price list by window appears.
- Select the drop-down menu to modify the filters for City, Name, and Zip Code.
- Fill in each of the fields according to your needs.
Note: The fields vary depending on which of the options you selected in the initial drop-down menu.
- Select DOWNLOAD to return to the Select a price list screen.
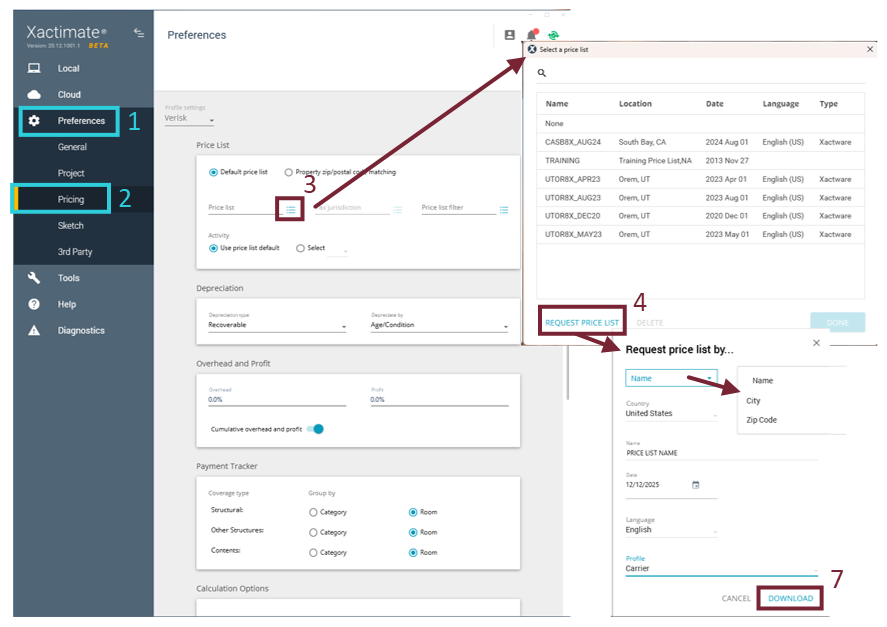
- Select the appropriate price list.
- Select DONE.