Creating a Sketch template
 Updated
by
Heather Jones
Updated
by
Heather Jones
- From within an estimate, navigate to Sketch (Estimate > Sketch in the navigation menu).
- Create the sketch you want included in the template.
Note: Templates can include either selected portions of an existing sketch or everything in all the levels.
- Select the portion you want included in the template.
Or
Ensure no portion of the sketch is selected to enable multi-level templates (Click in the white space if necessary to clear selections). - Select the Options tab at the top of the window.
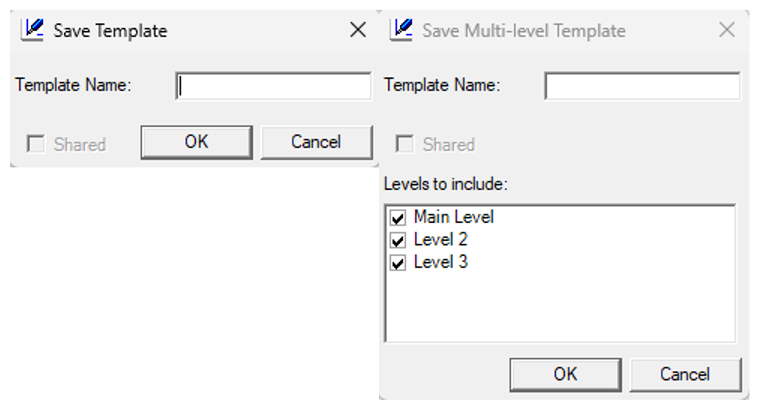
- Select Save Template. Depending on whether you have anything selected in the sketch, either the Save Multi-level Template window or the Save Template window appears.
Note: Alternatively, you can select the arrow next to the Save Template button to manually select the type of template, but only one option may be available (depending on whether you have anything selected or not), and it is an unnecessary step.
- Enter a name for the template in the Template Name text field.
The Shared checkbox is not selectable; it is selected if enabled in your instance and is greyed out if it is not enabled. If you want to be able to share templates but the option is not selected, reach out to your administrator to enable it.
- If this is a multi-level template, select the levels you want to include in the template. Basic templates, do not display this option.
- Select OK.