Use XactAI to create photo descriptions in desktop
 Updated
by
Heather Jones
Updated
by
Heather Jones
Xactimate now incorporates AI to help you create descriptions for photos in your projects. If you want to add it to your account, contact your account manager or our sales department (800-424-9228). You can also purchase XactAI in the Xactware store.
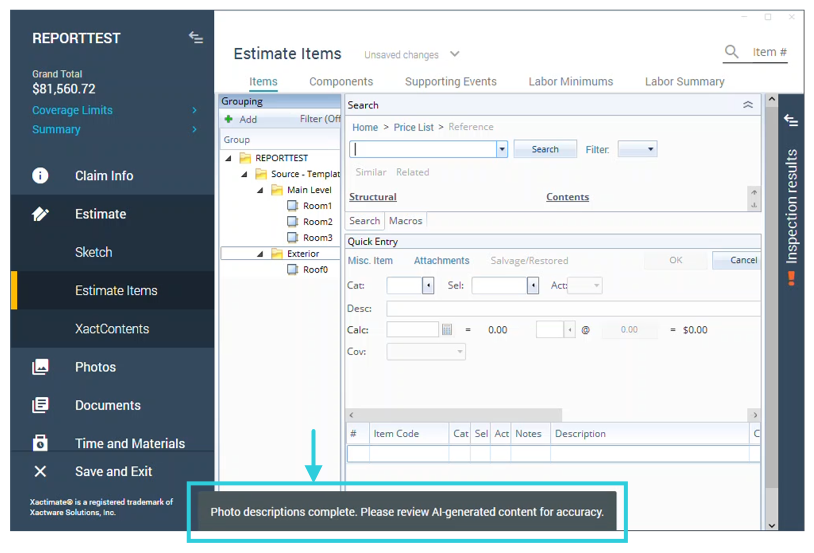
When enabled, Xactimate creates labels and descriptions for photos that do not already have them, but you must review and approve (or change) the generated content before completing the project in order to preserve the added text. Any AI-generated text that you do not approve or change is hidden once you complete the project.
If you have verified that Xactimate is up-to-date and that you should have access to XactAI, but it does not seem to be working, check your settings to ensure you have it enabled:
- Close any open projects.
- In the left navigation menu, select Preferences.
- Select General (if not already selected).
- Scroll down to Allow AI labels and descriptions.
- If not already selected, select the toggle to enable XactAI.
Access AI text
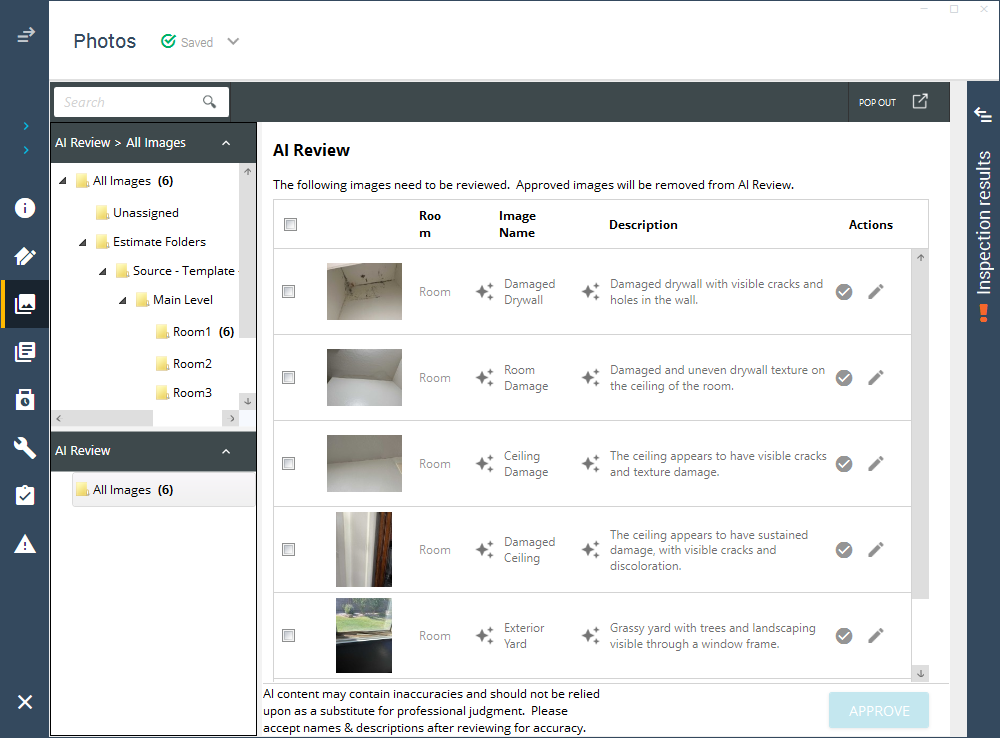
To access the AI text generation from within a project, select Photos in the left menu. When XactAI is enabled, and the selected folder has no photos, an information screen appears in the middle of the Photos page. It provides a high-level description of Xactimate’s AI labeling. You can refer to this at any time by selecting a folder or room that has no photos included.
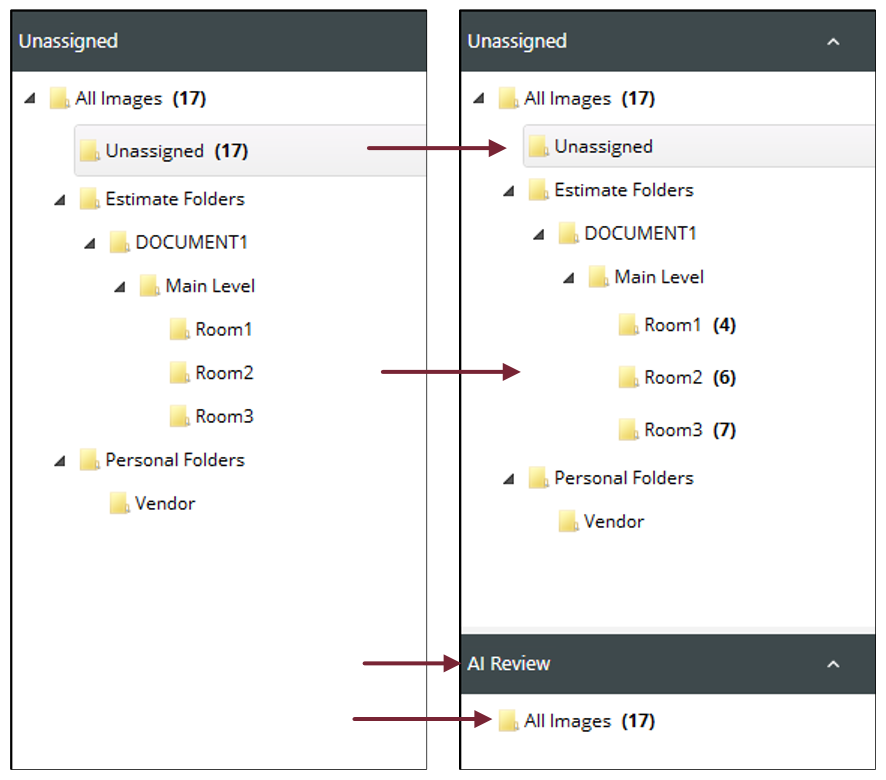
Once you add photos to a room or specific folder, XactAI automatically begins reviewing the images and creating a name and description for each. Once it initiates, an additional section (labeled AI Review) appears in the Photos navigation panel.
XactAI typically generates text within moments, but it can take longer when the internet connection is slow.
When the AI text is ready for review, open the Photos page again (if not still open); in the AI Review section, select the All Images folder to open the AI Review pane. For your convenience, Xactimate includes the number of photos with AI-generated text next to the folder name.
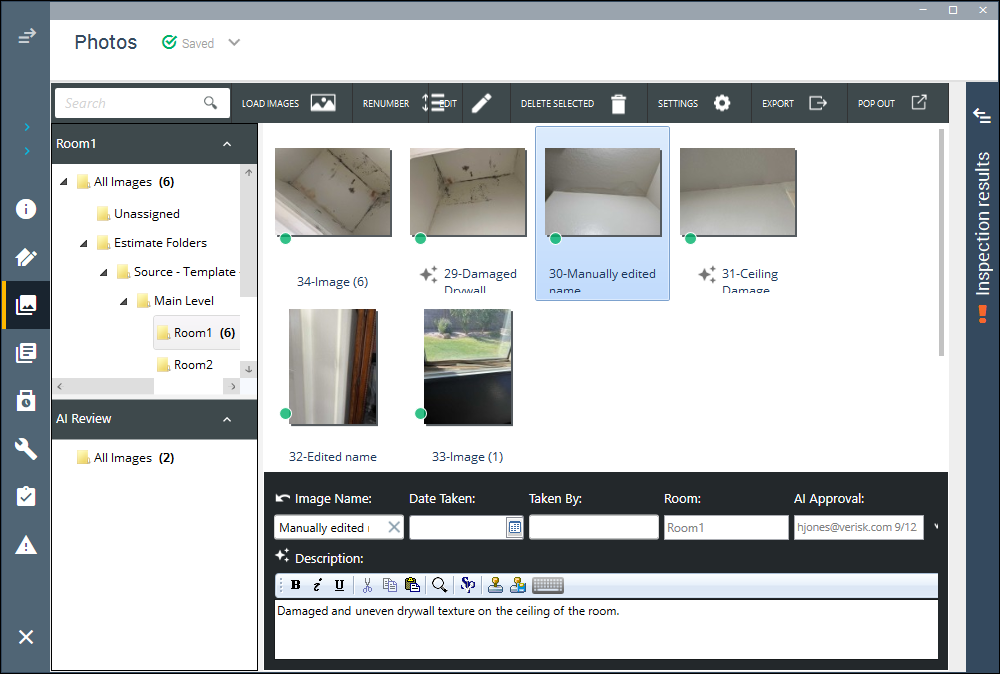
AI-generated content is accompanied by an AI sparkle icon to indicate that it was created by AI.
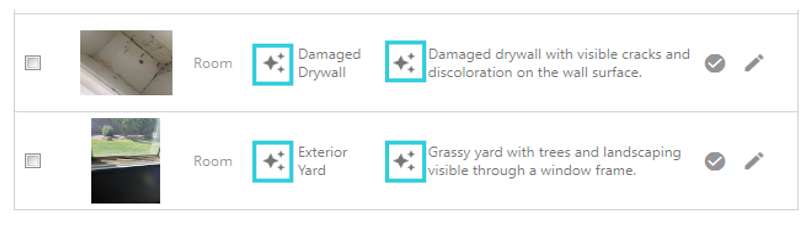
You must review and approve (or edit) all content that includes this icon (all AI-generated content) before you complete the project, or Xactimate hides it.
Review AI text
Approve text
You have three options for reviewing and approving image text:
- Quickly review and approve image text for individual photos by selecting the checkmark to the right of each image you want to approve.
- Approve multiple photos at once by selecting the checkbox to the left of each photo you want to approve and then selecting Approve at the lower right of the screen.
- Select the actual photo in the row you want to review. This opens a larger version of the image with the image name and the description underneath. If you have no changes to the AI-generated text, select APPROVE under the photo to accept the text.
When the text is approved, Xactimate adds a field to the photo details with the name of the approver and the date of approval.
Modify text
To modify the AI-generated text, complete the following:
- Select the image you want to change (in either the regular photo folder or the AI Review folder).
- Select the appropriate text field (either Image Name or Description).
- Make your changes.
Once the text is edited, it is no longer considered AI-generated, and the AI sparkle icon is replaced by the revert icon.
- When satisfied with the text, select APPROVE or SAVE (the option changes from APPROVE to SAVE if you make changes to both fields).

Identify AI-generated text in photos
Images in the usual folders do not include the AI-generated text until you approve it in the AI Review section. Here are a few things to keep in mind:
- If you approved the AI-generated photo name, the AI sparkle icon appears next to it in the viewing area.
- If you edited and saved the name, the icon does not appear.
- If you approved the description but changed the name, the icon does not appear.
- If either field has approved AI-generated text, the AI sparkle icon appears next to the approved field.