Import an underlay image in Xactimate mobile
 Updated
by
Heather Jones
Updated
by
Heather Jones
Note: For a full list of importable file types, visit our What file types can Xactimate desktop import? document.
Underlay images are typically virtual floorplans placed under your sketch so you can essentially trace them to create an accurate sketch. To learn more about underlays, view this video about underlays in Xactimate desktop:
To import an underlay in Xactimate mobile, complete the following:
Open Sketch
- Within your project, select the hamburger menu (three parallel lines) at the top left.
- Select Estimate. This opens two options, which you can navigate between by sliding the screen to the left or right (depending on which one is visible):
- Sketch allows you to create the sketch and add items directly to it.
- List View allows you to add rooms, levels, and items in list form without a sketch.
- Select Start Estimate in the Sketch screen.

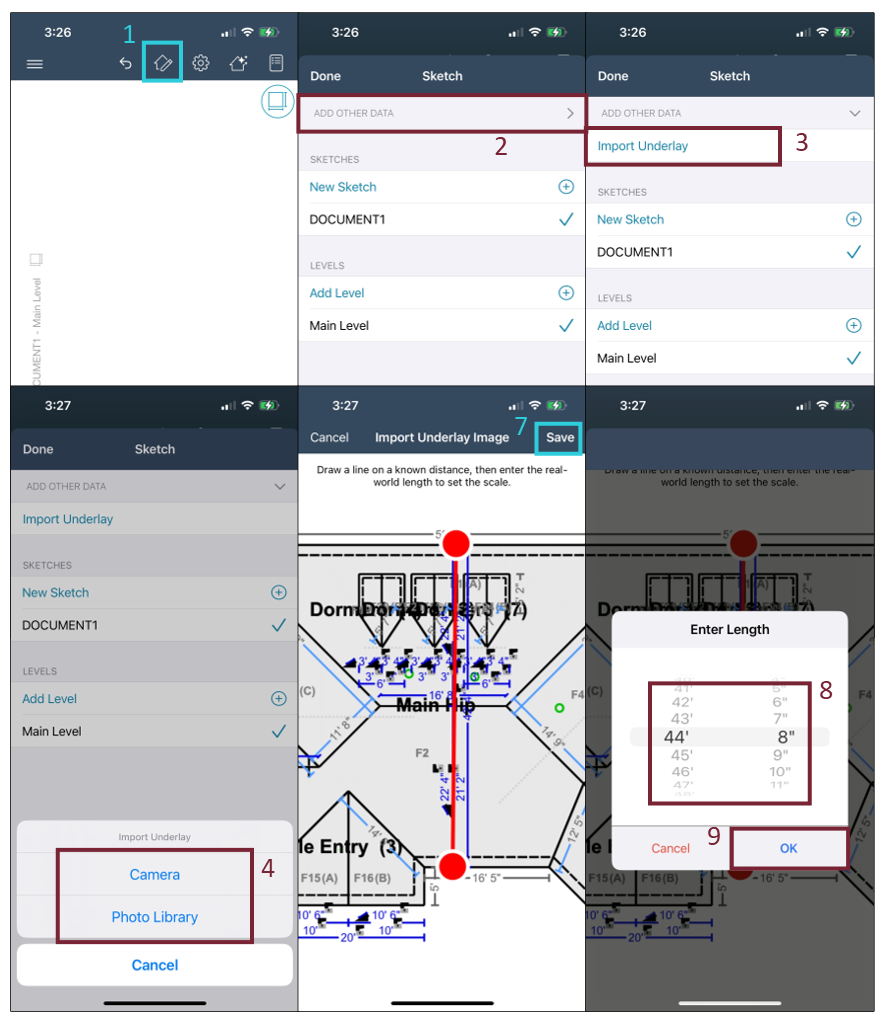
Import underlay image
- Within Sketch, select the icon with the house and pencil to open the Sketch menu.
- Select ADD OTHER DATA at the top of the screen.
- Select Import Underlay.
- Choose the right import option for your needs (Camera or Photo Library).
- Camera: Select this if you still need to capture the image.
- Photo Library: Select this if you already have the image in your photo library.
- Select (from the photo library) or capture (via the device camera) your photo based on the option you chose. The Import Underlay Image screen opens.
- Follow the instructions on the page by tapping and dragging along the longest known length in the image to create a line. You can tap and drag each end afterwards to adjust them as needed.
- Select Save. The Enter Length screen appears.
- Drag your finger up and down on the screen to adjust the length.
- Select OK.
- Create your sketch as usual with the image underneath.
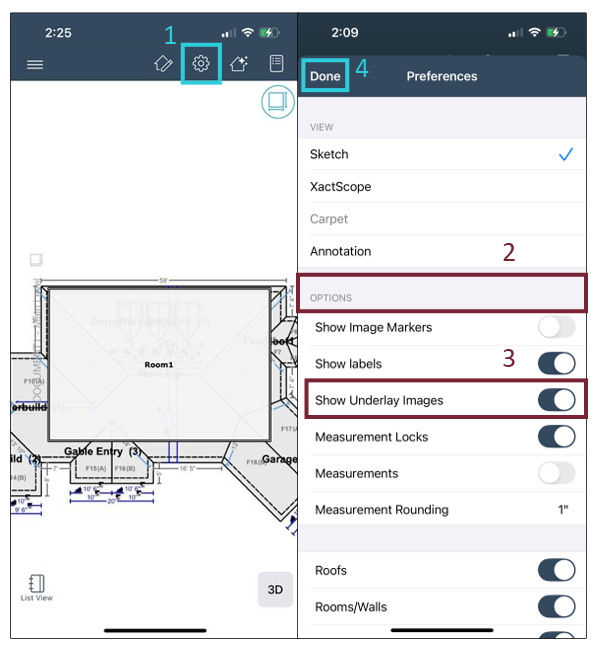
Hide underlay image
You can hide the underlay at any time, if needed. To do so, complete the following from within Sketch:
- Select the Preferences icon.
- Scroll to the OPTIONS section.
- Select the Show Underlay Images toggle so it switches off.
- Select Done.
- The underlay image is no longer visible. You can repeat this process to make it visible again.
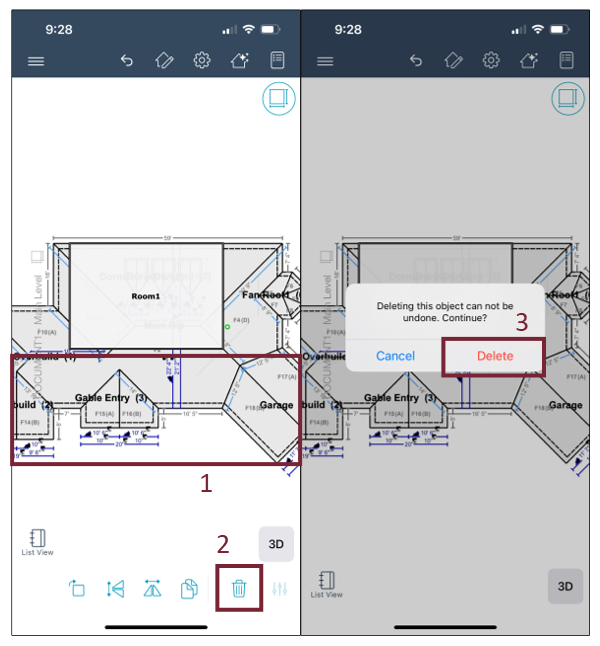
Remove underlay image
If, for any reason, you want to remove the underlay image entirely, complete the following:
- With the underlay image visible, tap anywhere within the image that is not covered by your sketch.
- Select the Delete icon.
- Confirm deletion.