Add a spiral staircase in X1
 Updated
by
Heather Jones
Updated
by
Heather Jones
Spiral staircases can be tricky. Before you begin, you will need three pieces of information:
- The degree the stairs rotate (for instance, does it create a full circle?).
- The total number of risers.
- The riser height.
If this is a common stair with a full degree of rotation of 270 degrees (30 degrees for each of the nine risers), you can instead import and use the spiral staircase template, ST_SPIROU. To view the instructions, go to Download a template from the Online Sketch Gallery.
- From within Sketch, select Staircase.
- Add a staircase. (See Creating a regular or custom staircase
- Select the wall or the landing at the top of the stairs (depending on how you created the staircase).
- Press Delete on the keyboard.
- Select the vertices (indicated by red diamonds) on the top and bottom of the wall that will be the center of the spiral, and drag them to the middle (one at a time).
- Open the Staircase Wall properties by either double-clicking the stair wall or selecting the stair wall and selecting the Properties icon (
 ) that appears.
 - In the General group, in the Arced Wall box, select Yes.
- Select the white box on the wall, and drag it out to create an arc. The arc should be at least twice the width of the stairs.

- Rotate the stairs.
- Select the stairs.
- Click and hold the vertex (the red diamond) on the top end of the stair wall.
- Drag it around to create an inverted triangle with the other vertex (red diamond).
- Select the stairs and confirm that the width on each side of the opening is correct. If either width is incorrect, adjust it.
- Select the inner vertex’s red diamond.
- Press and hold Shift on your keyboard.
- Select and drag the diamond to adjust the position until both widths are correct.
- Adjust the inner and the outer diamonds (using Shift, click, and drag) until the angle of the bottom to top stair is accurate and the widths are correct.
- Repeat Steps 10 and 11 if needed.
- Select the stair wall.
- Using the white box that appears at the top, drag the wall in until the wall diameter is twice the width of the stairs.
- Open the Staircase Properties ().
- Select the stairs
- Either double-click the stairs or select the Staircase Properties icon.
- In the Staircase group, in the Angled Treads box, select Yes. Your stair treads will look like they disappeared.
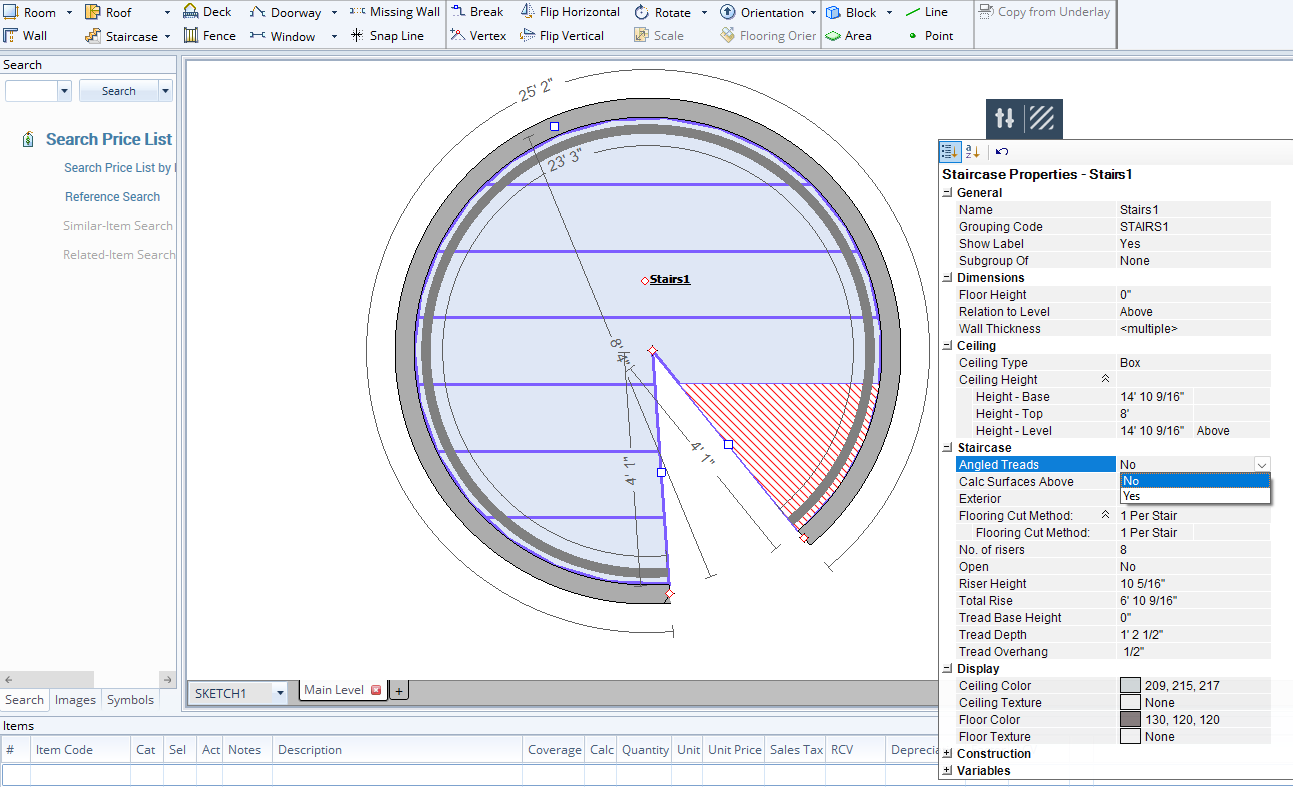
- Select the stairs again and zoom in so you can see the large blue plus sign (the intersection of the angle).
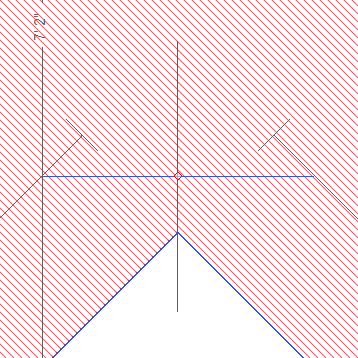
- Select the red diamond in the center of the plus.
- Drag the diamond off the stairs (usually to the open triangle) to make the treads appear.

- Press Shift on the keyboard and drag the crosshairs back to the intersection of the angle.
- Open the Staircase Properties dialog again.
- In the Staircase group, in the No. of risers field, enter the number of risers on the staircase.
- In the Riser Height field, enter the height of the risers.
You have successfully added a spiral staircase! However, you may now need to make some additional adjustments so your Sketch matches the actual structure.
- To remove the supporting material (such as walls) beneath the risers, in the Open field in the Staircase preferences, select Yes.
- To remove the staircase wall, open the Staircase Wall Properties dialog, and in the Wall Type field, select Missing (end to end).
- Change to 3D mode to view the spiral staircase in 3D view (press 3 or select the 3D button (
 ) in the lower right corner.
 - If you only created the bottom half of the stair:
- Copy the finished half.
- Paste it directly on top of the existing stair but on the upper level.
- If the stairs appear without angled treads, readjust the angled treads by zooming into the plus sign, pulling it off the stairs, and using Shift, click, and drag to pull it back into the center (see Steps 18–20).
- Use the free rotate tool (one of the options in the Rotate drop-down menu) to adjust the angle and line up the bottom edge of the upper stair with the upper edge of the bottom stair.