Two-factor authentication (2FA) or Multifactor authentication (MFA)

Two-factor authentication (otherwise known as multi-factor authentication and abbreviated 2FA or MFA) protects sensitive information by adding an additional layer of security beyond passwords. This change enhances security for personal and organizational data. This meets new laws and regulatory standards.
Who is impacted by two-factor authentication?
We require all non-federated users (including insurance professionals and policyholders) to use multi-factor authentication. This change helps you meet legal requirements and secure your and your customers’ information.
Users must use 2FA to sign in to the following applications:
| Allyne | PlaCrd | XactAnalysis QR |
| Benchmark | Property Preservation Wizard (PPW) | XactAnalysis SP |
| ClaimXperience | PropX | XactContents |
| ContentsTrack | Pruvan | Xactimate |
| Direct Supplier | Respond | XactPRM |
| Inspection Manager | Respond MAP | XactRemodel |
| OneXperience | XactAnalysis | XactRestore |
Restoration Manager and Punchlist Manager also use two-factor authentication, for assistance with these products, see our Restoration Manager multi-factor authentication (MFA) frequently asked questions (FAQ) document.
Initial two-factor authentication setup
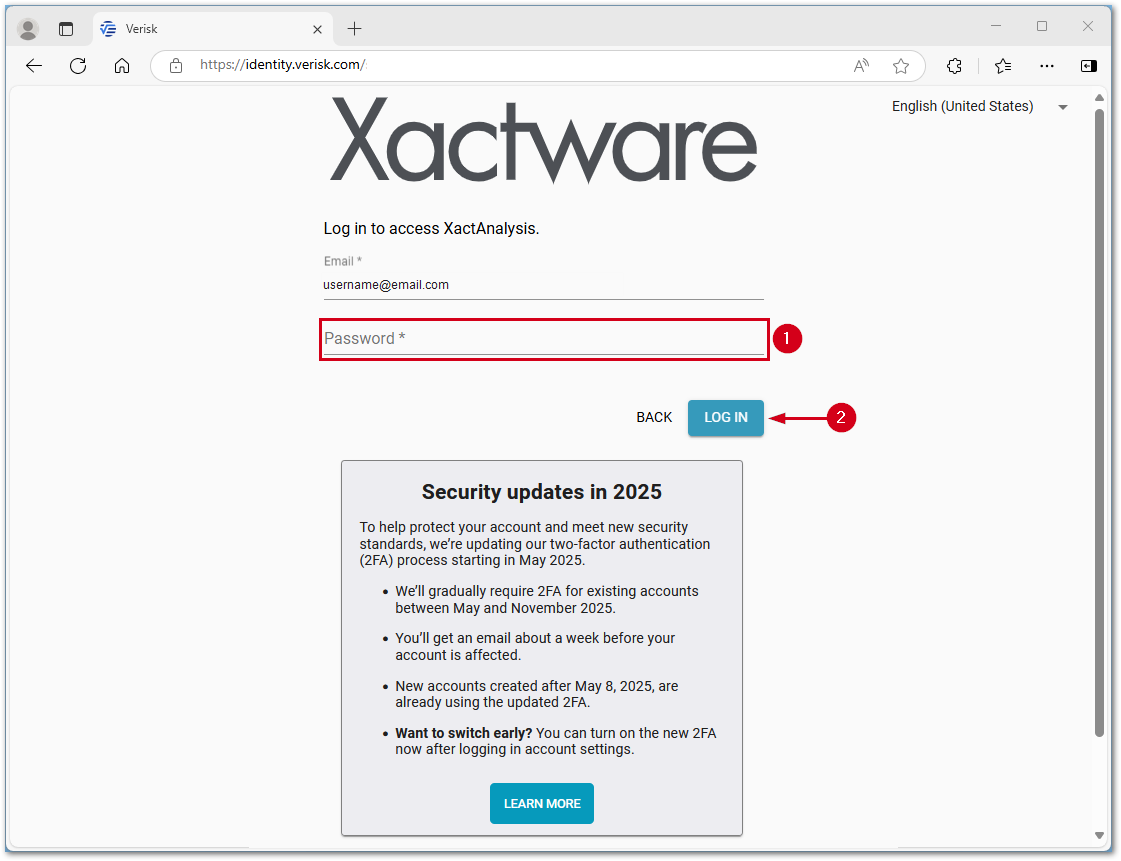
If you have not set up two-factor authentication, you will be prompted upon initial login. The example below shows a login to XactAnalysis; however, the process is similar in other products.
- Enter your password.
- Select LOG IN.
- Enter the code emailed to you in the Enter a code field.
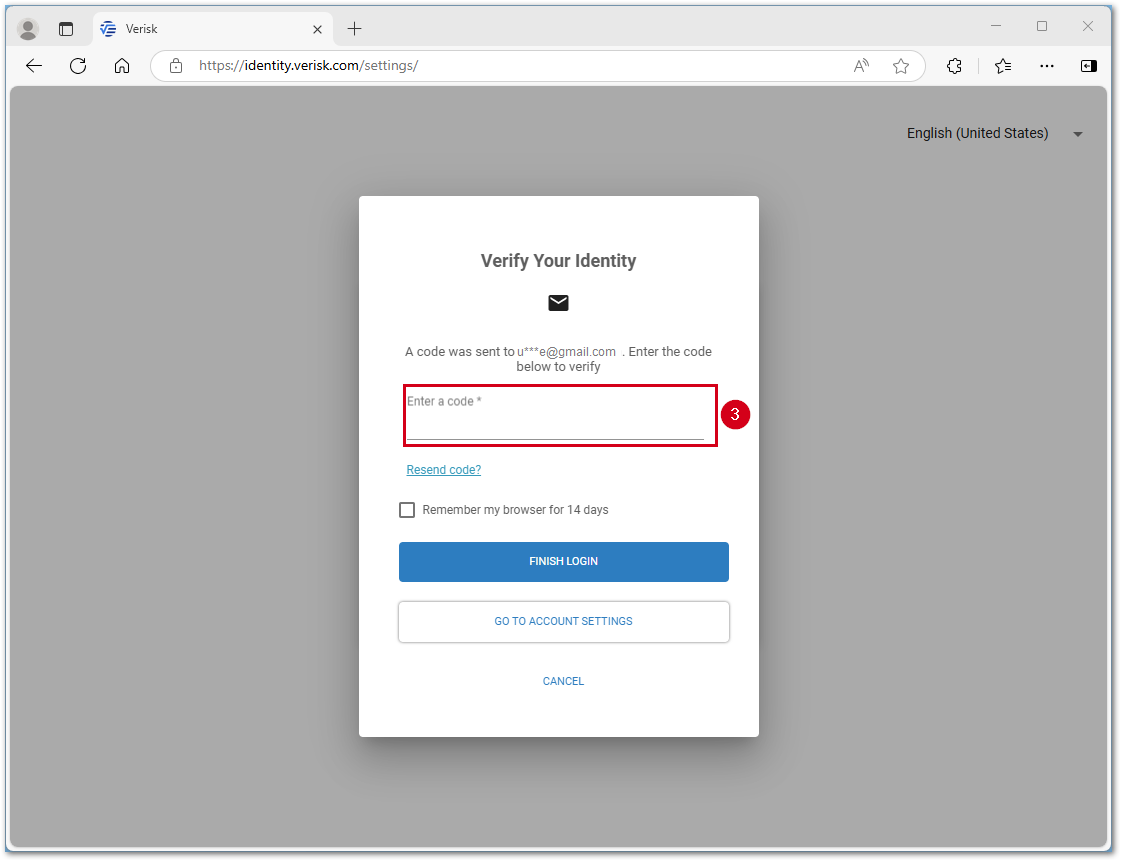
Select Go to app to continue into your selected program or select Go to account settings to setup text message or an authenticator app using the steps in the below sections.
Setup authenticator app 2FA (optional)
Note: The instructions below use Google Authenticator as an example, however the Microsoft Authenticator, Authy, 1Password, or LastPass Authenticator can be used as well. Duo Mobile is not compatible.
iOS and iPadOS devices
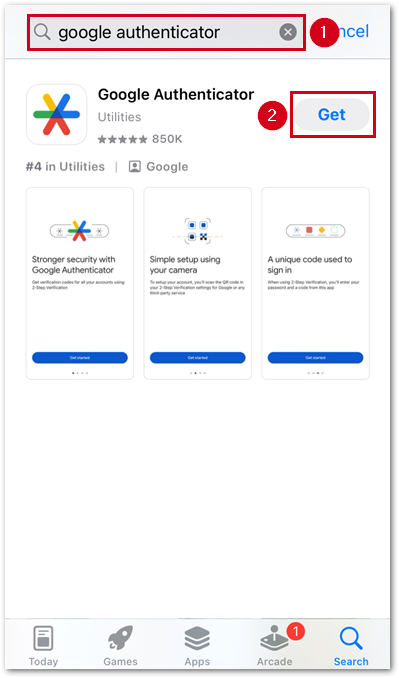
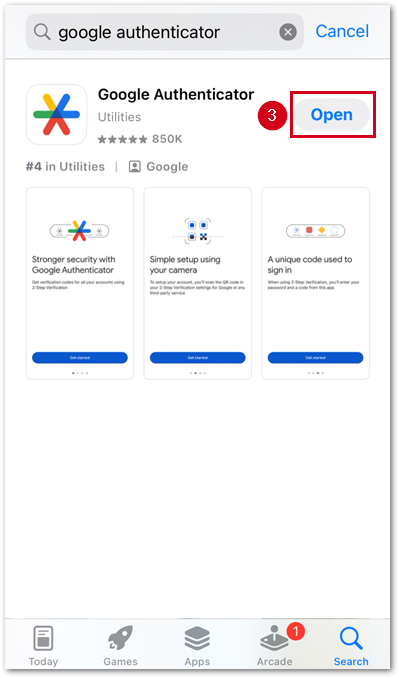
Follow the steps below to download Google Authenticator on iOS and iPadOS devices.
- Within the App Store, search for Google Authenticator.
- Select Get.
Note: Users may have to enter a password or use Face ID to download the app.
- Select Open.
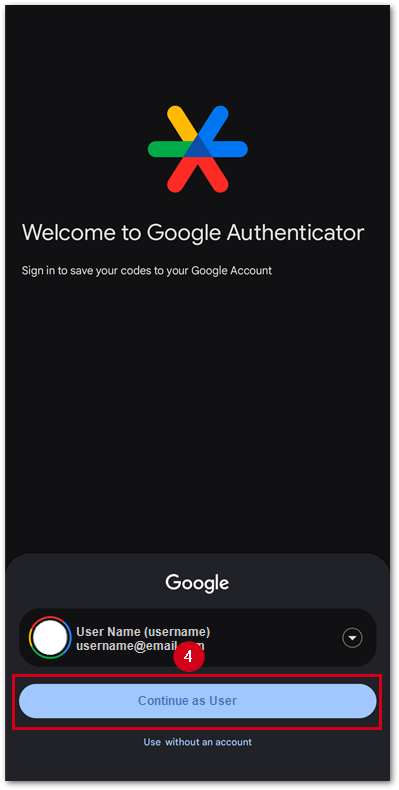
- Log in to Google Authenticator with your Google account information. You can also proceed without an account.

Android devices
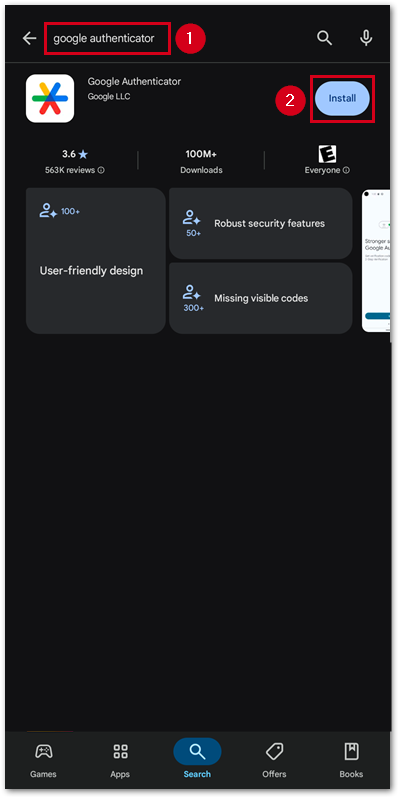
Follow the steps below to download Google Authenticator on Android devices.
- Within the Google Play store, search for Google Authenticator.
- Select Install.
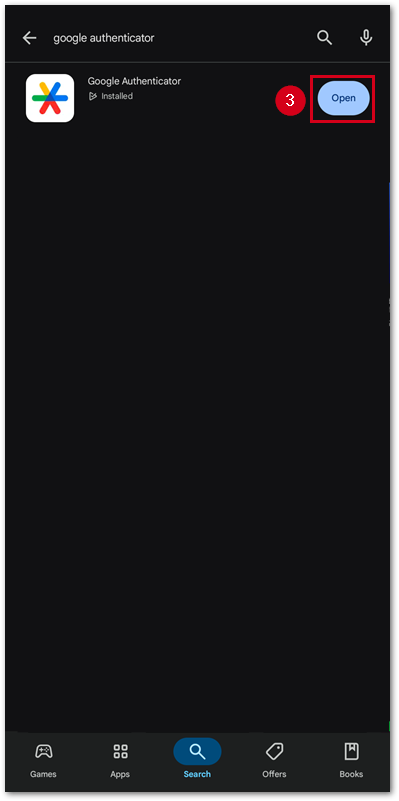
- When installation is complete, select Open.
- Log in to Google Authenticator with your Google account information. You can also proceed without an account.
Set up authenticator app in Account Settings
Once the authenticator app is installed on your device, follow the steps below to set up 2FA using the app.
Note: The steps below assume you are using the Google Authenticator app on iOS and setting up the authenticator from a computer browser. The steps may vary slightly if you are using an Android device or different app. To remove an authenticator app, select REMOVE instead of SET UP.
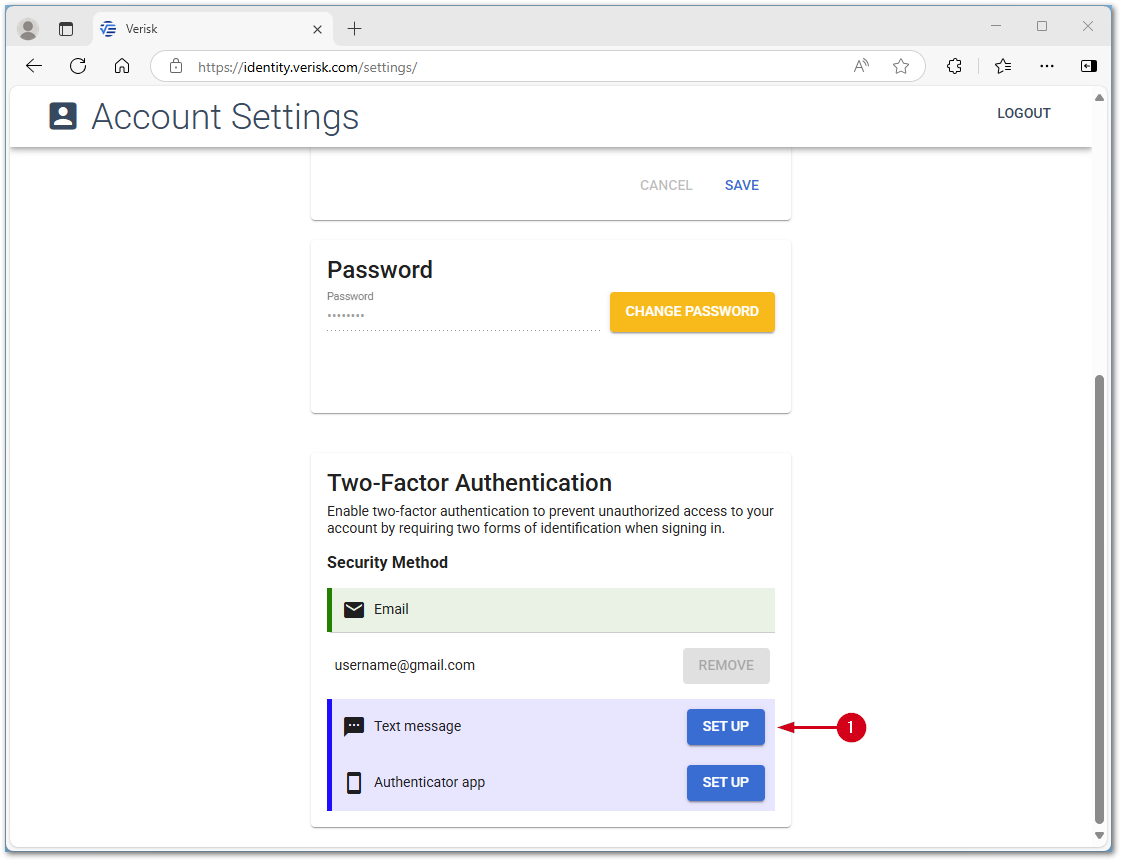
- In the Verisk Identity Server, select the SET UP button next to Authenticator app. This opens a popup with a QR code which is used in a later step.
Note: If setting up a device, there is an option to select Can’t scan and use a text code instead of the QR code. If can’t scan is selected, when adding the account to the authenticator, select the Enter a setup key option to input the text code.

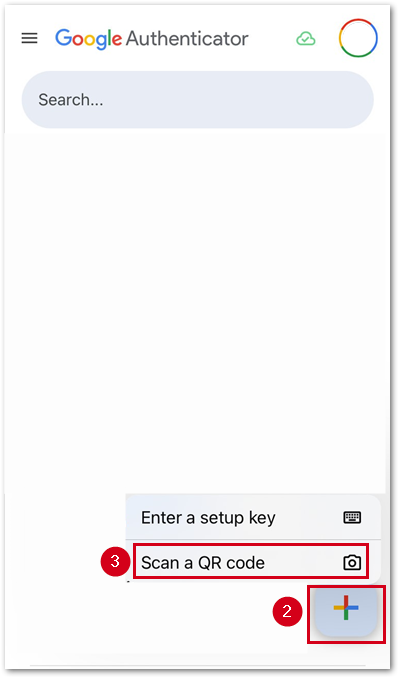
- Within the Google Authenticator app on your mobile device, select the Add button.
- Select Scan a QR code.
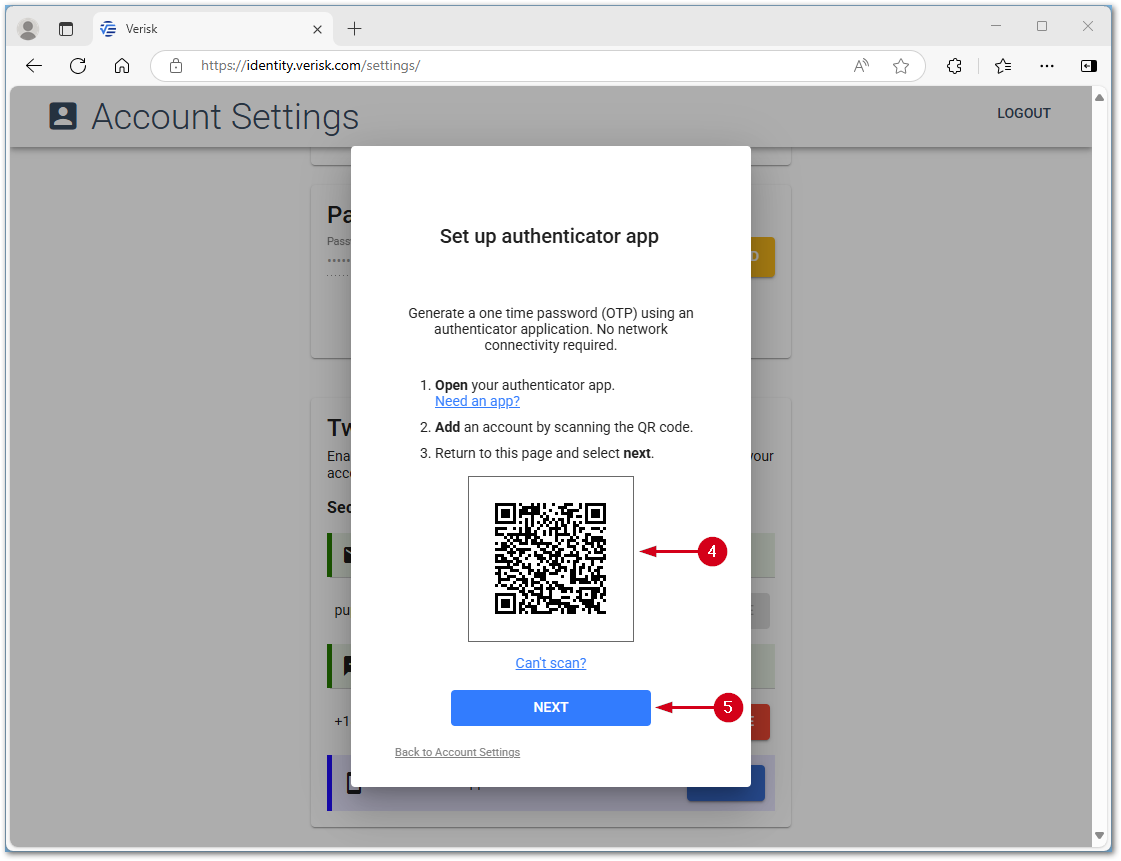
- Use the app on your mobile device to scan the QR code which was opened in step 1.
- After you scan the code, select NEXT in your browser.
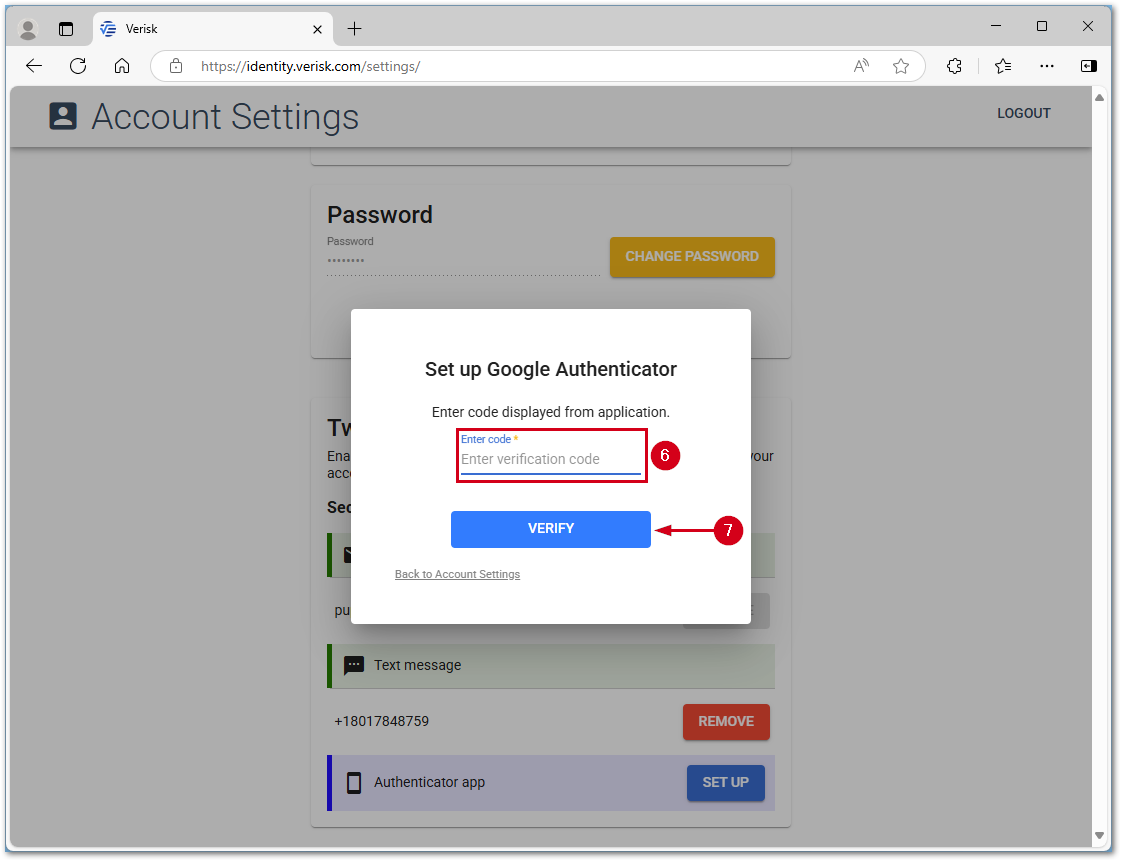
- Enter the code from the Google Authenticator app into the Enter code field.
- Select VERIFY.
Can an authenticator app be installed on multiple devices?
Yes, it's possible to install an authenticator app like Microsoft Authenticator or Google Authenticator on multiple devices. This allows you to use a different device for two-factor authentication (2FA) when your primary device is unavailable or at a different location. You must scan the same QR code you used on the primary device.
Note: For assistance, see either the Get verification codes with Google Authenticator document from Google Account Help or Back up your accounts in Microsoft Authenticator from Microsoft support.
Set up text message 2FA (optional)
Follow the steps below to set up text message (SMS) based 2FA.
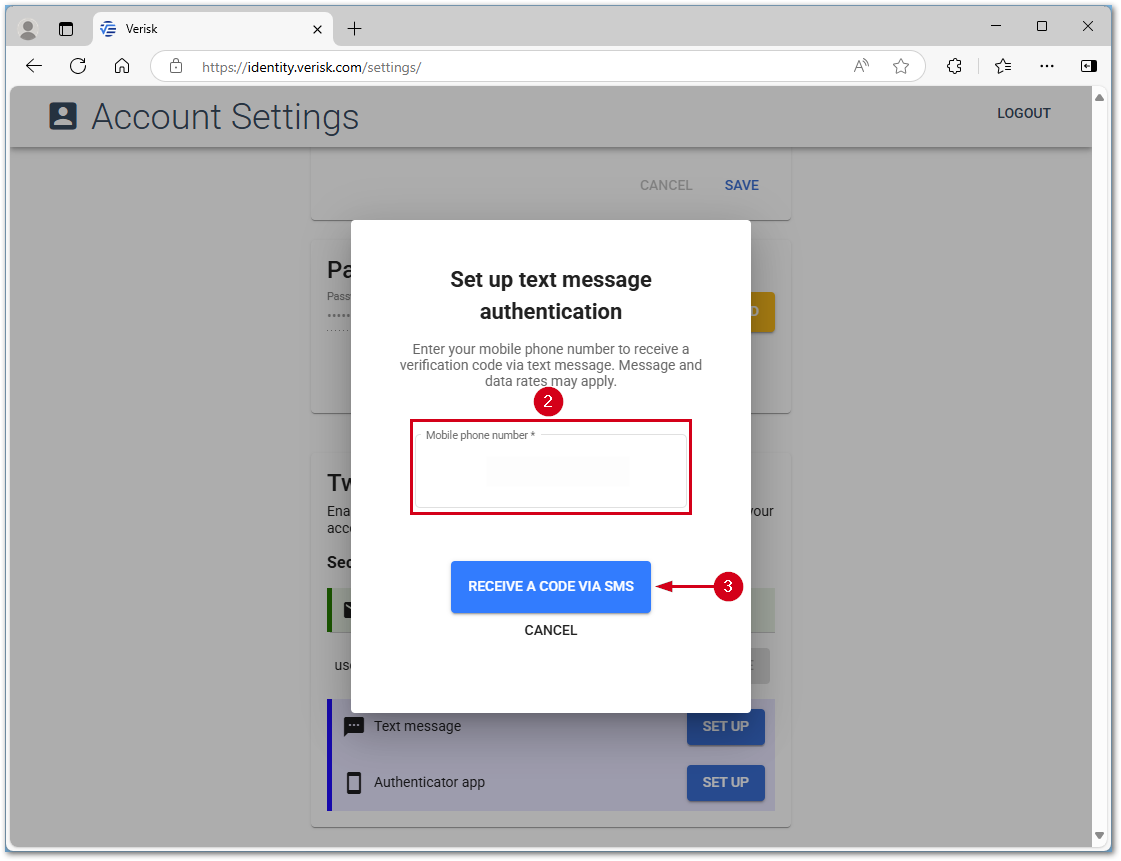
- In the Verisk Identity Server, select the SET UP button next to Text message.
- Enter your Mobile phone number.
Note: The mobile number entered here does not change the phone number on your account; it is only used for the 2FA. To update your phone number on your account, see our Xactware ID: Create, manage and change or forgot password document for assistance.
- Select RECEIVE A CODE VIA SMS.
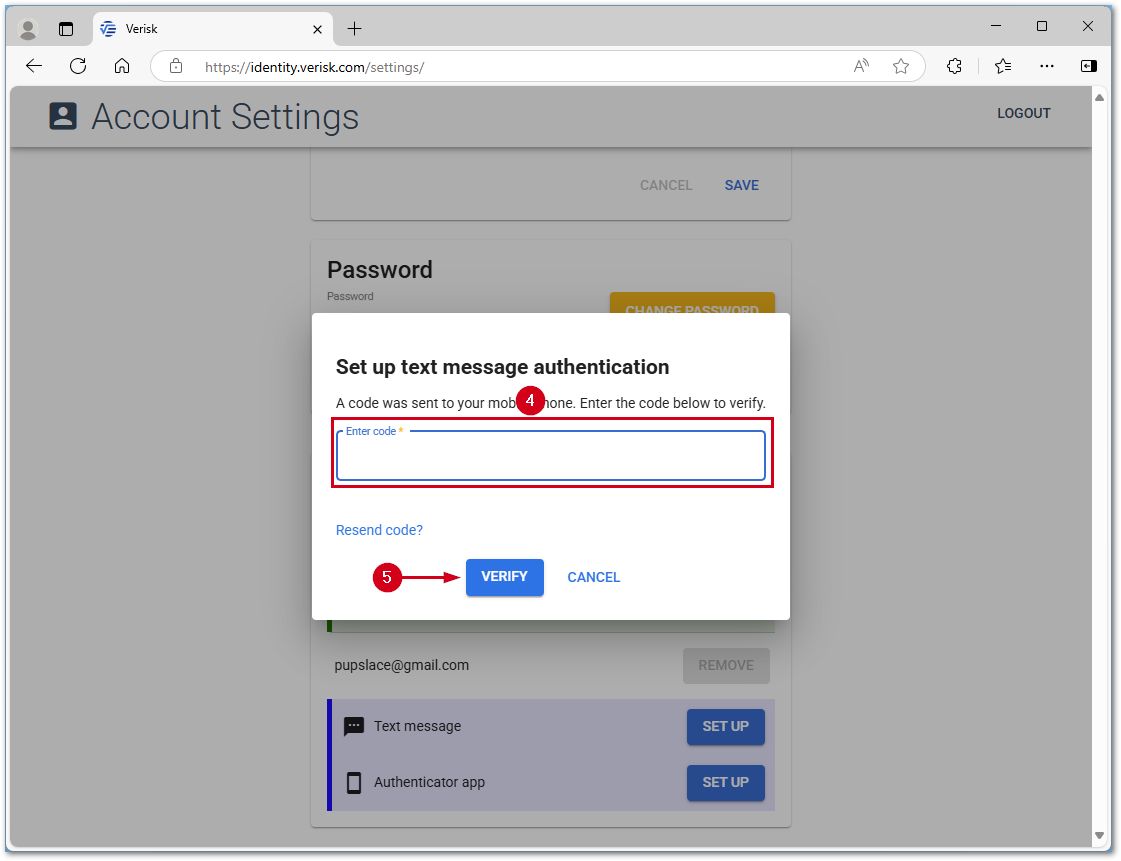
- Enter the code received via text message in the Enter code field.
Note: If you do not receive a text message, select Resend code? to try again.
- Select VERIFY.
Notes about 2FA and FAQs
Important reminders about the login experience
- Account holders are challenged with 2FA when they log in. If all three 2FA options are set up, the user can choose which one they want to use to sign in.
- Account holders can remove and reset optional security methods (text message and authenticator app) in Account Settings. However, email authentication is required and cannot be removed.
- Once users are set up in the new 2FA system, they cannot return to the legacy two-step authentication or opt out of 2FA.
- Security questions are no longer part of the login experience.
Not receiving the verification email
If you are not receiving the two-factor authentication verification email, please see our Troubleshoot 2FA when the email fails to send document.
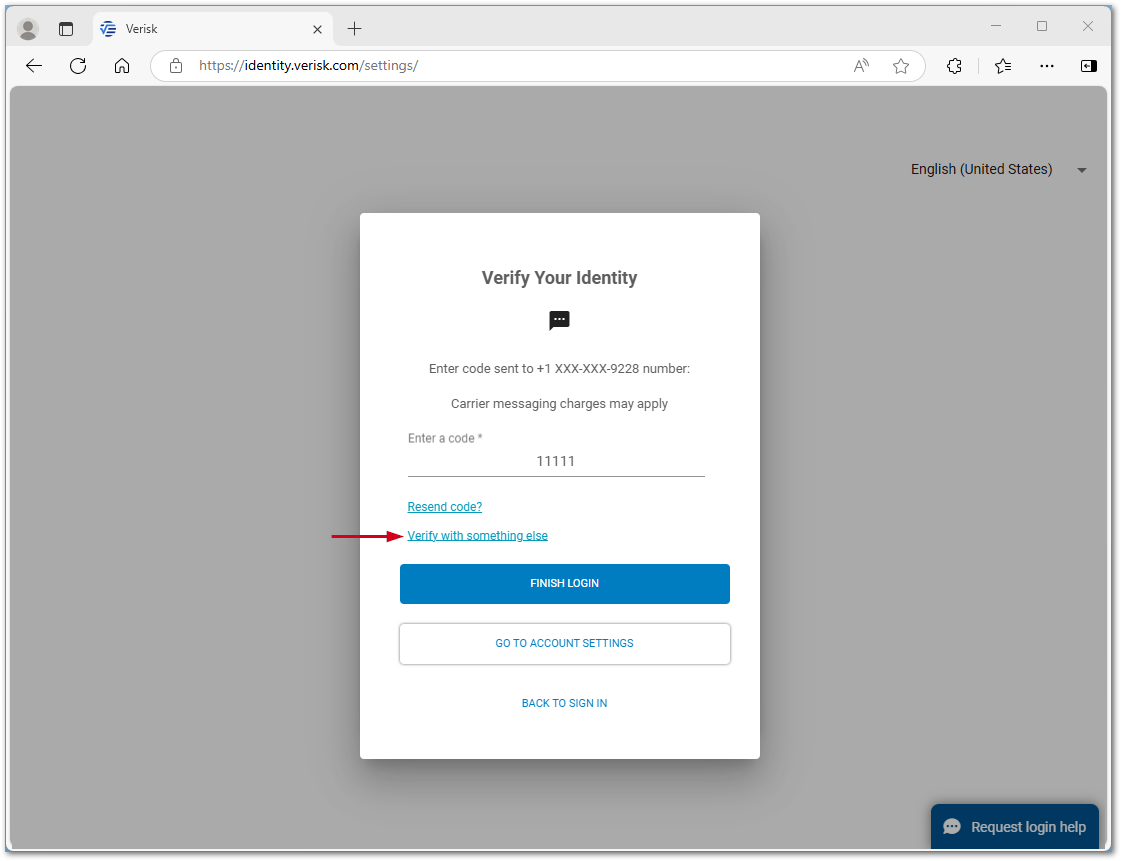
Automatic last verification method with the option to verify with something else
Two-factor authentication prompts with the same verification that was used last, e.g., if the last verification method was email, the verification method presented will be email. Email is the default option but if that is not the preferred option, simply select Verify with something else. Once verification is complete, the next time a log in is required, that same method will be presented.